
If you own a Samsung dryer and suddenly notice a loud squeaking sound, it can be both annoying and worrying. Many people experience this problem, and it often happens when you least expect it right in the middle of laundry day.
A squeaky dryer is more than just a noise issue; it could signal something is wrong inside your machine. Ignoring the sound may lead to bigger repairs, higher costs, or even a complete breakdown. Understanding why your Samsung dryer is squeaking, how to fix it, and how to prevent it in the future can help you keep your dryer running smoothly, save money, and avoid headaches.
In this guide, you’ll learn the most common causes, practical troubleshooting steps, repair tips, and when it’s time to call a professional. You’ll also find helpful tables to compare repair costs and see which parts are most likely to cause squeaks.
Let’s silence that dryer together.
Why Is Your Samsung Dryer Squeaking?
A squeaking sound from your dryer usually points to friction or worn parts. Samsung dryers, like all brands, rely on moving parts that can wear out over time. The most common sources of squeaks are:
- Drum rollers: These help the drum spin smoothly. When they wear out, the drum rubs and squeaks.
- Idler pulley: Keeps tension on the drive belt. A failing pulley can squeal or squeak.
- Drum glides: Support the drum at the front. Worn glides can create a high-pitched squeak.
- Drive belt: If the belt frays or cracks, it can squeak as it moves.
- Motor bearings: Worn bearings inside the motor may squeak or grind.
- Foreign objects: Coins, buttons, or small items stuck in the drum or lint trap can also cause noise.
What surprises many owners is that a squeak, even if it starts quietly, rarely goes away on its own. In fact, the sound often gets louder over time. If you hear a squeak, it’s important to find the cause quickly.
Most Common Causes Of Samsung Dryer Squeaking
Understanding what’s happening inside your dryer can help you spot issues before they get worse. Here are the main causes, with details on how each one creates a squeaking noise.
Drum Rollers
Drum rollers are small wheels that support the dryer drum as it spins. Over time, these rollers can wear down or become misshapen. When this happens, the drum may not spin evenly, leading to a squeak each time the roller passes a certain point. You might notice the sound gets worse with heavy loads.
- Signs: Squeaking starts at the beginning and may fade as the dryer runs. The sound often returns the next time you use it.
- Tip: If one roller is bad, the others may be close to failing too. It’s smart to replace all at once.
Idler Pulley
The idler pulley keeps tension on the drive belt that turns the drum. If the pulley’s bearing dries out or the wheel gets worn, it can create a sharp squeak or even a screech.
- Signs: Squeak is high-pitched and may come and go. Sometimes, the squeak turns into a thump or grinding noise.
Drum Glides
At the front of the drum, glides or pads help the drum move smoothly against the front panel. These glides are usually made of felt or plastic. When they wear out, the drum can rub metal-to-metal, causing a persistent squeak.
- Signs: Squeak is loudest at the front of the machine. You may see worn or thin spots on the glides.
Drive Belt
A drive belt connects the motor to the drum. Over time, the belt can become cracked, frayed, or glazed. As it moves, the worn belt can squeak, especially under heavy loads.
- Signs: Squeak is rhythmic, matching drum rotation. May be accompanied by a burning smell if the belt is slipping.
Motor Bearings
The motor itself has bearings that allow it to spin freely. If these bearings wear out, the motor may squeak, squeal, or grind. This is less common, but when it happens, it usually means a costly repair.
- Signs: Squeak continues even when the drum is empty or spins by hand.
Foreign Objects And Debris
Sometimes, the cause is simple: a small object stuck inside the drum, near the lint trap, or in the blower wheel can create a squeak.
- Signs: Squeak started suddenly. You may hear something rattling or see debris in the drum.
How To Diagnose The Squeak In Your Samsung Dryer
Before you can fix the squeak, you need to find out what’s causing it. A careful approach can save time and money. Here’s a step-by-step guide:
- Unplug the dryer. Never work on any appliance while it’s plugged in.
- Empty the drum. Remove all clothes, and check for loose objects.
- Spin the drum by hand. Listen for squeaks. If you hear the noise, note where it’s coming from (front, back, sides).
- Check the lint trap and vent. Remove lint and look for stuck objects.
- Open the dryer cabinet. Depending on your model, you may need to remove screws and panels. Look for worn rollers, glides, or a loose belt.
- Inspect each part:
- Rollers: Look for flat spots or excessive movement.
- Glides: Check for wear or missing pieces.
- Belt: Look for cracks, frays, or shiny spots.
- Idler pulley: Spin by hand—should move smoothly and quietly.
- Reassemble and test. After checking, run the dryer empty to see if the squeak is gone.
Pro tip: Take photos as you disassemble, so you can put everything back together correctly.
Diy Fixes For A Squeaky Samsung Dryer
Many squeaks can be fixed at home with basic tools and replacement parts. Here are the most common repairs, with step-by-step instructions.
Replacing Drum Rollers
- Unplug the dryer.
- Remove the top and front panels (check your manual for details).
- Take out the drum to access the rollers.
- Remove the old rollers and install new ones. Make sure they spin freely.
- Reassemble the dryer.
Insight: Rollers often wear out in pairs. Even if only one looks bad, replacing both (or all four, in some models) prevents future issues.
Replacing The Idler Pulley
- Unplug the dryer.
- Remove the access panel to reach the idler pulley.
- Release the belt from the pulley.
- Remove the old pulley and install a new one.
- Replace the belt and reassemble.
Tip: Lubricate the new pulley’s bearing with a small amount of high-temperature grease if recommended by the manufacturer.
Replacing Drum Glides
- Unplug the dryer.
- Remove the front panel.
- Locate the glides at the top or sides of the drum opening.
- Remove old glides and install new ones.
- Reassemble.
Common mistake: Forgetting to replace both glides. If one is worn, the other is likely close behind.
Replacing The Drive Belt
- Unplug the dryer.
- Remove the top and front panels.
- Take out the drum to access the belt.
- Remove the old belt and install the new one.
- Reassemble.
Tip: Route the belt exactly as shown in your manual. Incorrect routing can cause squeaks or prevent the drum from turning.
Lubricating Or Replacing Motor Bearings
This is a more complex repair. Most Samsung dryer motors are sealed, so you can’t add lubricant. If you suspect motor bearing failure, it’s usually better to replace the motor.
- Sign to watch: Squeaking persists even after replacing rollers, glides, and belt.
Removing Foreign Objects
- Check the drum, lint trap, and blower wheel for coins, buttons, or small objects.
- Remove any debris you find.
Helpful hint: Sometimes, lint builds up around moving parts. A vacuum or soft brush can help clear it away.

When To Call A Professional
Not every repair is safe or easy for a beginner. Here’s when you should consider calling a repair technician:
- You’re unsure how to disassemble the dryer.
- The squeak continues after replacing common parts.
- The motor, control board, or wiring appears damaged.
- The dryer is still under warranty—opening it may void your coverage.
Professional repairs can cost more, but they’re sometimes the best option for complicated problems or if you lack tools and experience.
Typical Repair Costs
Here’s a helpful comparison of average repair costs for squeaking Samsung dryers:
| Repair Type | Average Cost (Parts + Labor) | DIY Possible? |
|---|---|---|
| Drum Rollers | $100 – $200 | Yes |
| Idler Pulley | $75 – $150 | Yes |
| Drum Glides | $60 – $120 | Yes |
| Drive Belt | $80 – $160 | Yes |
| Motor Replacement | $200 – $350 | No |
Insight: DIY repairs can save you up to 50% compared to hiring a pro, especially for rollers and belts.
How To Prevent Dryer Squeaks In The Future
Prevention is always better than cure. Here’s how you can keep your Samsung dryer running quietly for years:
- Clean the lint filter after every load. Lint buildup can stress moving parts.
- Vacuum inside the dryer every few months. Pay special attention to the drum, rollers, and around the motor.
- Don’t overload the dryer. Heavy loads put extra strain on rollers and the belt.
- Check for objects before drying. Coins, zippers, and small items can damage internal parts.
- Listen for new noises. Address squeaks early—don’t wait for them to get worse.
- Schedule yearly maintenance. A professional can catch worn parts before they fail.
Maintenance Schedule Table
Here’s a simple maintenance schedule to keep your dryer healthy:
| Task | Frequency | Benefit |
|---|---|---|
| Clean lint filter | Every load | Prevents overheating, reduces strain |
| Vacuum interior | Every 3-6 months | Removes lint, prevents buildup |
| Inspect rollers, belt, glides | Yearly | Early detection of wear |
| Professional service | Every 1-2 years | Deep cleaning, safety check |
Non-obvious tip: Humidity and temperature changes in your laundry room can affect the life of rubber and plastic parts. Try to keep the area dry and well-ventilated.
Comparing Samsung Dryer Squeak Issues To Other Brands
Is Samsung more likely to squeak than other brands? In general, all dryers use similar parts that can wear out. However, some users report that Samsung dryers may develop squeaks a bit sooner due to lighter drum support rollers.
Here’s a quick comparison:
| Brand | Average Time to Squeak (Years) | Typical Squeak Source |
|---|---|---|
| Samsung | 3-5 | Rollers, pulley |
| LG | 4-6 | Glides, rollers |
| Whirlpool | 5-7 | Rollers, belt |
| GE | 5-8 | Glides, belt |
Key takeaway: Regular maintenance is the best way to extend the life of any dryer, regardless of brand.
What To Do If Squeaking Returns After A Repair
Sometimes, the squeak comes back even after you’ve fixed the obvious problem. Here’s what to try next:
- Double-check your work. Make sure all parts are installed correctly.
- Replace parts in pairs. For example, if you replaced one roller, the others may fail soon.
- Check for hidden damage. Sometimes, worn parts can damage the drum or mounting points.
- Listen for new sounds. A change in the noise may point to a different part.
- Consult your manual. Some Samsung dryers have unique designs. Your manual may offer model-specific tips.
Non-obvious insight: If you live in a humid area or do laundry often, some parts may wear out faster than average. Keeping a spare set of rollers or glides on hand can help you fix squeaks quickly.
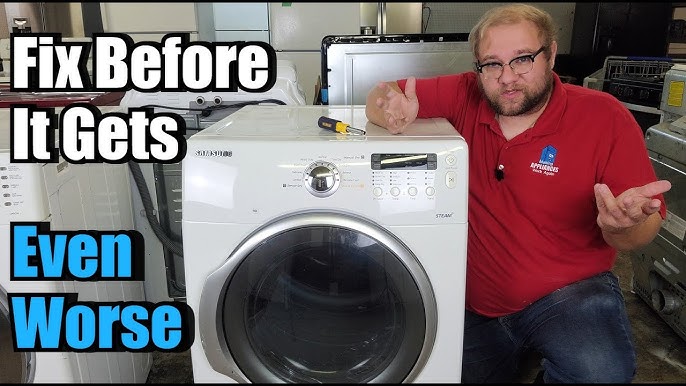
Choosing Replacement Parts: Oem Vs. Aftermarket
When you buy parts, you’ll see two main choices: OEM (Original Equipment Manufacturer) and aftermarket. Here’s what you need to know:
- OEM parts are made by Samsung or their authorized suppliers. They’re guaranteed to fit and work as intended.
- Aftermarket parts are made by third parties. They may cost less, but quality can vary.
Tip: For critical parts like rollers, pulleys, and belts, OEM is usually safest. For smaller items like glides or felt pads, high-quality aftermarket options can work well.
Oem Vs. Aftermarket Parts Table
| Part Type | OEM Average Price | Aftermarket Average Price | Reliability |
|---|---|---|---|
| Drum Rollers (set) | $40 – $80 | $20 – $50 | OEM higher |
| Idler Pulley | $25 – $40 | $10 – $25 | Similar, but check reviews |
| Drive Belt | $20 – $35 | $10 – $20 | OEM preferred |
Insight: Always check reviews and product ratings before buying aftermarket parts. Saving a few dollars isn’t worth it if the part fails early.
The Role Of Warranty And Customer Support
If your Samsung dryer is still under warranty, always check with Samsung customer support before starting any repairs. Performing unauthorized repairs may void your coverage. Warranties typically last 1 year, but some parts (like the drum) have longer coverage.
- Tip: Keep your proof of purchase and register your product with Samsung for easier claims.
- Mistake to avoid: Paying for repairs out-of-pocket when you may qualify for free service or parts.
For more information, you can check the official Samsung Support page.

Frequently Asked Questions
Why Does My Samsung Dryer Squeak Only When It Starts?
Often, squeaks that happen at the start and then fade away are caused by drum rollers or glides. As the parts warm up, they may expand and reduce the squeak. This is a sign the parts are worn and should be replaced soon.
Is It Safe To Use My Dryer If It’s Squeaking?
It’s usually safe for a short time, but not recommended. Squeaking means parts are wearing out. Continued use can cause more damage or even a total breakdown. It’s best to fix the issue as soon as possible.
How Long Do Samsung Dryer Rollers Typically Last?
Most Samsung dryer rollers last 3–5 years with normal use. Frequent use, heavy loads, or poor maintenance can shorten their lifespan. Replacing all rollers at once is a smart move.
What’s The Best Way To Lubricate Dryer Parts?
Most parts, like rollers and pulleys, are designed to be maintenance-free and should not be lubricated. If you use lubricant, only apply a small amount of high-temperature grease to metal-on-metal parts, and only if recommended by Samsung. Never use oil, as it can attract lint and cause problems.
Can I Prevent Squeaks Without Opening The Dryer?
Regular cleaning and light loads help, but to fully prevent squeaks, you’ll need to inspect and replace worn parts inside the machine. Scheduling professional maintenance every 1–2 years is a good way to avoid squeaks if you don’t want to do repairs yourself.
A squeaking Samsung dryer doesn’t have to ruin your laundry day. With the right knowledge and tools, most squeaks can be fixed quickly and affordably. By understanding the causes, following clear steps, and choosing quality parts, you can keep your dryer running quietly for years to come.
Don’t ignore that squeak—stop it early, and your dryer (and your ears) will thank you.