
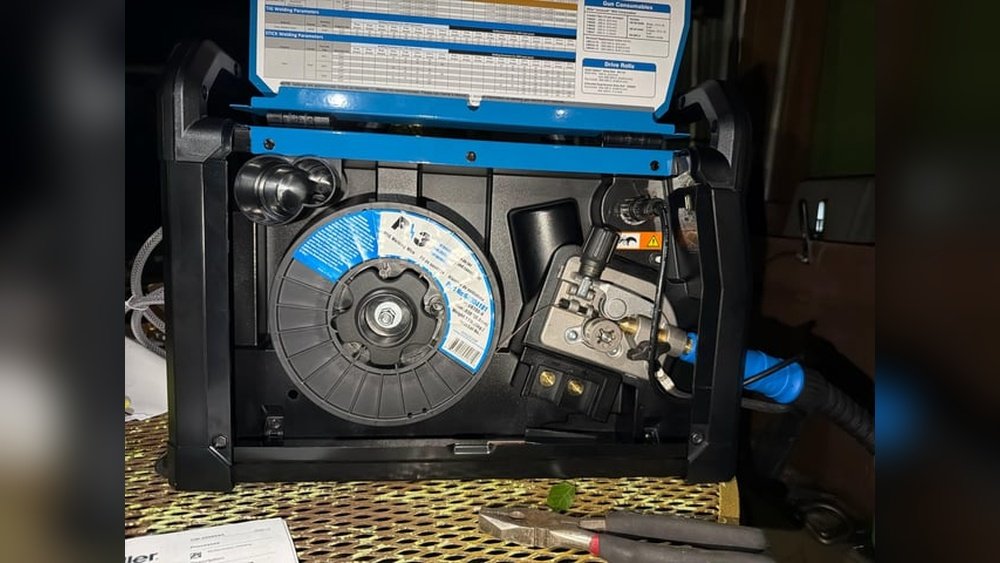
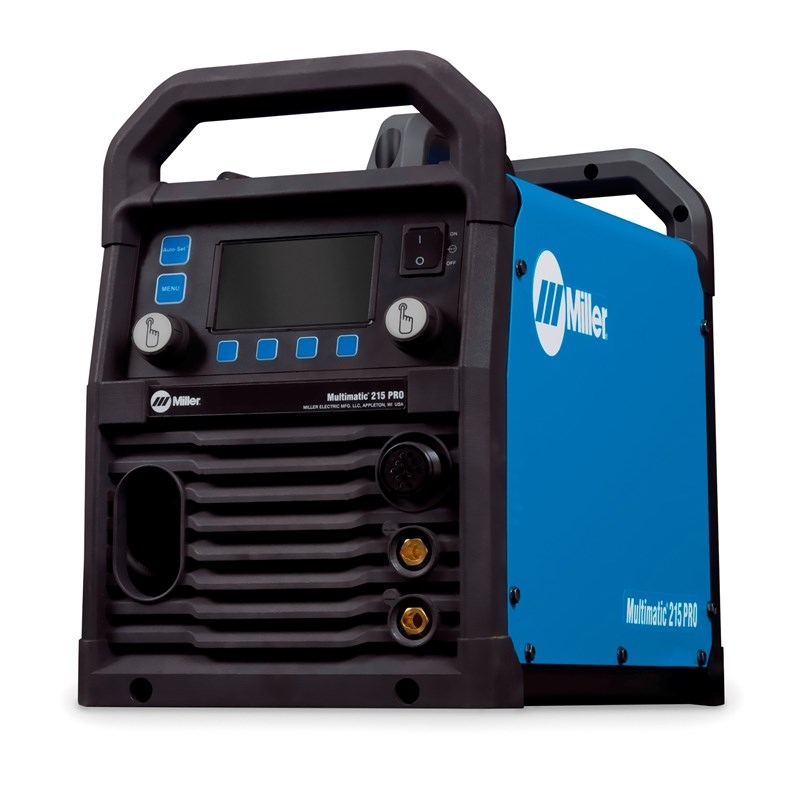
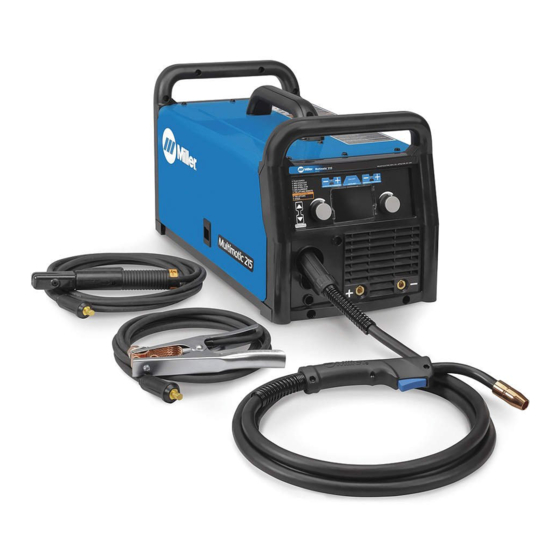
The Miller Multimatic 215 is a popular multi-process welder, trusted by both hobbyists and professionals. It promises MIG, TIG, and stick welding in a single, portable machine. But even the best machines have their challenges. Users often run into problems that can slow down or stop their work.
Understanding these issues—and how to solve them—can make a big difference in your welding experience.
In this article, you’ll find a complete guide to the Miller Multimatic 215 problems. We’ll cover all the major and minor issues, break them down individually, and give you practical solutions. Whether you’re a new owner or an experienced welder, this guide will help you keep your machine running smoothly.
Common Power And Startup Problems
- Machine won’t turn on: Check the power cord and outlet. Sometimes, a tripped breaker or faulty extension cord is the cause. Try a different outlet before calling for service.
- Blown fuse: The Multimatic 215 has internal fuses. If the display is dead, check the fuses inside the unit. Replace only with fuses of the correct rating.
- Tripped circuit breaker: If your home or shop breaker trips, the welder may be overloading the circuit. Use a dedicated 20A or 30A breaker.
- Erratic power up: Unstable voltage can cause the machine to power up and down. Use a surge protector or a stable power source.
- Voltage selector stuck: Sometimes the dual-voltage plug doesn’t seat properly. Remove and reseat the plug, ensuring it clicks into place.
Wire Feed And Mig Problems
- Wire not feeding: Check for a tangled spool or a loose drive roll. Tighten the drive roll and untangle the wire.
- Bird-nesting: This is when wire tangles near the feed. Use the correct drive roll for your wire type, and keep the liner clean.
- Wire slipping: If the drive roll tension is too loose, wire will slip. Adjust the tension knob until the wire feeds smoothly.
- Wire burns back to tip: Incorrect settings or a dirty contact tip can cause burn-back. Replace the tip and adjust the voltage and wire speed.
- Sputtering arc: Dirty wire or a worn-out contact tip can cause sputtering. Clean or replace these parts.
Tig Welding Challenges
- No arc start: For lift-arc TIG, make sure the torch is properly grounded and the tungsten is sharp.
- Torch gets hot: Overheating happens if you exceed the torch’s duty cycle. Allow the machine to cool down.
- Tungsten contamination: Touching the tungsten to the weld puddle can cause contamination. Keep a steady hand and regrind as needed.
- Gas not flowing: Check the gas hose for leaks, and ensure the regulator is set correctly.
- Arc wanders: This may be due to improper shielding gas or a bent tungsten. Use 100% argon for TIG and straighten your tungsten.
Stick Welding Issues
- Electrode sticking: Low amperage can cause sticking. Increase the current, and keep the electrode angle correct.
- Poor arc control: Dirty work clamps or connections can disrupt arc stability. Clean all contact points.
- Excessive spatter: Too high current or wrong electrode type leads to spatter. Adjust your settings to the recommended range.
- Slag inclusion: Not cleaning between passes can trap slag. Use a chipping hammer and brush.
- Difficulty striking arc: Use a fresh electrode, and check that your ground clamp is tight.
Display And Menu Problems
- Display not working: If the screen is blank, check the main fuse and the display cable.
- Error codes: The Multimatic 215 will show error codes for various faults. Refer to the manual for the code’s meaning.
- Frozen menu: Software glitches can freeze the menu. Turn the machine off and on to reset.
- Settings not saving: Internal memory issues can prevent settings from saving. Update the firmware or reset to factory settings.
- Unresponsive buttons: Dirt or debris can get under control buttons. Clean the panel with a dry cloth.
Gas Supply And Regulation
- Leaking gas hose: Use soapy water to find leaks, and tighten or replace fittings as needed.
- Gas not reaching torch: Blocked solenoid valves or pinched hoses can stop gas flow. Inspect and clear any obstructions.
- Regulator pressure drop: If the regulator doesn’t hold pressure, check for leaks or replace the regulator.
- Incorrect shielding gas mix: Always use the right gas for the process—100% CO2 for flux-core, or Argon-CO2 mix for MIG.
- Hissing noise: Continuous hissing means a leak—shut down and fix before welding.
Wire Spool And Drive System
- Wire spool jams: Over-tightened spool tension or a misaligned spool can jam wire. Adjust the tension knob and realign the spool.
- Drive motor failure: A silent drive motor may need replacement. Test it by switching to a different process.
- Drive roll wear: Worn drive rolls can’t grip wire. Replace them if grooved or shiny.
- Wire liner clog: Dust or debris can block the liner. Remove and blow out the liner regularly.
- Wire type mismatch: Use the correct wire type (solid or flux-cored) for your application.
Torch And Consumables
- Loose torch connection: Make sure the torch is fully seated and locked into the machine.
- Damaged nozzle: Dropping the torch can crack the nozzle. Replace it to ensure proper shielding.
- Clogged contact tip: Spatter can block the tip. Clean it with a tip cleaner or replace it.
- Overheated tip: Prolonged welding can overheat tips. Use tips rated for your amperage.
- Mismatched consumables: Use genuine Miller consumables for best fit and performance.
Feed Speed And Voltage Control
- Feed speed won’t adjust: Faulty control knob or software error can cause this. Try a reset or replace the knob.
- Voltage output too low: Internal board issues can cause low voltage. Have a technician inspect the unit.
- Feed speed erratic: Dirty potentiometers or loose wiring are common causes.
- Voltage jumps: Spikes or drops can damage your weld. Use a stable power source.
- Settings drift: Settings may change unexpectedly if controls are bumped during welding.
Cooling And Overheating
- Fan not running: The fan should start automatically. If not, check the fan wiring or replace the fan.
- Overheat shutdown: If the machine overheats, it will shut down until cool. Allow proper airflow around the unit.
- Frequent overheating: Welding above the duty cycle or in hot environments increases the risk. Use the machine within its limits.
- Hot power cord: A hot cord can be a sign of overload. Use the recommended cable size.
- Thermal overload indicator: If this light comes on, stop welding and let the unit cool.
Credit: www.weldersupply.com
Arc Quality And Stability
- Unstable arc: Poor connections or incorrect polarity can destabilize the arc.
- Porosity in welds: Insufficient gas coverage causes pores in the weld. Increase gas flow or check for leaks.
- Arc blow: Magnetic fields from the workpiece can deflect the arc. Adjust your ground clamp position.
- Arc wandering: This happens with contaminated tungsten or bad shielding gas.
- Low penetration: Increase voltage or use a slower travel speed.
Sound And Vibration Issues
- Loud buzzing: Transformer hum is normal, but new loud noises may mean loose parts.
- Rattling inside unit: Unplug and open the case (if comfortable) to check for loose screws.
- Torch vibration: Worn torch parts can vibrate. Replace as needed.
- High-pitched squeal: This may be a fan or drive motor issue.
- Chirping during wire feed: Check for a dry or worn drive roll.
Credit: www.manualslib.com
Portability And Handling
- Heavy to carry: At 38 pounds, it’s not ultra-light. Use the provided handle or a cart for easy movement.
- Awkward shape: The boxy design can bump into things. Plan your workspace for easier access.
- Cord storage: The Multimatic 215 lacks built-in cord storage. Use Velcro straps or hooks.
- Torch cable tangling: Keep cables coiled neatly when not in use.
- Transporting in vehicles: Pad the unit to protect it during transport.
Maintenance And Cleaning
- Dust buildup inside: Open the case (with power off) and blow out dust every few months.
- Dirty cooling vents: Clogged vents reduce airflow. Use a brush or compressed air to clean.
- Contact tip erosion: Replace tips regularly for best results.
- Stuck knobs: Spray with electronics-safe cleaner if knobs are hard to turn.
- Loose case screws: Check and tighten screws as part of your routine.
Settings And Calibration
- Settings reset after power loss: Some settings don’t save if the machine loses power abruptly.
- Calibration drift: Over time, internal components may need calibration by a technician.
- Display numbers flicker: Power fluctuations cause this. Check your power supply.
- Auto-set not working: Update firmware or reset the machine to fix auto-set issues.
- Inaccurate readings: Compare with a trusted multimeter for accuracy.
Safety Features And Concerns
- Ground clamp overheating: Use a heavy-duty clamp and keep connections clean.
- Torch trigger sticking: Replace the trigger switch if it sticks.
- Shock risk: Always wear gloves and check insulation on all cables.
- Gas leak detection: Use a leak detector or soapy water often.
- Warning lights ignored: Never bypass or ignore safety lights.
Storage And Environmental Challenges
- Stored in damp areas: Moisture can corrode parts. Store in a dry area.
- Freezing temperatures: Cold can make cables stiff. Warm up before use.
- High humidity: Use silica gel packs to prevent rust.
- Sunlight exposure: UV rays can fade the case and dry out cables.
- Rodent damage: Mice can chew wires. Store off the floor if possible.
Consumables And Accessories Compatibility
- Non-Miller tips: Off-brand tips may fit poorly or perform worse.
- Wrong size nozzle: Use the correct size for your wire and process.
- Cheap wire: Low-quality wire jams more often.
- Old electrodes: Stick electrodes absorb moisture—store in sealed containers.
- Mismatched gas hoses: Use hoses rated for welding gases.

Credit: www.reddit.com
Cable And Connector Issues
- Frayed power cord: Replace immediately to avoid shock.
- Loose ground cable: Tighten the clamp for a solid connection.
- Bent connectors: Straighten gently or replace.
- Damaged torch lead: Inspect for cuts or burns.
- Extension cord problems: Use a heavy-gauge cord, minimum 10-gauge for best results.
Software And Firmware
- Firmware update fails: Try a different USB drive or contact Miller support.
- Random reboots: Can be a sign of a software glitch or power issue.
- Settings not updating: Reset or update firmware to fix.
- Corrupt settings: Restore factory defaults if settings become corrupt.
- No firmware available: Check the Miller official website for updates.
Warranty And Service
- Warranty claim delays: Have your proof of purchase ready for faster service.
- Service center too far: Contact Miller for authorized mobile service options.
- Spare parts hard to find: Order directly from Miller or a trusted dealer.
- Long repair times: Ask for a loaner if repairs take weeks.
- Warranty void from DIY repair: Call Miller before opening the case.
Technical Support And Documentation
- Manual missing: Download a PDF from the Miller website.
- Poor phone support: Use the online chat for quicker answers.
- No wiring diagram: Ask Miller support for technical diagrams.
- Language barrier: Use translation tools for the manual.
- Outdated support info: Check for the latest downloads online.
Performance In Different Materials
- Thin sheet burn-through: Lower voltage and use smaller wire.
- Poor aluminum welds: Use the correct spool gun and pure argon.
- Stainless steel discoloration: Use proper gas mix and clean base metal.
- Galvanized steel spatter: Remove coating before welding.
- Welds cracking on cast iron: Preheat and use nickel electrodes.
Accessories And Add-ons
- Spool gun issues: Use the Miller spool gun for best compatibility.
- Foot pedal not working: Ensure it’s plugged in firmly for TIG welding.
- Cart too small: Use a larger cart to hold gas bottles securely.
- Helmet auto-darken delay: Change batteries or settings.
- Glove heat damage: Use gloves rated for high amperage.
User Experience And Ergonomics
- Control panel hard to read: Add extra lighting in your workspace.
- Small display size: Stand closer or use reading glasses if needed.
- Stiff knobs: Lubricate with electronics-safe spray.
- Trigger fatigue: Use a trigger lock if welding for long periods.
- Torch grip uncomfortable: Add grip tape for comfort.
Data Table: Wire Speed And Voltage Vs. Material Thickness
Below is a reference for common MIG settings:
| Material Thickness (inches) | Wire Speed (IPM) | Voltage (V) |
|---|---|---|
| 1/16″ | 180 | 16 |
| 1/8″ | 300 | 18 |
| 1/4″ | 450 | 20 |
Data Table: Common Error Codes And Meanings
| Error Code | Meaning | Solution |
|---|---|---|
| E01 | Overheat | Let machine cool |
| E02 | Low input voltage | Check power supply |
| E03 | Wire feed error | Check drive roll, spool |
Data Table: Duty Cycle Comparison
| Amperage | Duty Cycle (%) | Time Welding (min) | Time Resting (min) |
|---|---|---|---|
| 150A | 60 | 6 | 4 |
| 200A | 30 | 3 | 7 |
Uncommon Insights
One point many users miss: using the wrong extension cord can cause many mysterious problems—wire feed issues, display glitches, even overheating. Always use a heavy-duty, short extension cord with this unit.
Another tip: frequent wire jams are often due to a dirty liner. Most people think it’s a drive roll issue, but blowing out the liner every few spools can prevent hours of frustration.
The Miller Multimatic 215 is a robust, flexible machine, but like all tools, it needs care and attention. If you address small problems quickly, you’ll avoid major downtime later. For complex issues, don’t hesitate to consult Miller’s official support.
Frequently Asked Questions
What Is The Most Common Problem With The Multimatic 215?
The most frequent issue is wire feed problems, usually caused by improper drive roll tension or a dirty liner.
How Do I Reset The Multimatic 215 To Factory Settings?
Hold the settings button while turning the machine on. Release when the display flashes—this restores default settings.
Can I Use Any Brand Of Consumables?
You should use genuine Miller consumables for best performance. Off-brand parts may not fit correctly.
Why Does My Machine Shut Off During Use?
This is usually an overheat protection feature. Allow the machine to cool, and check that you’re within the duty cycle.
Where Can I Find Repair Parts Or Service?
Order parts or schedule service through Miller’s official website or local authorized dealers.
With the right care and knowledge, your Miller Multimatic 215 can deliver years of reliable welding. Use this guide to troubleshoot quickly, and always put safety first.