
A puddle under your fridge or drips from the freezer can be more than just an annoyance—it’s a sign something’s wrong with your ice maker. Many people ignore small leaks, thinking they will go away, but a leaking ice maker can lead to water damage, higher energy bills, and even spoiled food. If you’ve noticed your ice maker leaking water, you’re not alone. This is a common issue in both modern and older refrigerators, but the causes and fixes can be very different. Understanding why your ice maker is leaking and how to stop it will help you protect your kitchen and keep your ice supply steady.
Common Causes Of Ice Maker Leaks
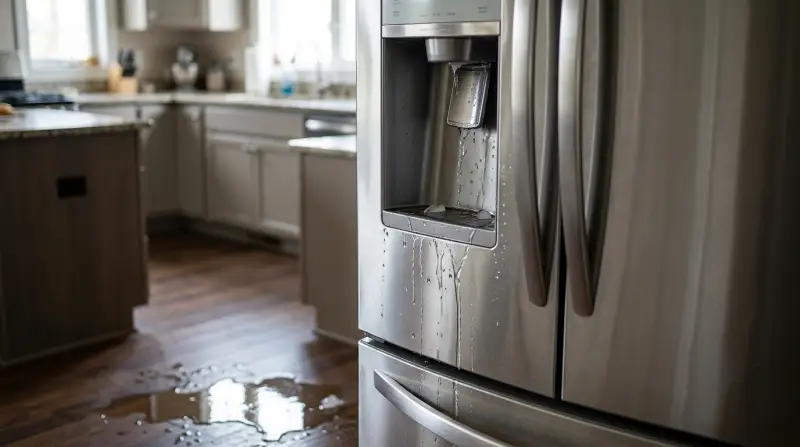
A leaking ice maker can have many sources. Knowing the most frequent causes will help you diagnose and solve the problem quickly.
Faulty Water Inlet Valve
The water inlet valve controls the flow of water into your ice maker. If this valve is cracked, loose, or has failed, water can leak out and pool beneath your fridge. This problem often starts small but can become worse over time.
Clogged Or Frozen Water Line
If the water line that supplies the ice maker is clogged or frozen, it can force water to leak out at the connection points or along the line itself. A frozen line is especially common in cold climates or if the fridge door is left open.
Misaligned Ice Maker Or Fill Cup
Sometimes, the fill cup—the part that catches water as it enters the ice maker—can get knocked out of alignment. When this happens, water misses its target and leaks into the freezer or fridge compartment.
Damaged Or Cracked Ice Maker Mold
The mold is the tray where water freezes into ice cubes. If it’s cracked or damaged, water can leak out before freezing, causing puddles or frost buildup inside the freezer.
Overfilling
If the ice maker’s water fill level is set too high, water may overflow the mold and leak out. This often happens after replacing the ice maker or making adjustments without proper calibration.
Loose Connections
Any loose connection between the water line and the ice maker or between the water valve and the supply line can allow water to drip out. Over time, vibrations from the fridge can cause fittings to work loose.
Blocked Drain
Some refrigerators have a drain system to carry away excess water. If this drain becomes blocked with ice or debris, water can back up and leak out.
Here’s a quick look at how common these problems are:
| Cause | Estimated % of Cases | Difficulty to Fix |
|---|---|---|
| Faulty Water Inlet Valve | 30% | Medium |
| Clogged/Frozen Water Line | 25% | Easy |
| Misaligned Fill Cup | 15% | Easy |
| Cracked Ice Maker Mold | 10% | Medium |
| Overfilling | 10% | Easy |
| Loose Connections | 5% | Easy |
| Blocked Drain | 5% | Medium |
How To Diagnose A Leaking Ice Maker
Finding the source of a leak is not always simple, but a step-by-step approach can save time and prevent further damage. Here’s how you can check your ice maker for leaks:
- Unplug the fridge to prevent electrical shock.
- Inspect the water line behind the fridge. Look for kinks, cracks, or wet spots.
- Check connections at the back and inside the freezer. Gently tug on fittings to see if they are loose.
- Examine the ice maker mold and fill cup for cracks or misalignment.
- Look for ice buildup in the drain or around the water supply area.
- Watch the fill cycle if possible. Sometimes leaks only appear when water is flowing in.
It’s important to work methodically. Missing a small crack or loose fitting can mean the leak returns, sometimes worse than before.

Step-by-step Solutions For Common Problems
Once you know where the leak is coming from, you can often fix it yourself. Here’s how to address the most common causes.
Fixing A Faulty Water Inlet Valve
- Turn off the water supply to the fridge.
- Remove the back panel to access the valve (usually at the bottom back).
- Inspect for visible cracks or mineral buildup.
- Replace the valve if damaged. These are inexpensive and available at most appliance stores.
- Reconnect everything, turn on the water, and check for leaks.
Clearing A Clogged Or Frozen Water Line
- Unplug the fridge and turn off the water supply.
- Gently disconnect the water line from the back.
- Use a hair dryer on a low setting to thaw any ice blockages.
- If clogged with debris, flush with warm water.
- Reconnect and check the flow before plugging back in.
Aligning The Fill Cup And Ice Maker
- Remove the ice maker assembly by loosening the screws or clips.
- Gently reposition the fill cup so it sits directly beneath the water supply tube.
- Reinstall the ice maker, making sure it’s level and secure.
Repairing A Cracked Mold
- If the mold is cracked, it will need to be replaced.
- Purchase a replacement mold specific to your model.
- Follow manufacturer instructions for removing and installing the new tray.
Adjusting Overfilling
- Check your owner’s manual for instructions on adjusting the water fill level.
- Many ice makers have a screw or electronic control to change how much water is dispensed.
- Make small adjustments and test after each change.
Tightening Loose Connections
- Use a wrench or pliers to snug all fittings.
- Do not overtighten, as this can crack plastic parts.
Clearing A Blocked Drain
- Locate the drain hole, usually at the bottom of the freezer.
- Use a turkey baster or syringe with hot water to clear ice or debris.
- Repeat until water flows freely.
Preventing Future Leaks
Fixing a leak is good, but preventing it is better. Here are some simple habits and maintenance tips:
- Check water lines and fittings every six months.
- Clean the drain hole with hot water if you see frost buildup.
- Defrost your freezer regularly if ice accumulates.
- Replace water filters as recommended to prevent clogs.
- Avoid overloading the freezer, which can damage the ice maker or lines.
- If you notice slow ice production, check for blockages before leaks start.
How Leaks Affect Your Fridge And Kitchen
Even small leaks from your ice maker can cause bigger issues:
- Water damage to floors and cabinets
- Mold growth under or behind the fridge
- Reduced cooling efficiency, which raises your energy bill
- Rust and corrosion inside your fridge
Here’s a quick comparison of damage types and their typical repair costs:
| Damage Type | Average Repair Cost | Time to Fix |
|---|---|---|
| Water-damaged flooring | $200 – $1,000 | 1–3 days |
| Mold remediation | $500 – $3,000 | 2–7 days |
| Fridge component replacement | $80 – $400 | 1–2 hours |
| Cabinet repair | $150 – $600 | 1–2 days |
As you can see, letting a leak go unchecked can cost much more than a quick repair.
When To Call A Professional
Some leaks are easy to fix, but others require an expert. Call a certified appliance technician if:
- The leak continues after you’ve tried basic fixes.
- You see electrical issues or burning smells.
- There’s water inside fridge walls or insulation.
- The ice maker is built into a complex or expensive fridge model.
A professional can also check for hidden damage that might not be obvious to a DIYer.
Two Insights Most Beginners Miss
First, many people think a small leak is harmless. In fact, even a few drops can signal a larger problem, like a cracked water line behind the fridge, which can quickly become a flood. Always act fast when you spot water.
Second, many assume ice makers are fully self-contained. Actually, the system relies on several outside parts—like the water valve, filter, and supply line—that are just as likely to fail. Be sure to check these external components, not just the ice maker itself.
Choosing Quality Parts For Repairs
When replacing any part—water valve, mold, or line—choose manufacturer-approved parts. Generic or off-brand pieces may be cheaper but can leak or wear out faster. Always match the part number to your fridge model.
Here’s a comparison of original vs generic parts:
| Part Type | Average Cost | Expected Lifespan | Warranty |
|---|---|---|---|
| OEM (Original) | $35 – $70 | 5–7 years | Yes |
| Generic | $15 – $40 | 1–3 years | Often No |
Paying a little more for quality parts can save you money and trouble in the long run.
Frequently Asked Questions
Why Does My Ice Maker Leak Only Sometimes?
Intermittent leaks usually happen when the fill cup is slightly misaligned or when ice partially blocks the water line. As the ice shifts or melts, the leak may stop and start again. Regular inspection and realignment can solve this.
Can A Leaking Ice Maker Cause Mold?
Yes. Leaked water can seep under your fridge and into the flooring, creating a perfect environment for mold growth. This can lead to health issues and expensive repairs if left unchecked.
How Do I Know If The Water Inlet Valve Is Bad?
If you see water pooling under your fridge, or the ice maker is slow to fill or overfills, the water inlet valve could be faulty. You may also hear a humming noise or see mineral deposits on the valve.
Is It Safe To Use My Ice Maker If It’s Leaking?
It’s not recommended. Leaks can cause electrical problems or lead to water damage. Unplug the fridge and fix the leak before continuing to use the ice maker.
Where Can I Find More Information About Refrigerator Maintenance?
For a deep dive into refrigerator repair and maintenance, check out the advice from Consumer Reports.
Taking care of a leaking ice maker right away helps keep your kitchen safe, your fridge running well, and your ice cubes tasting fresh. Don’t ignore small leaks—most can be fixed quickly with a little know-how and the right parts.
If in doubt, call a professional to avoid bigger problems down the road.