A clothes dryer is one of those appliances you don’t think much about—until it suddenly won’t start or has no power. Maybe you loaded it with laundry, pressed the button, and nothing happened. No lights, no sounds, and definitely no warm air.
It’s a frustrating problem that can throw off your entire day. The good news? In many cases, you can figure out the cause yourself and even fix it, without calling a technician. This guide will show you the most common reasons why a clothes dryer won’t start or has no power, and what you can do about it.
If you’re ready to get your laundry routine back on track, keep reading.
Understanding How A Clothes Dryer Gets Power
Before jumping into possible issues, it helps to know how a typical clothes dryer receives power. Most dryers need a strong electrical connection—usually 240 volts for electric models, and 120 volts for gas models (just for the controls and drum motor). There’s often a dedicated circuit in your breaker panel just for your dryer. If this connection is interrupted, your dryer simply won’t start.
The dryer also has several built-in safety features. These include door switches, thermal fuses, and sometimes circuit boards. If any of these fail, the dryer can lose power or refuse to start, even if the main power is fine.
Common Reasons A Clothes Dryer Won’t Start
Many people assume the worst when their dryer won’t start. But often, the cause is simple and easy to fix. Here are the most common reasons:
1. Power Supply Problems
Without a good power supply, your dryer is just a big metal box.
- Tripped circuit breaker: Check your home’s breaker panel. Dryer circuits are powerful and can trip if overloaded.
- Blown fuse: Some homes use fuses instead of breakers. A blown fuse cuts power to the outlet.
- Unplugged cord: It sounds obvious, but sometimes the cord gets pulled loose behind the dryer.
- Bad wall outlet: Outlets can go bad over time. Try plugging in another appliance to see if it works.
2. Door Switch Issues
The door switch is a small but important safety device. If the dryer thinks the door is open, it won’t start.
- Broken switch: With heavy use, the switch may stop working.
- Misaligned door: If the door isn’t fully closed, the switch won’t activate.
- Lint buildup: Sometimes lint or debris blocks the switch from making contact.
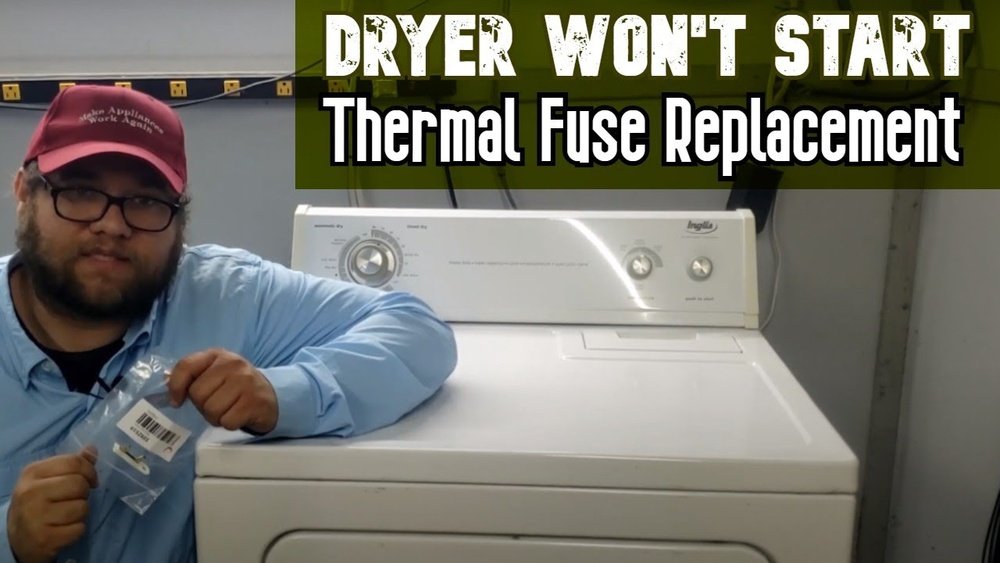
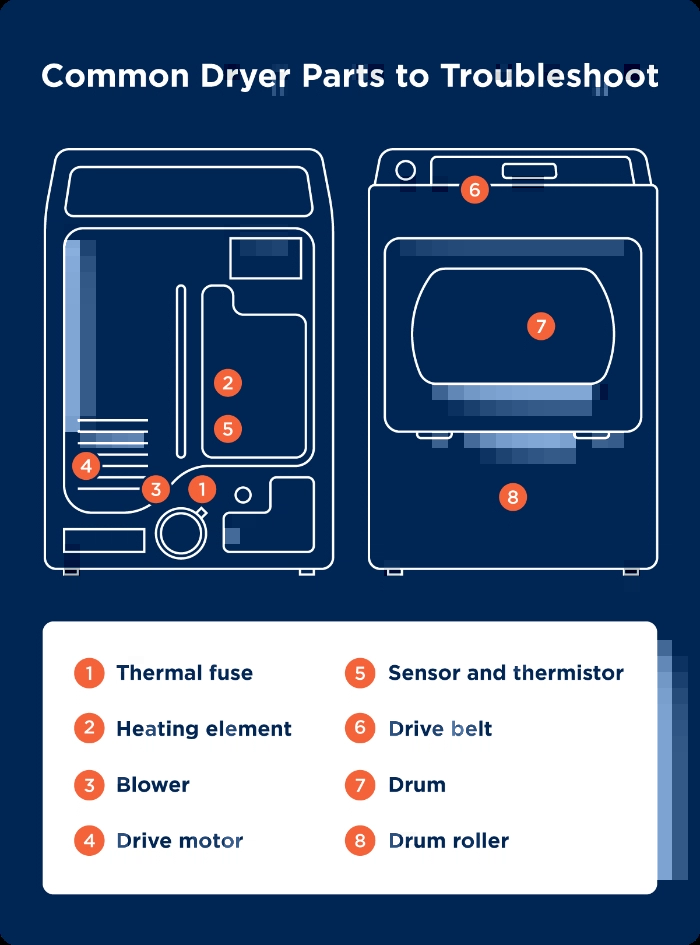
3. Blown Thermal Fuse
A thermal fuse protects your dryer from overheating. If the dryer gets too hot, the fuse blows—and the dryer won’t run until it’s replaced.
- Overloaded dryer: Too much laundry can cause overheating.
- Blocked vent: Poor airflow leads to high temperatures.
- Aging fuse: Fuses can wear out over time.
4. Start Switch Malfunction
The start switch is the button or knob you press to begin the drying cycle. If it fails, nothing happens.
- Worn out contacts: Frequent use can wear down the switch.
- Loose wiring: Sometimes, a wire comes loose or disconnects from the switch.
5. Control Board Or Timer Problems
Modern dryers use electronic control boards; older ones use mechanical timers. Either can fail.
- Burned out board: Power surges or age can damage the electronics.
- Stuck timer: Mechanical timers can wear out and stop working.
6. Motor Problems
The dryer motor turns the drum and sometimes the blower fan. If it’s faulty, the dryer won’t start.
- Burned out motor: Old motors can fail completely.
- Jammed drum: If something is stuck, the motor won’t turn and may not start.
Quick Troubleshooting Steps
Before calling for help, try these steps. Sometimes, the fix is simpler than you think.
Check The Power
- Look at the breaker panel. Reset any tripped breakers.
- Test the wall outlet. Use a lamp or phone charger to check for power.
- Inspect the dryer cord. Make sure it’s firmly plugged in and the cable isn’t damaged.
Inspect The Door
- Open and close the dryer door firmly.
- Check for lint or debris around the door switch area.
- Listen for a click as you close the door—this means the switch is working.
Test The Start Switch
- Press the start button and listen for a sound.
- If there’s no sound at all, the switch or power supply may be the problem.
Look For Obvious Signs
- Check for lights or display. If the display is dead, suspect power issues.
- Smell for burning. A burning smell can indicate a failed motor or wiring problem.
- Try a different cycle. Sometimes, only one cycle or setting is affected.
When To Check Internal Dryer Components
If you’re comfortable with basic tools, you can check some internal parts. Always unplug the dryer first.
Checking The Thermal Fuse
Find the thermal fuse near the exhaust vent inside the back panel. Use a multimeter to test for continuity (a continuous circuit). If the fuse is blown, replace it. Note: If it blows again soon, your dryer may have a blocked vent or another heating problem.
Testing The Door Switch
With the dryer unplugged, remove the switch and test with a multimeter. No continuity means the switch is bad.
Inspecting The Start Switch
Remove the control panel and test the switch. If it shows no continuity when pressed, replace it.
Evaluating The Motor
If the motor makes buzzing sounds but won’t start, it may be jammed or burned out. Sometimes, coins or small items fall through the drum and jam the motor. Remove the drum and check for obstructions.
Comparison: Electric Vs Gas Dryer Startup Problems
Here’s how electric and gas dryers differ when it comes to startup and power issues:
| Feature | Electric Dryer | Gas Dryer |
|---|---|---|
| Voltage Needed | 240V (main), 120V (sometimes for controls) | 120V (controls), gas for heat |
| Common Power Issues | Tripped breaker, blown fuse, bad outlet | Tripped breaker, gas supply issue |
| Startup Safety Features | Thermal fuse, door switch | Thermal fuse, door switch, gas valve coils |
| Repair Cost (avg.) | $100–$350 | $120–$400 |
Preventing Dryer Power Issues
You can avoid many dryer startup problems with regular care and a few simple habits:
- Clean the lint filter after every load. Lint buildup causes overheating.
- Check and clean the vent hose every few months. A blocked vent can trip the thermal fuse.
- Don’t overload the dryer. Too much laundry strains the motor and causes high temperatures.
- Inspect the power cord for signs of wear or damage.
- Have a professional check your breaker panel if you notice frequent trips.
Key Maintenance Checklist
| Maintenance Task | How Often | Why It Matters |
|---|---|---|
| Clean lint filter | After every load | Prevents overheating and fire risk |
| Clean vent hose | Every 3–6 months | Improves airflow, reduces fuse blowout |
| Inspect cord and plug | Every 6 months | Stops power connection problems |
| Check breaker/fuse box | Yearly | Detects electrical issues early |

Credit: www.youtube.com
Signs You Need A Professional
Some dryer problems are best left to experts:
- Burnt wiring smell or visible smoke
- Repeated blown fuses or breakers
- No power even after replacing fuses or switches
- Complex electronic control board issues
- Gas leaks (for gas dryers)
A qualified technician will have the tools and training to safely diagnose and repair these problems.
Non-obvious Insights: What Most People Miss
- Thermal fuse repeats: If you replace a blown thermal fuse and it blows again soon after, simply replacing the fuse won’t solve the root issue. Most often, this means your dryer’s vent is partially blocked or your loads are too large, causing repeat overheating. Always check and clear the vent before replacing the fuse.
- Hidden child lock: Many modern dryers have a child lock or control lock feature. If activated, the dryer will not start, even if everything else is working. Check your user manual for instructions on unlocking the controls.
- Voltage drop: In some older homes, the dryer outlet may not provide full power because of worn wires or corroded connections inside the wall. This can cause the dryer to have power for lights but not enough to start the motor or heating element.
- Startup sequence confusion: Some dryers need the door fully closed, a specific setting selected, and the start button held for a few seconds. Rushing through the process or skipping a step can make the dryer seem dead.
Credit: www.ifixit.com
Cost To Repair A Dryer That Won’t Start
Here’s what you might expect to pay for common repairs in the US:
| Problem | DIY Cost | Professional Cost |
|---|---|---|
| Replace thermal fuse | $10–$30 | $100–$200 |
| Replace door switch | $15–$40 | $100–$180 |
| Repair start switch | $15–$50 | $120–$200 |
| Replace motor | $50–$200 | $250–$400 |
| Control board repair | – | $250–$400 |
DIY repairs can save money, but always consider safety. If you’re not sure, hire a professional.
Frequently Asked Questions
Why Does My Dryer Have Power But Won’t Start?
If the lights or display turn on but the dryer won’t start, the issue is often the door switch, start switch, or thermal fuse. Check these parts first.
Can A Bad Outlet Cause My Dryer Not To Start?
Yes, a bad electrical outlet can stop your dryer from getting power. Test the outlet with another device or use a voltage tester.
What Does A Blown Thermal Fuse Look Like?
A blown thermal fuse usually has no visible signs. You need a multimeter to check for continuity. If it’s blown, it will show no continuity.
Is It Safe To Replace A Dryer Fuse Myself?
If you are comfortable using basic tools and follow safety steps (unplugging the dryer), replacing a thermal fuse or door switch is usually safe. Don’t attempt repairs if you smell burning or see damaged wires.
How Do I Reset My Dryer After A Power Outage?
Some dryers have a reset button inside the control panel. Others reset automatically when unplugged for a few minutes. Consult your user manual or the manufacturer’s website for specific steps.
If your clothes dryer won’t start or has no power, don’t panic. Start with the basics: check power, door, and controls. With careful troubleshooting and a little knowledge, you can often solve the problem yourself. Regular maintenance will keep your dryer running for years and avoid costly repairs. For more detailed safety tips and repair guidance, visit the Consumer Reports Dryer Repair Guide. If in doubt, don’t risk your safety—call a trusted appliance technician. You’ll soon have your laundry routine back to normal, with fresh, dry clothes every time.
Credit: www.mrappliance.com