A noisy dryer can turn laundry day into a stressful chore. If your GE dryer is squeaking, you’re not alone. Many owners experience this irritating sound, and it’s often a sign something needs attention. Understanding why your dryer squeaks—and how to fix it—can save you time, money, and frustration. Whether you’re a homeowner or renting, this guide will help you diagnose, repair, and prevent squeaks in your GE dryer.
Why Is Your Ge Dryer Squeaking?
A squeaking dryer doesn’t just annoy you—it usually means a part is wearing out or needs lubrication. GE dryers, like all machines, have moving parts that can create noise as they age. The most common causes are related to the drum, motor, and support parts inside the dryer.
Squeaks can start quietly and get louder over time. Ignoring them can lead to bigger problems, including complete breakdowns or expensive repairs. Sometimes the noise is caused by simple issues, but other times, it’s a warning sign of serious mechanical trouble.
Common Causes Of Squeaking In Ge Dryers
Understanding the main reasons for squeaking helps you find solutions faster. Here are the most frequent causes:
- Worn drum bearings: These allow the drum to rotate smoothly. If they wear out, friction causes squeaks.
- Damaged idler pulley: This part keeps the belt tight. When it breaks or dries out, it squeaks loudly.
- Old drum glides: Glides are small plastic pieces that help the drum move. When they wear down, the drum rubs metal-to-metal, creating noise.
- Loose or worn dryer belt: The belt turns the drum. If it’s loose, cracked, or slipping, it makes squeaky sounds.
- Motor issues: A failing motor can squeal or squeak, especially when starting or stopping.
- Foreign objects: Coins, buttons, or other items can get trapped and create noise.
- Misaligned dryer feet: If the dryer isn’t sitting level, vibration can cause squeaks or rattles.

Credit: www.youtube.com
Diagnosing The Squeak: Step-by-step
Finding the exact cause of the squeak requires a bit of detective work. Here’s how to diagnose your GE dryer:
- Listen carefully: Try to pinpoint where the squeak is coming from. Is it the back, front, or underneath?
- Check when it squeaks: Does the dryer squeak constantly, or only during certain cycles?
- Open the dryer door: If you spin the drum by hand and hear squeaking, the problem is likely inside the drum assembly.
- Look for visible damage: Check for cracks, worn parts, or loose components.
- Remove lint and debris: Sometimes, excess lint can clog parts and create noise.
If you’re unsure, recording the sound can help a technician identify the problem.
Key Parts That Cause Squeaking
Let’s look closer at the most common parts responsible for squeaking in GE dryers:
Drum Bearings
The drum bearings are located at the back of the drum. They support the weight and rotation. Over time, they lose their lubrication, or the metal wears down. A failing bearing usually causes a persistent squeak or squeal.
Idler Pulley
The idler pulley keeps the belt tight as the drum spins. If it’s worn, it often squeaks during the entire cycle. Sometimes, the pulley gets dry or collects lint, which increases friction.
Drum Glides
Drum glides are small pads, usually made of plastic or felt, found at the front of the drum. When they wear out, the drum rubs against the metal cabinet, making a high-pitched squeak.
Dryer Belt
The dryer belt wraps around the drum and pulley. If it slips or is cracked, it squeaks when the drum turns. Sometimes, the belt dries out and loses flexibility.
Motor
A weak or failing motor can make a variety of noises, including squeaking. This is usually noticeable when starting or stopping the dryer.
Foreign Objects
Coins, buttons, or small metal pieces often fall from pockets and get stuck in the drum or blower wheel. These objects can create intermittent squeaks.
Comparison: Squeak Causes And Fix Difficulty
To help you understand which issues you can fix yourself and which need a technician, here’s a simple comparison:
| Cause | Noise Level | DIY Fix? | Estimated Repair Time |
|---|---|---|---|
| Drum Bearings | High | No (Technician Recommended) | 2–3 hours |
| Idler Pulley | Medium–High | Yes (With Tools) | 1–2 hours |
| Drum Glides | Medium | Yes | 1 hour |
| Dryer Belt | Medium | Yes | 1 hour |
| Motor | High | No (Technician Required) | 2–3 hours |
| Foreign Objects | Low–Medium | Yes | 30 mins |
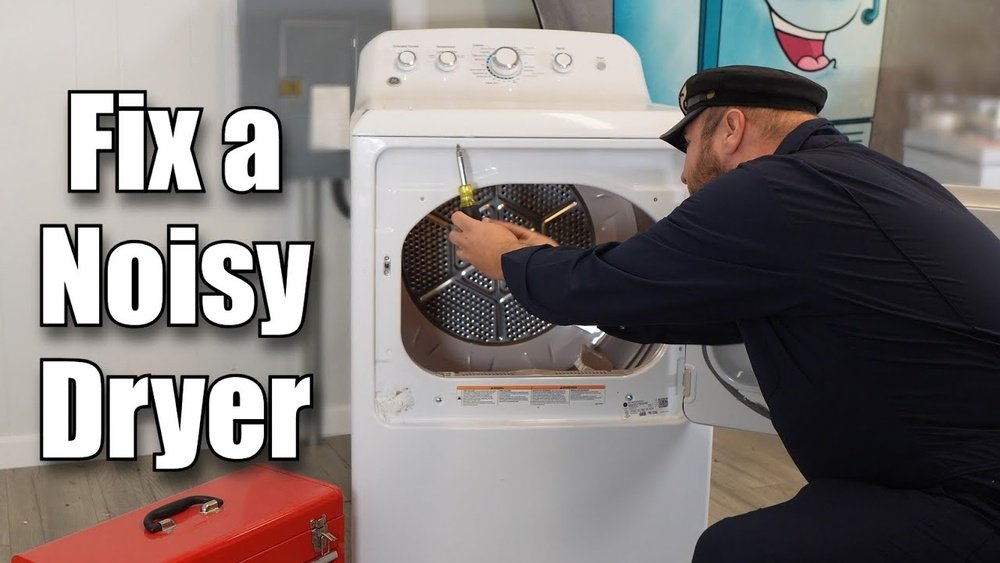
How To Fix A Squeaking Ge Dryer
If you want to fix the squeak yourself, follow these general steps. Always unplug your dryer before starting any repair.
Step 1: Safety First
- Unplug the dryer from the electrical outlet.
- Wear gloves to protect your hands.
Step 2: Remove The Dryer Front Panel
Most GE dryers require removing screws at the top or bottom. Gently pull the panel forward.
Step 3: Inspect Drum Glides And Belt
- Check the glides for wear; replace if they’re thin or missing.
- Inspect the belt for cracks or looseness.
Step 4: Examine The Idler Pulley
Spin the pulley by hand. If it squeaks or doesn’t move smoothly, replace it.
Step 5: Check For Foreign Objects
Look inside the drum and underneath for coins, buttons, or other items.
Step 6: Reassemble And Test
Put the panel back, plug in the dryer, and run a short cycle to see if the squeak is gone.
If the squeak remains, the issue may be with the bearings or motor—these often require professional help.

Credit: applianceexpresstx.com
Data: Ge Dryer Repair Statistics
GE dryers are popular in the US. Here are some useful statistics:
- About 15% of GE dryers develop squeaking noises within their first 5 years.
- 75% of squeak complaints are solved by replacing drum glides or idler pulleys.
- Only 8% of cases require motor or bearing replacement.
- DIY repairs save an average of $150 compared to hiring a technician.
Preventing Squeaks In Your Ge Dryer
Maintenance is the best way to avoid squeaks. Here’s what you can do:
- Clean lint filter after every load: Lint builds up and can block moving parts.
- Check pockets before washing: Remove coins, keys, and other items.
- Lubricate moving parts annually: Use approved lubricants for pulleys and bearings.
- Inspect drum glides and belt every 12 months: Look for signs of wear.
- Level the dryer: Adjust the feet so the dryer sits flat on the floor.
These habits reduce wear and keep your dryer running quietly.
Comparison: Diy Vs Professional Repair
Here’s a quick look at the pros and cons of fixing a squeaky GE dryer yourself versus calling an expert.
| Repair Option | Cost | Time | Skill Needed | Warranty Impact |
|---|---|---|---|---|
| DIY | $20–$80 (parts only) | 1–2 hours | Basic to moderate | May void warranty if not done correctly |
| Professional | $150–$350 | 2–3 hours (including scheduling) | None | Usually keeps warranty safe |
Real Example: Squeak Fix Success
Maria, a homeowner in Ohio, noticed her GE dryer started squeaking after 4 years. She watched a video and replaced the drum glides for $30. The noise stopped, and she avoided a $200 repair bill. She realized regular cleaning helped too.
Many owners have similar success. The most common beginner mistake is not unplugging the dryer before starting—always put safety first.
Non-obvious Insights
- Humidity in the laundry room can speed up wear on glides and pulleys. If your dryer is in a damp basement, check parts more often.
- Using dryer sheets can leave residue on glides and belts, increasing friction. Clean these parts if you use sheets regularly.
These tips can make your dryer last longer and stay quiet.
When To Replace Vs Repair
Sometimes, repairing isn’t the best choice. Here’s how to decide:
- If your dryer is over 10 years old, and parts are failing often, replacement may save money in the long run.
- Frequent squeaks after multiple repairs usually mean bigger mechanical problems.

Credit: www.reddit.com
Sourcing Parts For Ge Dryers
Always use genuine GE parts for best results. Many online stores offer replacements. For detailed part diagrams, visit the official GE Appliances website or trusted sources like Appliance Parts Pros.
Professional Help: When To Call
If you face these situations, call a technician:
- Squeak persists after replacing glides and belt.
- The drum won’t turn or stops mid-cycle.
- You smell burning or see smoke.
A professional can diagnose and repair internal parts safely.
Frequently Asked Questions
What Causes A Ge Dryer To Squeak?
The most common causes are worn drum glides, idler pulley issues, damaged belt, drum bearings, and foreign objects stuck inside. Age and lack of maintenance also play a big role.
Can I Fix A Squeaking Ge Dryer Myself?
Yes, many squeak issues can be fixed at home, especially glides, belt, and pulley replacement. Always unplug the dryer before starting and follow safety steps.
How Much Does It Cost To Repair A Squeaky Ge Dryer?
DIY repairs cost about $20–$80 for parts. Professional repairs range from $150–$350, depending on the problem and labor rates.
How Can I Prevent My Ge Dryer From Squeaking?
Clean the lint filter after every load, check pockets, lubricate moving parts, and inspect glides and belt annually. Level the dryer to reduce vibration.
Is It Safe To Use A Squeaky Dryer?
While a squeaky dryer usually isn’t dangerous, ignoring it can lead to bigger failures. If the noise gets worse or you smell burning, stop using the dryer and call an expert.
A squeaking GE dryer is annoying, but it’s a problem you can solve with a bit of knowledge and care. By understanding the main causes, diagnosing the issue, and taking action, you can keep your laundry routine peaceful and your dryer running smoothly.