
When you install a bathroom vanity, you often find a gap between the back of the vanity and the wall. This space can look strange, gather dust, and even allow water to get behind the vanity. Many homeowners and even professionals face this problem, and it can be frustrating if you want a clean, finished look.
The gap might be small—just a quarter inch—or wide enough to see behind the cabinet. No matter the size, the solution is important for both looks and function.
This article will guide you through everything you need to know about how to fill the gap between vanity and wall. You will learn why these gaps appear, what problems they can cause, and which methods work best. You’ll also get practical tips, step-by-step solutions, and common mistakes to avoid. Whether you’re a DIY enthusiast or just want to talk confidently with your contractor, this guide will help you achieve a perfect, professional finish.
Why Gaps Appear Between Vanity And Wall
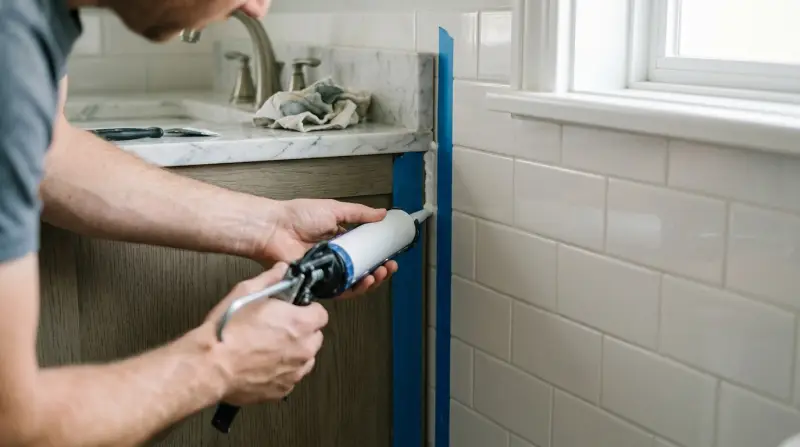
Before fixing the gap, it’s helpful to understand why it happens. Even new homes can have this issue, and it’s not always because of poor installation. Here are some main reasons:
- Walls Are Not Perfectly Straight: Most walls, especially in older homes, have some curves or bumps. Builders use drywall, which can bend or shift a little over time.
- Standard Vanity Sizes: Vanities are made in standard widths. Your bathroom may not match those sizes exactly, leaving a gap.
- Plumbing Location: To fit pipes, installers sometimes move the vanity slightly away from the wall.
- Baseboard or Trim: Thick baseboards or wall trim can push the vanity forward, creating a gap.
- Floor Unevenness: If the floor isn’t perfectly level, the vanity may tilt, causing a gap at the top or bottom.
- Settling Over Time: Houses settle and shift, which can widen or shrink the gap after installation.
These reasons show that gaps are common and often unavoidable. The good news: you have several ways to fill and hide them for a clean, water-resistant finish.
Problems Caused By Leaving The Gap
Some people ignore the gap, thinking it’s only cosmetic. But leaving it open can lead to bigger problems:
- Water Damage: Water from the sink can splash into the gap, damaging the vanity or wall.
- Dust and Debris: Gaps collect dust, hair, and small objects, making cleaning harder.
- Pest Entry: Small spaces can attract insects or even mice in rare cases.
- Unfinished Look: The bathroom may look sloppy or poorly built.
- Mold Growth: In humid bathrooms, gaps can trap moisture and encourage mold.
Fixing the gap is not just about looks. It’s about protecting your bathroom and making cleaning easier.
How Wide Is The Gap? Measuring And Evaluating
Before choosing a solution, measure the gap. This will help you pick the right materials and method.
- Use a Tape Measure: Measure at a few points along the back and sides of the vanity.
- Note the Widest Point: Use the largest measurement—gaps are often uneven.
- Check for Plumbing or Obstructions: Make sure you see any pipes or wires behind the vanity.
- Assess Accessibility: Some gaps are hard to reach, especially on the sides.
Typical gaps range from 1/8 inch to 1 inch, but sometimes they can be larger. Write down your measurements before buying supplies.
Most Effective Ways To Fill The Gap
There are several methods to fill the gap between vanity and wall. The best choice depends on the gap size, your skill level, and the look you want.
1. Caulk (for Small Gaps)
Caulk is the simplest and most common solution for gaps up to 1/4 inch.
- Silicone Caulk: Best for bathrooms, as it’s waterproof and flexible.
- Acrylic Caulk: Easier to paint, but less flexible than silicone.
Steps:
- Clean the area to remove dust and grease.
- Cut the tip of the caulk tube at a slight angle.
- Use a caulk gun to apply a steady bead along the gap.
- Smooth with a wet finger or tool.
- Wipe away excess and let dry.
Pros: Easy, cheap, water-resistant
Cons: Not good for wide gaps, can shrink over time
2. Backer Rod Plus Caulk (for Medium Gaps)
For gaps between 1/4 and 1/2 inch, use a backer rod (a foam rope) before caulking. The backer rod fills most of the space, so you use less caulk.
Steps:
- Push the backer rod into the gap using a blunt tool.
- Apply caulk over the top.
- Smooth as usual.
Pros: Fills wider gaps neatly, uses less caulk
Cons: Backer rod may be visible if not covered well
3. Trim Or Molding
Trim gives a clean, finished look for gaps up to 1 inch or more. You can use quarter-round, shoe molding, or custom-cut wood strips.
Steps:
- Measure the length and width of the gap.
- Buy trim that matches or complements your vanity or wall.
- Cut to fit with a miter saw or hand saw.
- Paint or stain to match, if needed.
- Attach with finishing nails or strong adhesive.
- Caulk the edges for a seamless look.
Pros: Professional appearance, hides big gaps
Cons: More work, may need painting or staining
4. Scribe Filler Strips
Scribe strips are custom-cut panels, often used for kitchen cabinets but great for vanities too. These are fitted to the wall’s shape and fill uneven gaps.
Steps:
- Place a strip of wood or MDF next to the vanity.
- Use a compass to trace the wall’s contour onto the strip.
- Cut along the traced line with a jigsaw.
- Sand for a snug fit.
- Paint or finish as needed.
- Attach with adhesive or screws.
Pros: Perfect for uneven walls, seamless result
Cons: Requires careful measuring and cutting
5. Expanding Foam (for Hidden Gaps)
If the gap is behind the vanity and not visible, expanding foam can fill large spaces. It blocks drafts and pests.
Steps:
- Spray foam carefully into the gap.
- Wait for it to expand and harden.
- Trim excess with a knife.
- Cover with trim if needed.
Pros: Fills big, hidden gaps; insulates
Cons: Messy if overused, not for visible areas
6. Vanity Top Overhang
If you are installing a new vanity top, order a countertop with extra overhang at the back or sides. This covers the gap.
Pros: Cleanest look, water cannot enter gap
Cons: Only works with new installations, may cost more
7. Custom Fit Vanity
For major remodels, consider a custom-built vanity that fits your space exactly. This eliminates gaps but is usually more expensive.
Pros: Perfect fit, best appearance
Cons: High cost, long lead time
Comparing Solutions
Here’s a quick look at how the main gap-filling options stack up:
| Method | Best For | Estimated Cost | Skill Needed | Durability |
|---|---|---|---|---|
| Caulk | Small gaps (<1/4″) | $5–$10 | Beginner | Good (3–5 years) |
| Backer Rod + Caulk | Medium gaps (1/4″–1/2″) | $10–$15 | Beginner | Good (3–5 years) |
| Trim/Molding | Wide gaps (>1/2″) | $10–$50 | Intermediate | Excellent |
| Scribe Strip | Uneven gaps | $20–$60 | Advanced | Excellent |
| Expanding Foam | Hidden gaps | $5–$15 | Beginner | Good (if covered) |
Step-by-step Guide: Filling The Gap With Caulk
Let’s walk through the most common solution, which is caulking a small gap.
- Clean the Area: Wipe away dust, grime, and old caulk with a damp cloth and mild cleaner.
- Dry Thoroughly: Make sure the area is completely dry for the best caulk adhesion.
- Apply Painter’s Tape: Place tape above and below the gap to keep lines neat.
- Prepare the Caulk: Cut the tip of the tube at an angle, slightly smaller than the gap size.
- Apply the Caulk: Squeeze a bead of caulk into the gap, moving smoothly from one end to the other.
- Smooth the Caulk: Use a wet finger or caulk tool to press the caulk into the gap and create a smooth surface.
- Remove Tape: Pull off the tape while the caulk is still wet.
- Let It Dry: Check the label for drying time, usually 24 hours for full cure.
For best results, match caulk color to your vanity or wall. Many brands offer white, clear, or colored options.
Step-by-step Guide: Adding Trim Or Molding
If your gap is wide, trim offers a long-lasting, attractive fix.
- Select Trim Style: Choose quarter-round, shoe molding, or flat trim to match your decor.
- Measure and Cut: Measure the length you need. Use a miter saw for angled corners.
- Paint or Stain: Finish the trim before installing for a neater job.
- Test Fit: Hold the trim in place to ensure a snug fit.
- Attach the Trim: Use finishing nails or a strong adhesive to secure it.
- Fill Nail Holes: Use wood filler for a smooth look.
- Caulk Edges: Run a bead of caulk along the top edge for a sealed finish.
If the wall is uneven, use a scribe to trace the shape onto the trim, then sand or cut to fit.
Real-world Example: Solving A Tricky Gap
A homeowner in Chicago installed a new vanity and found a half-inch gap on one side, tapering to almost nothing at the other. The wall was uneven, so caulk looked messy. Instead, the homeowner bought a 1-inch wide flat wood strip, traced the wall curve with a compass, cut the strip to fit, painted it, and attached it to the vanity.
The result looked seamless, and the homeowner reported no water or dust issues after two years.
Non-obvious insight: Many people try to force the vanity flush to the wall and end up damaging the drywall or vanity. It’s better to work with the gap than fight it.
When To Hire A Pro
Some situations are best handled by a professional:
- Large or uneven gaps
- Stone or tile countertops that need cutting or adjustments
- Custom vanity installations
- Plumbing or electrical conflicts behind the vanity
Professionals have the right tools and experience to create a seamless result. If you’re unsure, ask for quotes and see if the price fits your budget.
Mistakes To Avoid
- Overfilling with Caulk: Too much caulk can look messy and attract dirt.
- Using Interior Caulk in Bathrooms: Always use bathroom-grade (mildew resistant) caulk.
- Skipping Cleaning: Caulk won’t stick to dirt or soap residue.
- Ignoring Uneven Walls: Straight trim on a wavy wall will leave gaps behind the trim.
- Rushing Dry Times: Let caulk or paint cure fully before using the sink.
- Not Matching Colors: Mismatched caulk or trim draws attention to the repair.
- Forgetting Moisture Protection: Any exposed wood should be sealed to prevent rot.
For paintable caulk, let it dry completely before painting for the best finish.
Keeping The Gap Clean And Maintained
After you fill the gap, keep it looking good:
- Wipe caulked or trimmed areas with a damp cloth weekly.
- Inspect for cracks or peeling once every few months.
- Reseal caulk every 3–5 years or if you notice wear.
- Repair chipped paint or trim right away to prevent water damage.
How To Hide The Gap In Different Styles
Your method should match your bathroom’s style.
- Modern bathrooms: Use clear or white silicone caulk for a minimal look.
- Traditional bathrooms: Painted wood trim blends with classic details.
- Rustic or farmhouse: Try stained wood strips for a warm, natural finish.
- Luxury bathrooms: Custom stone or marble backsplashes can fill and hide gaps elegantly.

Materials Comparison: What Works Best?
Here’s a breakdown of common materials for filling vanity gaps:
| Material | Water Resistance | Paintable | Best For |
|---|---|---|---|
| Silicone Caulk | Excellent | No | Small, wet-area gaps |
| Acrylic Caulk | Good | Yes | Small, dry-area gaps |
| Wood Trim | Fair (if sealed) | Yes | Wide or uneven gaps |
| MDF Scribe Strip | Poor (unless sealed) | Yes | Custom-shaped gaps |
| Expanding Foam | Good (if covered) | No | Hidden, large gaps |
Non-obvious insight: Many people use regular wood trim in bathrooms without sealing it. Always use a waterproof sealer or paint on any wood in wet areas.
Should You Move The Vanity?
Some homeowners wonder if they should move the vanity to close the gap. This is usually not recommended unless you are remodeling the whole bathroom. Moving the vanity can:
- Damage plumbing or electrical connections
- Cause new gaps elsewhere
- Crack tiles or damage flooring
It’s almost always easier and safer to fill the gap instead of moving the vanity.
When The Gap Is Too Wide: Creative Solutions
If your gap is more than 1 inch, consider these options:
- Install a decorative panel: A painted or tiled panel can act as a feature and fill the space.
- Add a recessed shelf: If the gap is on one side, turn it into a small storage shelf.
- Extended countertop: Order a new vanity top with a custom overhang to cover the entire gap.
- Install a filler cabinet: In some cases, a small filler cabinet can be added for storage.
The Role Of Backsplash
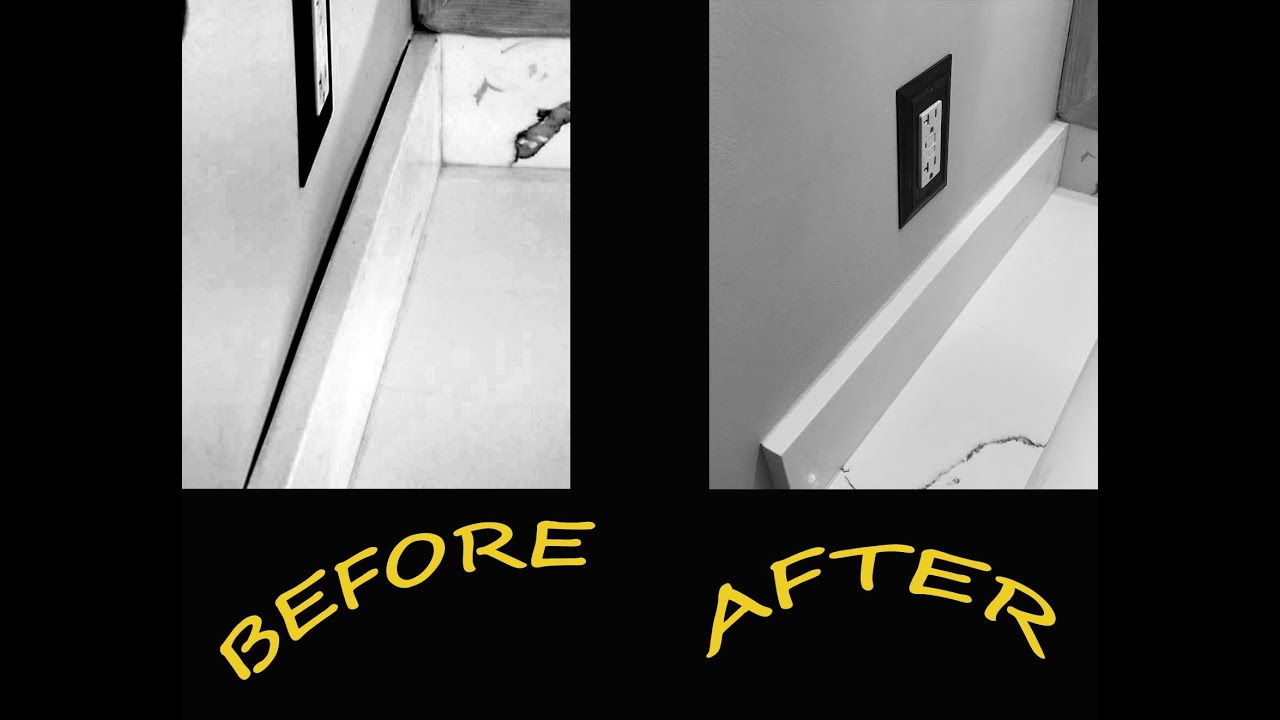
A backsplash can help cover the gap and protect the wall from water. If your vanity has a gap at the back, a backsplash that sits on the vanity top and extends up the wall can hide the space completely.
- Tile backsplashes: Waterproof and easy to clean.
- Stone or quartz: Matches high-end countertops for a luxury look.
- Acrylic or glass: Modern, easy to wipe down.
Credit: www.youtube.com
Eco-friendly And Healthy Options
Some materials release fumes (VOCs) as they dry, especially caulk or foam. For a healthier choice:
- Choose low-VOC caulk and adhesives.
- Use pre-finished trim to avoid painting indoors.
- Open windows or use a fan while working.
Cost Breakdown: What To Expect
Most DIY gap-filling projects cost between $10 and $60, depending on materials and tools. Hiring a professional can cost $100–$300 or more, especially for custom carpentry or stonework.
If you need to buy tools (like a caulk gun, saw, or paintbrush), add another $10–$40.
Tools And Supplies Checklist
You may need some or all of these tools, depending on your chosen method:
- Tape measure
- Caulk gun
- Utility knife
- Painter’s tape
- Level
- Miter saw or hand saw
- Wood filler
- Sandpaper
- Paint or stain
- Finishing nails or adhesive
- Backer rod
- Compass (for scribing)
- Damp cloth
Fast Fixes Vs. Long-term Solutions
It’s tempting to use a quick fix, but think about long-term results:
- Fast fixes: Caulk or foam can be applied in minutes, but may need touching up.
- Long-term solutions: Trim, scribe strips, or custom vanities take more time but last for years.
If you plan to stay in your home or want a high-quality look, invest the extra effort for a better result.

Credit: www.youtube.com
Frequently Asked Questions
Why Is There A Gap Behind My Bathroom Vanity?
Most walls are not perfectly flat or straight, and vanities are made in set sizes. Even a small curve or bump in the wall will leave a gap. Plumbing and baseboards can also push the vanity away from the wall.
What Is The Best Material For Filling A Small Gap?
For small gaps (up to 1/4 inch), silicone caulk is the best material. It’s flexible, waterproof, and comes in several colors to match your vanity or wall.
Can I Use Expanding Foam To Fill The Gap?
Yes, but only for hidden gaps behind the vanity. Expanding foam is messy and not attractive, but it’s great for blocking drafts or pests in big, unseen gaps. Cover with trim if the foam is visible.
How Do I Fill An Uneven Gap?
Use a scribe filler strip. Trace the wall’s uneven shape onto a piece of wood or MDF, cut it to fit, and attach it to the vanity. This gives a neat, professional look even on wavy walls.
How Do I Keep Water From Getting Behind The Vanity?
Use waterproof caulk along the top and sides of the vanity where it meets the wall. For extra protection, add a backsplash that covers the back gap. Always seal any wood trim or panels in wet areas.
If you’d like more detailed information on common bathroom installation issues, the Wikipedia page on vanities is a great resource.
Filling the gap between your vanity and the wall is an important finishing touch that protects your bathroom and makes cleaning easier. With the right method and materials, you can achieve a clean, polished look that lasts for years. Take your time, measure carefully, and choose the solution that fits your space and style best.
Your bathroom will look better, feel cleaner, and stay protected from water damage for the long run.
1 thought on “Fill Gap Between Vanity And Wall: Easy Fixes for a Seamless Look”