Filling large gaps in a subfloor can seem intimidating, especially if you are not an experienced DIYer. These gaps are more than just cosmetic—they can cause squeaks, uneven floors, moisture problems, and even structural issues. If you plan to install new flooring or want to make your home safer and more comfortable, understanding how to deal with subfloor gaps is important.
Many people overlook subfloor gaps, thinking the new flooring will hide the problem. In reality, the gaps affect the performance and longevity of your floors. Fixing them properly saves time and money in the long run. This guide will walk you through everything you need to know, from identifying the causes to choosing materials, applying them, and making sure your floor is ready for the next step.
Along the way, you’ll see real examples, practical tips, and mistakes to avoid.
Why Large Gaps Appear In Subfloor
Large gaps can show up for several reasons, and knowing the cause helps you pick the right repair method. Some of the most common causes include:
- Moisture changes – Wood expands with moisture and shrinks when it dries. Over time, this can create gaps.
- Improper installation – If the subfloor was not installed tightly or the boards are not the correct size, gaps can form.
- Settling or movement – Houses settle, and floors shift. This movement may pull boards apart.
- Damage or rot – Water leaks or pest damage can destroy parts of the subfloor, leaving empty spaces.
A good repair starts with understanding what caused the gap. If you fix the surface but ignore underlying moisture or movement, gaps will return.
Assessing The Gap Size And Location
Before you buy any materials or start repairs, check the gap carefully.
- Measure the width and length – Gaps under 1/8 inch are usually not a big problem, but anything over 1/4 inch needs attention.
- Check depth – If the gap goes all the way through the subfloor, you might need extra support.
- Look for signs of rot – Soft, crumbly wood must be replaced, not patched.
- Identify the area – Is the gap between boards, at the wall, or in the center of the room?
Here’s a simple comparison of gap sizes and the best repair approach:
| Gap Size | Common Cause | Best Repair Method |
|---|---|---|
| Up to 1/8 inch | Seasonal movement | Flexible filler (caulk or latex) |
| 1/8 to 1/4 inch | Minor settling or shrinkage | Wood filler or patch compound |
| 1/4 to 1 inch | Structural movement, poor installation | Wood shims, new boards, or expanding foam |
| Over 1 inch | Major damage or rot | Replace subfloor section |
Choosing The Right Materials For Filling Large Subfloor Gaps
The material you choose depends on the size of the gap, the location, and the type of subfloor (plywood, OSB, plank).
Common Materials
- Wood shims – Thin pieces of wood used to fill and support wide gaps.
- Expanding foam – Fills gaps quickly, good for irregular spaces, but not strong enough alone.
- Epoxy filler – Strong, durable, and sticks well. Good for deep, narrow gaps.
- Wood strips or boards – For very wide gaps, replacing missing wood is best.
- Floor patch compound – Cement-based, designed for leveling floors.
- Latex caulk – Flexible, easy for small gaps, but not for structural repairs.
Material Comparison
Here’s a quick look at how these materials perform:
| Material | Gap Size | Strength | Flexibility | Recommended Use |
|---|---|---|---|---|
| Wood shims | 1/4 to 1 inch | High | Low | Structural gaps |
| Expanding foam | 1/4 to 1 inch | Medium | High | Irregular gaps, insulation |
| Epoxy filler | 1/8 to 1/2 inch | High | Medium | Deep, narrow gaps |
| Wood strips | 1 inch+ | High | Low | Missing sections |
| Patch compound | Up to 1/2 inch | High | Low | Surface leveling |
| Latex caulk | Up to 1/8 inch | Low | High | Small, flexible gaps |
Pro tip: For gaps wider than 1 inch, always add solid support (wood or plywood) instead of just fillers.
Step-by-step: How To Fill Large Gaps In Subfloor
Repairing large gaps is more than just squeezing in filler. Here’s a proven process:
1. Clean The Gap
Remove debris, dust, or old filler. Use a vacuum and a stiff brush. If you see mold or rot, treat or replace the affected wood.
2. Cut Wood Shims Or Strips
For gaps bigger than 1/4 inch, measure the width and length. Cut wood shims or strips to fit snugly. Use plywood for larger sections.
- Make sure the wood is dry and matches the height of the surrounding subfloor.
- Test-fit the piece before securing.
3. Secure With Adhesive
Apply construction adhesive to the shim or strip. Press it into the gap. This stops future movement and squeaks.
- Use clamps or weights if needed until the glue dries.
- For extra strength, add screws through the shim into the joist.
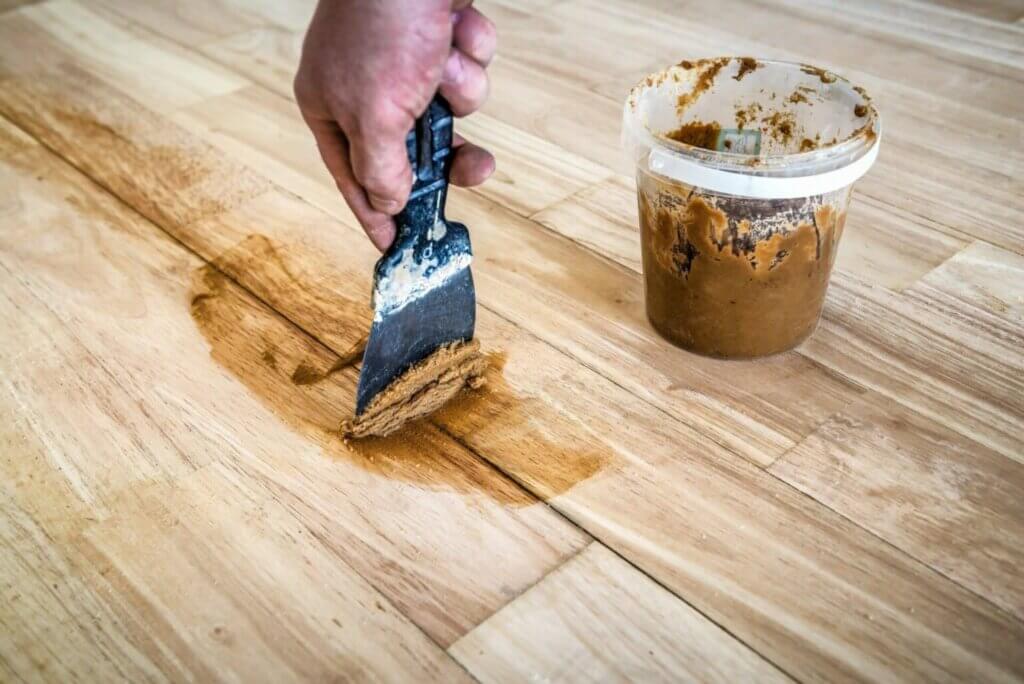
4. Fill Small Spaces
If there’s still a small gap after adding wood, use epoxy filler or floor patch compound. Mix and apply with a putty knife.
- Smooth the surface so it’s level with the rest of the floor.
- Allow to dry fully (usually 24 hours).
5. Sand And Inspect
Once dry, sand the area flat. Check for any uneven spots or movement. If you notice soft wood or loose filler, redo the repair.
6. Prime Before Flooring
For maximum durability, apply a floor primer over repaired spots. This reduces moisture and makes sure new flooring sticks well.
Non-obvious insight: Many beginners forget to check for joist movement below the gap. If the joist is loose or damaged, repair it before filling the gap. Otherwise, the subfloor will keep moving, and the gap will return.
Alternative Methods For Irregular Gaps
Not all gaps are straight or easy to fill. Here are some solutions:
- Expanding foam works well for odd-shaped gaps. Spray, let it expand, then cut off excess. Cover foam with floor patch compound for strength.
- For gaps at wall edges, use backer rod (a foam rope) before caulking. This saves filler and gives a firm base.
- If gaps run along the length of the board, consider removing and reinstalling that section. Sometimes, a fresh board is the easiest fix.
Mistakes To Avoid When Filling Subfloor Gaps
Even experienced builders make mistakes. Here are some to watch for:
- Skipping structural repairs – Filling a gap is pointless if the subfloor or joist is damaged underneath.
- Using weak fillers for wide gaps – Caulk or foam alone is not enough for structural support.
- Not leveling the repair – Uneven repairs cause bumps, squeaks, and can ruin your finished floor.
- Ignoring moisture issues – If the gap is caused by water, fix leaks and dry the area first.
- Rushing the drying process – Let adhesives and fillers cure fully before sanding or installing flooring.
Non-obvious insight: Many DIYers only fill visible gaps, ignoring hidden ones under baseboards or cabinets. These hidden gaps can cause problems later, so check the whole floor.

Credit: www.reddit.com
Preparing For New Flooring After Gap Repairs
Once you’ve filled all the gaps, it’s time to prepare for flooring installation.
- Check for flatness – Use a straightedge or level across the floor. If you see dips or bumps larger than 1/8 inch, fix them.
- Moisture testing – Before installing wood or laminate, check subfloor moisture. Too much moisture leads to warping.
- Vacuum thoroughly – Dust and debris can affect glue or underlayment.
A strong, gap-free subfloor means your flooring will last longer and perform better.
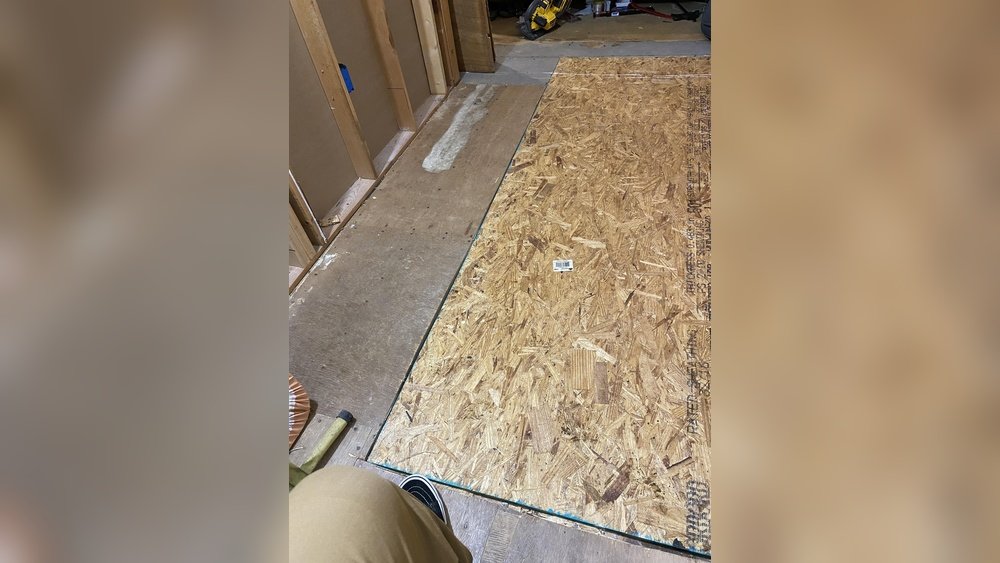
Real-world Example: Repairing Large Subfloor Gaps In An Old Home
Let’s look at a real example. A homeowner in Ohio had gaps up to 1 inch wide between old plank subfloor boards. The gaps caused cold drafts and squeaky floors.
- They cleaned the gaps, cut plywood strips to fit, and glued them with construction adhesive.
- For irregular gaps, they used expanding foam and covered it with floor patch compound.
- After sanding and priming, they installed new hardwood floors. The squeaks stopped, and the room felt warmer.
This method saved them over $1,000 compared to replacing the whole subfloor.

Credit: www.reddit.com
Cost And Time Estimates For Filling Large Subfloor Gaps
How much will you spend? Here’s a rough guide:
| Material | Cost (per 100 sq ft) | Time Required |
|---|---|---|
| Wood shims/strips | $30–$60 | 2–4 hours |
| Expanding foam | $15–$40 | 1–2 hours |
| Epoxy filler | $40–$80 | 2–3 hours |
| Patch compound | $35–$70 | 1–2 hours |
| Primer | $20–$50 | 30 mins |
These costs are much lower than replacing the whole subfloor, which can run $2,000 or more.
Frequently Asked Questions
What Is The Best Material For Filling Large Subfloor Gaps?
For gaps over 1/4 inch, wood shims or strips are best because they provide strength. For irregular gaps, expanding foam plus floor patch compound works well. Always use a strong adhesive for lasting results.
Can I Use Caulk To Fill Wide Subfloor Gaps?
Caulk is only suitable for gaps under 1/8 inch. Wide gaps need solid materials like wood or patch compound. Caulk is flexible but not strong enough for structural repairs.
Should I Replace The Subfloor If There Are Many Large Gaps?
If gaps are everywhere or caused by rot, it’s safer to replace the affected subfloor sections. Minor gaps can be filled, but damaged wood should be removed. This prevents future problems.
How Long Does It Take To Fill Large Gaps In A Subfloor?
Most repairs take 2–6 hours, depending on the size and number of gaps. Allow extra time for adhesives or fillers to dry before sanding and installing new flooring.
Do I Need To Hire A Professional For This Job?
You can fill subfloor gaps yourself if you follow the steps and use the right materials. If the subfloor is damaged or the gaps are very wide, hiring a professional is wise. They can check for structural issues and make sure repairs last.
Taking care of subfloor gaps is one of the smartest things you can do before installing new floors. With careful inspection, the right materials, and proper steps, you can fix large gaps and enjoy a quieter, stronger home. If you want more technical details or step-by-step videos, check resources like The Family Handyman for expert guides. Repairing subfloor gaps may take some effort, but the results are well worth it.
Credit: mrsander.co.uk