When you close your door and feel a draft or see daylight around the edges, it can be frustrating. You might have installed weather stripping to block air, water, and noise, but sometimes the door just won’t close tight against it. This problem is more than a minor annoyance—it can waste energy, let in pests, and reduce comfort in your home. Understanding why doors fail to seal properly and how to fix it can save money, improve safety, and make your living space more pleasant.
Many homeowners try to fix this issue by simply adding more weather stripping or pushing harder when closing the door. But these quick solutions rarely work long-term. If your door isn’t closing tight, you need to know what’s causing the gap.
Is it the door frame? The hinges? The weather stripping itself? By learning how doors, frames, and seals interact, you can solve the problem at its root and avoid repeating repairs.
Let’s dive into why doors fail to close tightly against weather stripping, how to identify the cause, and what steps you can take to fix it for good.
How Door And Weather Stripping Work Together
To solve door sealing problems, it’s important to understand the basic relationship between the door, the frame, and the weather stripping. Weather stripping is a material—usually rubber, foam, or metal—placed around the door’s edges to block air, water, and dust.
When the door closes, it should compress the weather stripping just enough to create a tight seal. This balance is crucial: too much compression and the door becomes hard to close; too little and there’s a gap. The weather stripping should last for years, but many factors can disrupt this balance.
Types Of Weather Stripping
Different kinds of weather stripping have different sealing properties. Here are the most common types:
- Foam Tape: Flexible and easy to install, but wears out faster.
- Rubber Bulb: Good for heavy doors; provides strong compression.
- Vinyl or Silicone: Durable and water-resistant; often used for exterior doors.
- Metal V-strip: Thin, springy metal; good for small gaps.
Each type needs to be matched with the door’s material, size, and expected use. For example, foam tape is ideal for interior doors, but may compress too much under a heavy exterior door. Rubber bulb is best for high-traffic doors because it withstands repeated closing.
The Role Of The Door Frame
The door frame provides structure and support. If it’s warped, out of square, or damaged, the door won’t press evenly against the weather stripping. Even a small misalignment can cause gaps, making the weather stripping ineffective.
Common Causes Of Door Not Closing Tight
A door that won’t seal properly against weather stripping usually has one or more underlying problems. Identifying the cause is the first step to fixing it.
1. Misaligned Door Or Frame
Over time, buildings settle. Doors and frames shift, creating misalignment. You might notice the door sticks at the top or bottom, or there’s a gap on one side. This prevents the door from pressing evenly against the weather stripping.
2. Worn Or Damaged Weather Stripping
Weather stripping wears out with age and use. Foam can tear, rubber can crack, and metal can bend. Even a small section of damaged stripping can create a leak.
3. Incorrect Weather Stripping Installation
If the weather stripping is installed unevenly, or the wrong type is used, it can stop the door from closing tight. Sometimes, strips are too thick, making the door hard to latch. Other times, strips are too thin to seal.
4. Loose Hinges
Door hinges loosen over time, especially with frequent use. A loose hinge lets the door sag or move, creating gaps and reducing compression against the weather stripping.
5. Swollen Or Warped Door
Wood doors can swell due to humidity or shrink during dry weather. Warping changes the shape, causing uneven contact with the frame and stripping.
6. Obstructions
Paint buildup, debris, or objects stuck in the frame can prevent the door from closing fully. Even a small piece of dirt can block proper sealing.
7. Incorrect Strike Plate Position
The strike plate is the metal piece where the latch enters the frame. If it’s misaligned, the door won’t latch securely, leaving gaps.
8. Settling Foundation
A home’s foundation settles naturally over years. This can twist door frames, changing the way the door meets the weather stripping.
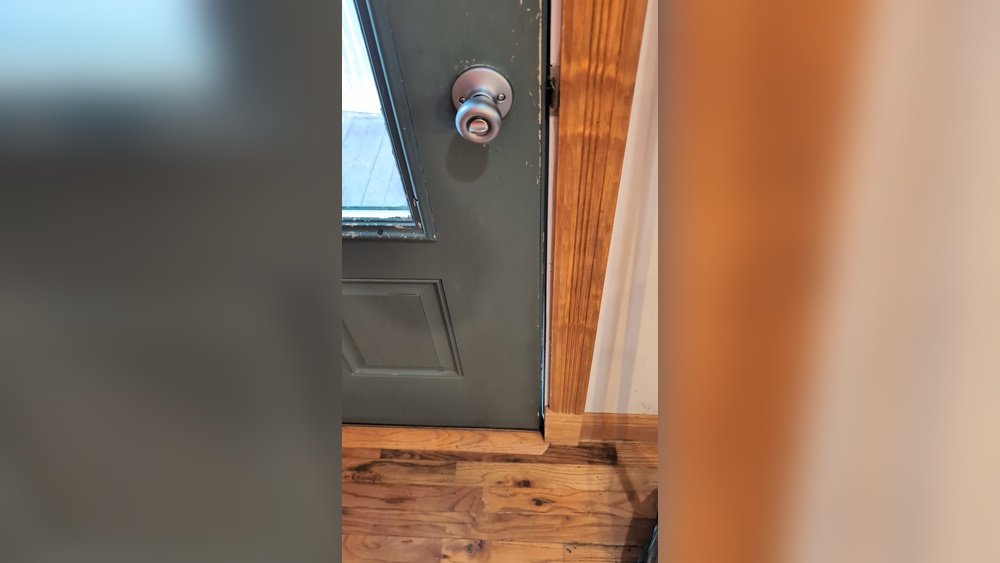
Credit: www.reddit.com
Signs Your Door Isn’t Closing Tight
Sometimes the problem is obvious; other times, it’s subtle. Here are signs to watch for:
- You feel drafts near the door, especially in cold or windy weather.
- The door is hard to close or latch.
- You see daylight or gaps around the edges.
- Water leaks in during rain.
- You hear outside noises more clearly.
- The door rattles when closed.
These signs may appear gradually. Ignoring them can lead to bigger problems, like increased energy bills or pest entry.
Diagnosing The Problem: Step-by-step
Before fixing your door, you need to pinpoint the exact cause. Here’s a simple diagnostic process:
- Inspect the Weather Stripping: Look for cracks, tears, or missing sections. Run your hand along the stripping to feel for uneven compression.
- Check Door Alignment: Close the door and observe the gap around all sides. Is it even? Are there spots where the door doesn’t touch the frame?
- Test Hinges: Wiggle the door up and down. If it moves, the hinges may be loose.
- Look for Obstructions: Examine the frame and door edge for paint, debris, or objects.
- Examine the Strike Plate: See if the latch enters smoothly. If not, the plate may need adjustment.
- Check for Swelling: If you have a wood door, see if it feels tight or sticks. Measure humidity levels if needed.
- Assess Foundation Issues: Look for cracks in walls or floors near the door. This can indicate settling.
By following these steps, you can usually identify the main cause without special tools.

Credit: www.reddit.com
Fixing Door Not Closing Tight: Practical Solutions
Once you know what’s causing the gap, you can choose the right solution. Here are practical fixes for each common issue.
Adjusting Door Alignment
If your door is misaligned:
- Tighten the Hinges: Use a screwdriver to secure all hinge screws. If screws are stripped, replace them with longer ones.
- Shim the Hinges: If one side sags, add a thin shim behind the hinge.
- Sand or Plane the Door: If the door is too tight in one area, gently sand or plane it for even fit.
Replacing Weather Stripping
If the weather stripping is worn or damaged:
- Remove Old Stripping: Peel off or unscrew the old material.
- Clean the Surface: Wipe away debris and adhesive.
- Install New Stripping: Choose the right type for your door. Cut to size, and attach according to manufacturer instructions.
Correcting Installation Mistakes
If weather stripping is too thick or thin:
- Measure the Gap: Use a ruler or feeler gauge.
- Choose Suitable Stripping: Match the thickness to the measured gap.
- Install Evenly: Make sure the strip is continuous and covers all edges.
Repairing Loose Hinges
If hinges are loose:
- Tighten Screws: Use a screwdriver.
- Replace Damaged Hinges: Buy matching hinges from a hardware store.
- Use Longer Screws: For extra support, use screws that reach the wall stud.
Fixing Swollen Or Warped Doors
If the door is swollen:
- Reduce Humidity: Use a dehumidifier or improve ventilation.
- Sand Down Swollen Areas: Remove small amounts of material for better fit.
- Seal and Paint: Protect wood from future moisture.
Clearing Obstructions
If paint or debris is blocking closure:
- Scrape Away Paint: Use a utility knife or sandpaper.
- Remove Debris: Clean with a brush or vacuum.
Adjusting The Strike Plate
If the latch won’t engage:
- Move the Strike Plate: Unscrew and reposition slightly.
- Enlarge the Hole: Use a file to widen the opening.
Foundation Repairs
If settling causes the problem:
- Consult a Professional: Major foundation issues need expert help.
- Use Temporary Shims: For minor shifts, shims can help until repairs are made.
Comparing Weather Stripping Types
Choosing the right weather stripping is key to a tight seal. Here’s a comparison to help you decide:
| Type | Best For | Durability | Ease of Installation | Cost (USD/ft) |
|---|---|---|---|---|
| Foam Tape | Interior doors | Low | Easy | $0.20–$0.40 |
| Rubber Bulb | Exterior doors | High | Moderate | $0.50–$0.80 |
| Vinyl/Silicone | Waterproof sealing | High | Moderate | $0.60–$1.00 |
| Metal V-strip | Small gaps | Medium | Moderate | $0.40–$0.70 |
Non-obvious insight: While foam tape is popular for easy fixes, it often loses shape after a few months, especially in high-traffic areas. Rubber bulb and vinyl/silicone are better for long-term solutions.
Measuring Door Gaps And Compression
Proper sealing depends on the right amount of compression. Too much, and the door is hard to close; too little, and there’s a gap. Here’s how to measure:
- Close the door and insert a piece of paper between the door and frame. If the paper slides out easily, the seal is weak. If it’s hard to pull, compression is strong.
- Use a feeler gauge for precise measurement. Ideal gap: 1/16″ to 1/8″.
- Check all edges—top, sides, and bottom. Uneven compression is a sign of misalignment.
Non-obvious insight: Compression can vary with temperature. Rubber and foam expand in heat and contract in cold. Check sealing during different seasons for best results.
How Weather Stripping Affects Energy Efficiency
A door that closes tight against weather stripping can save up to 15% on heating and cooling costs. According to the US Department of Energy, gaps around doors and windows account for nearly 30% of energy loss in homes.
| Condition | Estimated Energy Loss | Annual Cost (USD) |
|---|---|---|
| No weather stripping | 30% | $350–$500 |
| Poor seal | 15–20% | $175–$300 |
| Tight seal | 5–10% | $75–$150 |
Fixing your door not only improves comfort but also lowers bills. The investment in quality weather stripping pays off quickly.

Credit: diy.stackexchange.com
Preventing Door Sealing Problems
After fixing your door, prevention is key. Here are steps to keep your door closing tight:
- Regularly Inspect Weather Stripping: Look for signs of wear every six months.
- Clean Door Edges and Frame: Remove dust, debris, and paint buildup.
- Maintain Humidity Levels: Use humidifiers or dehumidifiers as needed, especially with wood doors.
- Check Hinges and Screws: Tighten hardware annually.
- Monitor Foundation and Walls: Watch for cracks or movement.
- Choose Quality Stripping: Invest in durable materials for long-lasting seals.
When To Call A Professional
Sometimes, door sealing issues are too complex for DIY fixes. Consider professional help if:
- The door frame is badly warped or damaged.
- Foundation settling is severe.
- You’re unable to align the door after multiple attempts.
- Water leaks persist despite new weather stripping.
Door specialists have tools to measure gaps, adjust frames, and recommend the best weather stripping for your situation.
Upgrading Door Hardware For Better Sealing
Modern door hardware can make a big difference. Here’s a comparison of common upgrades:
| Hardware | Benefit | Average Cost (USD) |
|---|---|---|
| Adjustable Strike Plate | Fine-tune door latch position | $10–$25 |
| Heavy-Duty Hinges | Prevent sagging in large doors | $15–$30 |
| Door Sweep | Seal bottom edge of door | $8–$20 |
| Threshold Plate | Block drafts under door | $12–$40 |
Upgrading hardware is a smart way to improve sealing, especially for older doors.
Weather Stripping Maintenance Tips
Proper maintenance extends the life of your weather stripping and keeps doors closing tight.
- Clean regularly: Use a damp cloth to wipe rubber, foam, and metal strips.
- Lubricate moving parts: Hinges and latches work better with a drop of oil.
- Replace damaged sections: Don’t wait for total failure—fix small tears early.
- Avoid harsh chemicals: Use mild soap and water to prevent material breakdown.
- Monitor for pests: Ants and other insects may chew on foam and rubber.
The Importance Of Proper Door Sealing
A tight seal is not just about comfort. It:
- Reduces energy costs by blocking drafts.
- Prevents water damage during storms.
- Keeps out pests like insects and rodents.
- Improves security by ensuring the door latches firmly.
- Boosts property value with better insulation.
Many homeowners underestimate the impact of a small gap. Over time, poor sealing can lead to mold, warped flooring, and expensive repairs.
Frequently Asked Questions
Why Does My Door Still Leak Air After Installing Weather Stripping?
Often, the problem is misalignment or uneven compression. Weather stripping only works if the door presses evenly against it. Check for loose hinges, warped frames, or installation mistakes. You may need to adjust the door or replace the stripping with a thicker type.
How Often Should I Replace Weather Stripping?
Most weather stripping lasts 2–5 years, depending on material and usage. Foam wears out faster; rubber and silicone last longer. Inspect every six months and replace when you notice cracks, tears, or loss of elasticity.
Can I Use Any Weather Stripping For My Door?
No. Choose weather stripping based on door type, material, and gap size. For heavy exterior doors, use rubber bulb or silicone. For interior doors, foam tape may be enough. Measure the gap before buying.
What Tools Do I Need To Fix A Door Not Closing Tight?
Basic tools include a screwdriver, utility knife, measuring tape, sandpaper, and a feeler gauge. For more advanced fixes, a plane or chisel may help. Adjustable strike plates and shims are useful for alignment.
Is Professional Help Necessary For Sealing Doors?
DIY solutions work for most minor problems. But if your door frame is warped, or foundation settling is severe, call a professional. They have specialized tools and experience to ensure a tight, lasting seal. For more information, visit Energy Saver.
A door that closes tight against weather stripping keeps your home comfortable, secure, and efficient. With the right diagnosis, materials, and maintenance, you can solve sealing problems and enjoy the benefits for years to come. Take a close look at your doors today—small fixes can make a big difference.