
If you have an Eero router and need to set up port forwarding, you expect your devices to connect smoothly. But sometimes, Eero port forwarding not working can become a real headache. Whether you want to host a game server, access your security camera remotely, or just make a device reachable from the internet, port forwarding is key. When it fails, frustration builds fast. This guide will help you understand why port forwarding on Eero doesn’t always work, how to fix it, and what mistakes most people make. If you’re new to networking or Eero, don’t worry—you’ll get practical advice and clear steps that make sense even if English isn’t your first language.
Understanding Port Forwarding On Eero
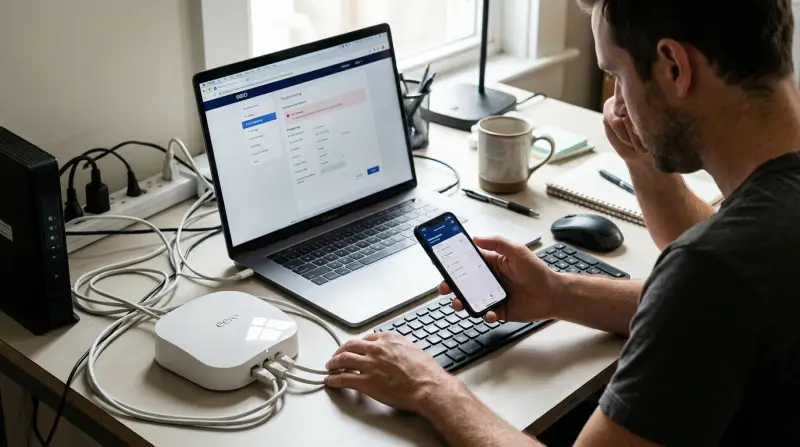
Port forwarding lets you open specific doors (ports) in your router to direct traffic from outside to a device inside your home network. For example, if you’re running a web server, you might forward port 80 so visitors can access your website.
Eero routers handle port forwarding differently from traditional routers. Here are some key points:
- All settings are managed through the Eero app—there’s no web interface.
- Eero supports both port forwarding and UPnP (Universal Plug and Play), but manual port forwarding is often needed for gaming, remote desktop, and other services.
Not all devices or apps work with Eero’s system. Some users find that their settings seem correct, but the ports remain closed.
Common Reasons Eero Port Forwarding Fails
Before you start troubleshooting, it helps to know the most frequent causes:
- Double NAT: If you have another router or modem/router combo before your Eero, your network may use two layers of NAT (Network Address Translation). This can block port forwarding.
- Incorrect IP Address: Port forwarding must point to the correct internal device IP, which can change if the device disconnects or the router restarts.
- Device Not Listening: If the device (like a server or camera) isn’t running the service or has a firewall, the port won’t appear open even if forwarded.
- ISP Restrictions: Some internet providers block certain ports for security reasons.
- Eero App Bugs: Sometimes, the app doesn’t save settings properly or displays wrong info.
- UPnP Conflicts: If UPnP is enabled, it can interfere with manual port forwarding.
Many beginners miss the importance of checking for Double NAT—this causes most port forwarding failures but isn’t obvious. Another common mistake is forgetting to assign a static IP to the device.

How To Check For Double Nat
Double NAT happens when two routers handle the same network. It’s like having two security guards at the door, each checking IDs. Port forwarding usually fails in this setup.
To check:
- Look at your modem. If it’s a modem/router combo (sometimes called gateway), it’s probably doing NAT.
- In the Eero app, check the WAN IP. If the IP starts with 192.168.x.x, 10.x.x.x, or 172.16.x.x–172.31.x.x, you’re behind another NAT.
If you see Double NAT, you must fix it for port forwarding to work.
Fixing Double Nat On Eero
You have two main options:
- Bridge Mode: Put your modem/router into bridge mode so Eero handles all routing. This removes the extra NAT layer.
- Eero Bridge Mode: You can set your Eero to bridge mode, but this disables advanced features like parental controls.
Here’s a quick comparison:
| Mode | Who Handles Routing? | Features Available | Best For |
|---|---|---|---|
| Modem Bridge Mode | Eero | All Eero features | Most users |
| Eero Bridge Mode | ISP Modem/Router | Basic Wi-Fi only | When you can’t change modem settings |
Most users should put their modem/router into bridge mode. If you can’t, use Eero bridge mode, but understand you lose many features.
Setting Up Port Forwarding On Eero
Once you fix Double NAT, follow these steps:
- Open the Eero app.
- Tap on Settings.
- Tap Advanced.
- Select Reservations & Port Forwarding.
- Choose Add a Reservation to set a static IP for your device.
- Tap Add a Port Forward and select the device.
- Enter the port range and protocol (TCP, UDP, or both).
- Save your settings.
It’s important to reserve a static IP first. If the device’s IP changes, port forwarding won’t work. Many beginners skip this step.
Checking If Port Forwarding Works
After setting up, test your port:
- Use online tools like canyouseeme.org to check if the port is open.
- Make sure the device is running the service (for example, a web server must be active).
- Try accessing the device from outside your network (not from inside).
If the port still shows closed, move to troubleshooting.
Troubleshooting Eero Port Forwarding Problems
1. Confirm Static Ip
If you didn’t assign a static IP, your device may get a new IP after reboot or disconnect. Always use a static IP for port forwarding.
2. Restart Eero And Devices
Simple but effective. Restart your Eero router and the device you’re forwarding to. This often fixes app bugs or stuck settings.
3. Check Device Firewall
The device may block incoming connections. Make sure any firewall or antivirus allows the traffic for the port you forwarded.
4. Disable Upnp Temporarily
UPnP can interfere with manual port forwarding. In the Eero app, disable UPnP and test again.
5. Verify Port And Protocol
Double-check you’re forwarding the correct port number and protocol. For example, some apps need UDP, not TCP.
6. Ask Isp About Blocked Ports
Some ISPs block ports like 25, 80, or 443. Contact your provider if you suspect this.
7. Update Eero Firmware
Outdated firmware can cause bugs. In the Eero app, check for updates and install them.
8. Try A Different Port
If the port is blocked or not working, try forwarding a different port and see if it works.
9. Remove Other Port Rules
Too many port forwarding rules can cause conflicts. Remove unused rules and test.
Advanced Tips And Non-obvious Insights
- If you use multiple Eero units, port forwarding only applies to the main router (the one connected to your modem).
- Check for IPv6 settings—Eero supports IPv6, but most port forwarding happens over IPv4.
- Many users don’t realize that some smart home devices (like certain cameras) use cloud-based connections and never need port forwarding.
If your device connects to the internet using a cloud service, port forwarding is often unnecessary and can even reduce security.
Comparing Eero Port Forwarding To Other Routers
Eero’s app-based approach is simple, but not as flexible as traditional routers. Here’s how Eero compares to popular alternatives:
| Router Brand | Port Forwarding Setup | Advanced Options | Web Interface? |
|---|---|---|---|
| Eero | App only | Basic | No |
| Netgear | Web interface | Advanced | Yes |
| TP-Link | Web/app | Advanced | Yes |
| Google Nest | App only | Basic | No |
Eero is easy for beginners but lacks detailed controls. If you need advanced port management, consider routers with web interfaces.
What If Eero Port Forwarding Still Doesn’t Work?
If you’ve tried all steps and port forwarding still fails, consider:
- Using DMZ (Demilitarized Zone) if your modem/router supports it, placing the Eero in DMZ to avoid NAT conflicts.
- Switching to another router for advanced needs.
- Contacting Eero support through their app or website. They can check logs and settings.
Many users don’t realize that ISP-level NAT (Carrier-grade NAT) can block port forwarding entirely. This is common with cellular or fiber ISPs. If you suspect this, ask your provider for a public IP.
Security Considerations
Opening ports makes your devices reachable from the internet. Always:
- Use strong passwords and keep software updated.
- Forward only the ports you need.
- Disable port forwarding when not in use.
Eero’s simple setup is good for security because fewer settings mean fewer mistakes, but always stay alert.
Real-world Example
Let’s say you want to access your security camera remotely. You forward port 8080 to the camera’s IP. But it doesn’t work. After checking, you find your modem/router is still doing NAT. Switching to bridge mode on your modem fixes the issue, and now your camera can be accessed from anywhere.
Useful External Resource
For more technical details on NAT and port forwarding, see this guide from Wikipedia.
Frequently Asked Questions
Why Is My Eero Port Forwarding Not Working Even When I Set It Up Correctly?
Usually, Double NAT is the cause. If you have two routers (modem/router plus Eero), port forwarding won’t work until you use bridge mode or DMZ.
How Do I Assign A Static Ip To My Device In The Eero App?
Go to Settings > Advanced > Reservations & Port Forwarding. Choose the device, tap Add a Reservation, and set the IP address. This prevents IP changes.
Can I Use Both Upnp And Manual Port Forwarding On Eero?
You can, but it’s risky. UPnP may override or conflict with manual rules. If you have issues, disable UPnP and try manual forwarding only.
Does Eero Support Port Forwarding For Ipv6?
Eero supports IPv6, but most port forwarding is for IPv4. Check if your device needs IPv6 forwarding most don’t.
What Ports Are Commonly Blocked By Isps?
ISPs often block ports like 25 (email), 80 (web), and 443 (secure web). If you can’t open these, ask your provider or use alternative ports.
Closing Thoughts
Port forwarding with Eero can be simple, but hidden issues like Double NAT and dynamic IPs cause problems for many users. Take time to check your setup, assign static IPs, and use bridge mode if possible. If you still face trouble, try each troubleshooting step carefully and don’t hesitate to contact Eero support or your ISP.
With patience and the right approach, you can make port forwarding on Eero work for your needs—whether you’re gaming, hosting a server, or connecting smart devices.