
The Schluter Shower System has become a popular choice for people who want a reliable, waterproof shower installation. Many tile professionals and DIYers trust this system for its ease of use, flexibility, and reputation for preventing leaks. Yet, like any building product, it’s not perfect.
Homeowners and installers sometimes face unexpected problems that can lead to frustration, costly repairs, or even water damage.
Understanding the most common issues with the Schluter Shower System is essential before you start your project or if you’re troubleshooting an existing one. This article will cover the real-world problems users encounter, why these problems happen, and how to avoid or fix them. You’ll also find data, practical advice, and professional insights that go beyond the basics.
What Is The Schluter Shower System?
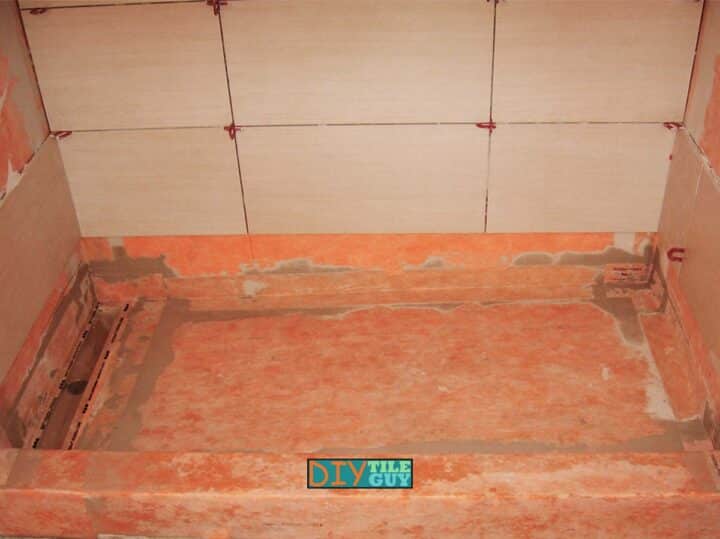
The Schluter Shower System is a group of products designed to create a waterproof, tiled shower. The main components include:
- Kerdi membrane: A waterproof sheet applied to walls and floors.
- Kerdi-Board: Lightweight, waterproof building panels.
- Kerdi-Shower tray: Pre-sloped foam base for easy installation.
- Kerdi-Drain: Integrated drain system.
- Accessories: Band, corners, and sealant for full waterproofing.
These products work together to provide a watertight barrier under your tile. The goal is to stop leaks, mold, and damage to the structure below your shower.
Why Problems Happen With The Schluter Shower System
No shower system is “set and forget.” Problems can happen due to:
- Incorrect installation (the most common reason)
- Using the wrong materials
- Skipping steps in the instructions
- Poor planning or design
- Changes in the building over time (movement, settling, etc.)
Even experienced installers can make mistakes, especially if they’re new to the Schluter system or rush the job.
Most Common Schluter Shower System Problems
Let’s look at the real issues users face, how to spot them, and what causes them.
Leaks At Seams Or Corners
Leaks are the most serious problem. They can cause water damage that’s hard to see until it’s too late. The most common places for leaks are:
- Where the Kerdi membrane overlaps (especially corners)
- Around the drain connection
- Where the wall meets the shower base
Why this happens:
If the membrane is not overlapped by at least 2 inches, or if thin-set mortar is not applied evenly, water can seep through. Sometimes, air bubbles or gaps form under the membrane, creating weak points.
Non-obvious insight: Even a pinhole in the membrane can let water through. Water always finds the weakest spot.
Poor Thin-set Mortar Bond
The thin-set mortar is what holds the membrane to the substrate and the tiles to the membrane. If the bond is weak, tiles may loosen, or the membrane may peel.
Why this happens:
- Using the wrong type of mortar (e.g., premixed or mastic)
- Not applying enough mortar or letting it skin over (dry on the surface before bonding)
- Substrate (wall or floor) is dusty, dirty, or uneven
Practical tip: Schluter recommends unmodified thin-set mortar for bonding the Kerdi membrane. Modified mortars can prevent proper drying and bonding.
Cracked Or Hollow Tiles
Tiles may sound hollow when tapped or crack after installation. This usually points to a problem beneath the surface.
Why this happens:
- Shower base is not solid (foam tray not fully supported)
- Too much movement in the floor or walls
- Inadequate mortar coverage under tiles
Example: If the shower tray flexes under foot traffic, tiles above may crack or pop off. This is more common with larger tiles.
Mold Growth
Mold is often found in showers with poor waterproofing or bad drainage. With Schluter, mold usually grows when water gets trapped behind the membrane.
Why this happens:
- Gaps in waterproofing let water seep in
- Slope to drain is not correct, so water pools
- Organic material (like drywall) used behind the system
Non-obvious insight: Even if you use waterproof materials, trapped moisture can still create a breeding ground for mold if the system can’t “breathe.”
Clogged Or Leaking Drain
The Kerdi-Drain is designed to integrate perfectly with the membrane. If it’s not installed correctly, leaks or blockages can follow.
Why this happens:
- O-ring or gasket not seated properly
- Membrane not sealed tightly to the drain flange
- Debris in the drain during installation
Tip: Always test the drain for leaks before tiling.
Membrane Blisters Or Bubbles
Sometimes, the Kerdi membrane develops blisters (raised areas) or bubbles that don’t stick to the substrate.
Why this happens:
- Not pressing the membrane firmly into the mortar
- Mortar drying too quickly (hot, dry conditions)
- Trying to “stretch” the membrane
Consequence: These blisters are weak points and can collect water, leading to leaks or tile cracks.
Failure At Transitions Or Niches
Shower niches (built-in shelves) and changes in plane (wall to floor, wall to ceiling) are tricky to waterproof.
Why this happens:
- Not using pre-formed corners or banding
- Cutting membrane pieces too short
- Overlapping in the wrong order
Pro tip: Use Schluter’s pre-formed inside and outside corners for best results.
Grout Discoloration Or Efflorescence
White, powdery stains or uneven color in grout lines may appear.
Why this happens:
- Water trapped behind tiles pushes minerals (efflorescence) to the surface
- Using too much water to clean grout
- Incomplete waterproofing allows moisture movement
Membrane Peeling Or Delamination
Sometimes, the Kerdi membrane peels off the substrate, especially near the base or corners.
Why this happens:
- Incompatible surfaces (e.g., glossy paint, old tiles)
- Not enough mortar or poor coverage
- Movement in building structure
Slope Problems: Ponding Water
A shower floor must slope toward the drain—usually 1/4 inch per foot. If not, water pools and may seep through grout lines.
Why this happens:
- Shower tray not installed level
- Thin-set applied too thick in some areas
- Cutting tray to fit (changing the slope)
Non-obvious insight: Even a slight error in slope can lead to standing water, which increases risk for leaks and mold.
How To Identify Problems Early
Early detection can prevent expensive repairs. Here’s how to spot issues before they get worse:
- Water test: Plug the drain and fill the shower base with water before tiling. Leave for 24 hours to check for leaks.
- Tap test: Gently tap tiles after installation. Hollow sounds may mean poor mortar coverage.
- Visual checks: Inspect seams, corners, and edges for gaps, bubbles, or exposed substrate.
- Moisture meter: Use a moisture meter on walls next to the shower. High readings may signal leaks.
Key Installation Steps To Prevent Problems
Most issues come from mistakes during installation. Following these steps can help prevent trouble:
- Prepare the substrate: Use cement backer board, not drywall. Clean and flatten the surface.
- Use the right mortar: Only unmodified thin-set mortar (unless Schluter says otherwise).
- Overlap seams: At least 2 inches overlap for all membrane joints.
- Seal corners and penetrations: Use pre-formed corners and Kerdi-Band.
- Check the slope: Ensure the tray or floor slopes at least 1/4 inch per foot.
- Test before tiling: Water test the system for leaks.
- Follow instructions: Read Schluter’s guides and watch their videos.
Comparison: Schluter Shower System Vs. Traditional Mortar Bed
To understand the pros and cons, see how Schluter compares with the old-school “mud bed” method.
| Feature | Schluter Shower System | Traditional Mortar Bed |
|---|---|---|
| Installation Time | Faster (1-2 days) | Slower (3-5 days) |
| Skill Level | Beginner to Intermediate | Advanced |
| Waterproofing | Integrated, sheet membrane | Requires liquid or sheet membrane |
| Cost | Higher material cost | Lower material cost, higher labor |
| Common Failures | Seams, corners, drain connection | Cracking, poor drainage |
Pros And Cons Of The Schluter Shower System
No system is perfect. Here’s a quick look at the main advantages and disadvantages.
| Pros | Cons |
|---|---|
| Quick installation | Higher material cost |
| Lightweight materials | Requires careful attention to detail |
| Excellent waterproofing (if installed right) | Not forgiving of mistakes |
| Compatible with large tiles | Some installers lack experience |
| Easy to cut and shape | Foam base can compress if not installed right |
Real-world Data: How Common Are Schluter System Failures?
It’s hard to find official failure rates, but online forums, tile contractor surveys, and home inspection reports offer some clues:
- A survey of professional tile setters (Tile Council of North America, 2022) found that over 70% of Schluter system failures traced back to improper installation—not the materials.
- On user forums, the most common complaints are leaks at seams and corners, followed by tile cracking due to movement or poor support.
- Home inspectors report that leaks in shower systems account for up to 30% of all bathroom water damage claims.
Non-obvious insight: Most Schluter system “failures” are not product defects—they’re installer errors or missed steps.
How To Fix Schluter Shower System Problems
If you discover a problem, act quickly. Here’s what you can do:
Fixing Leaks
- Find the leak source (often at seams or drain)
- Remove tiles around the area, cut back membrane to sound material
- Reapply membrane with correct overlap and mortar
- Use Kerdi-Band for extra protection
- Water test before retile
Repairing Hollow Or Loose Tiles
- Remove loose tiles carefully
- Scrape away old mortar and clean area
- Reapply new mortar and membrane if needed
- Reset tiles, grout after 24 hours
Addressing Mold Growth
- Remove affected tile and membrane
- Clean substrate with mold remover
- Dry thoroughly before repair
- Check for source of trapped moisture
Improving Drain Problems
- Remove drain cover, check for debris
- If gasket or membrane failed, remove tiles and reset drain assembly
- Seal membrane to drain flange with correct mortar and pressure
Resolving Slope Issues
- For minor ponding, remove tiles and add mortar to adjust slope
- For major slope errors, tray may need replacement
Expert Tips For A Trouble-free Schluter Shower
- Mock-up practice: Before starting, do a small test install on scrap material to learn the membrane bonding.
- Double-check overlaps: Use a ruler to confirm 2-inch overlaps at all seams.
- Use corner pieces: Pre-formed corners prevent most leaks at tricky spots.
- Don’t skip the flood test: Always test for leaks before setting tile.
- Document your work: Take photos as you build; helpful for warranty claims.
- Let mortar cure fully: Don’t rush to grout or use the shower early.
Extra advice: Some installers use a “peel test”—after placing the membrane, gently try to peel it up after 10 minutes. If it lifts easily, the bond is weak and should be redone.

When Should You Call A Professional?
While many DIYers have success with Schluter, you should call a pro if:
- You find leaks after tiling (removal can be complex)
- The shower is on a second floor or over wood framing (more at risk for damage)
- You’re unsure about substrate prep or membrane installation
Professional tile setters with Schluter certification are trained to avoid common mistakes and fix them if they occur.
Common Mistakes To Avoid
- Using premixed mortar: Only use unmodified thin-set with the Kerdi membrane.
- Skipping the flood test: Testing before tiling catches leaks early.
- Not pressing membrane firmly: Air pockets lead to leaks.
- Cutting corners with overlap: Less than 2 inches is not enough.
- Improper drain connection: Membrane must seal perfectly to the drain flange.
Understanding The Schluter Warranty
Schluter offers a limited warranty on its shower system, but it only applies if:
- All products are installed according to instructions
- The installer uses approved materials
- The failure is due to a product defect, not installation error
Important: Keep all receipts, photos, and documentation. If you need to file a claim, Schluter may send a representative to inspect the installation.
For full warranty terms, visit the official Schluter website or see their warranty page.
Alternatives To Schluter Shower System
If you’re not sure Schluter is right for your project, there are other waterproofing systems:
- LATICRETE Hydro Ban: Liquid-applied membrane
- Wedi Shower System: Similar foam and panel system
- USG Durock Shower System: Competes directly with Schluter
Each has its own installation quirks, so compare instructions and reviews before choosing.

Frequently Asked Questions
What Type Of Mortar Should I Use With The Schluter Shower System?
Use only unmodified thin-set mortar that meets ANSI A118.1 standards. Modified mortars can prevent the Kerdi membrane from bonding properly and may void the warranty.
How Long Should I Wait Before Using My Schluter Shower After Installation?
Wait at least 24 hours after grouting before using the shower. This allows the mortar and grout to cure fully and ensures the system is watertight.
Can I Install The Schluter System Over Drywall?
Schluter allows the Kerdi membrane to be installed over drywall in dry areas, but in wet areas like showers, cement backer board is recommended for extra safety and durability.
How Do I Prevent Leaks At The Drain?
Carefully follow the instructions for sealing the membrane to the drain flange. Press the membrane firmly into the mortar and double-check that the gasket or O-ring is seated correctly.
Is The Schluter Shower System Diy-friendly?
Yes, many homeowners install Schluter systems themselves. However, attention to detail is critical. If you’re not confident, consider hiring a certified installer to avoid costly mistakes.
Schluter shower systems offer a modern, reliable way to build a waterproof shower—if you install them right. Most problems come from missed steps or small errors during installation. By understanding the common pitfalls and following best practices, you can enjoy a leak-free, low-maintenance shower for years to come. If you ever have doubts, don’t hesitate to consult professional resources or reach out to the manufacturer for support. For more technical details, the official Schluter website provides comprehensive guides and updates.