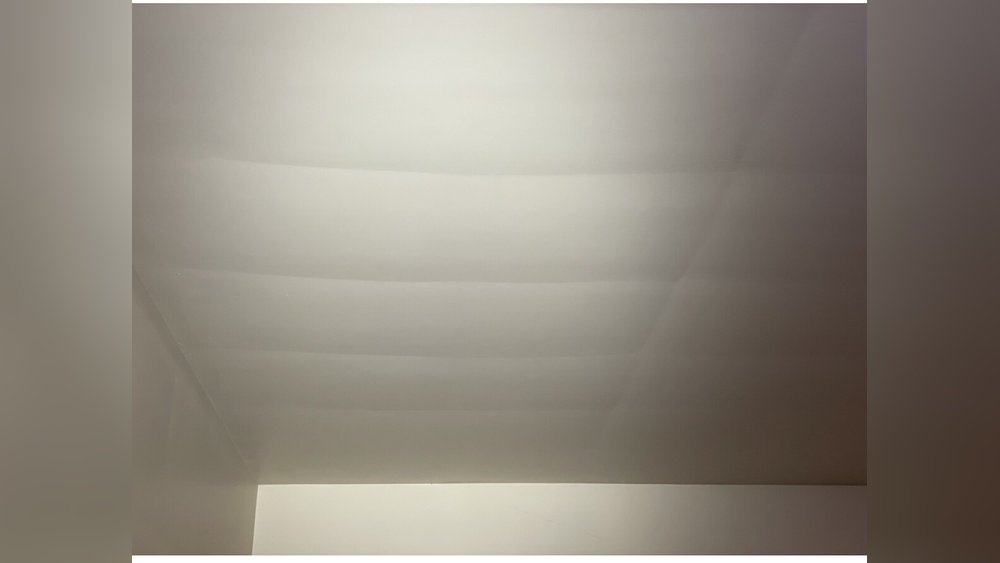
Drywall seams showing in the ceiling can make a room look unfinished, even if the rest of the space is perfectly designed. Many homeowners notice these lines after painting, or under certain lighting, and wonder what went wrong. If you see visible drywall seams in your ceiling, you’re not alone. This problem affects both new builds and older homes, and it’s more common than most people expect. Understanding why seams appear, how to fix them, and how to prevent them in the future can help you achieve a flawless ceiling.
Why Drywall Seams Show In Ceilings
Most ceilings are made with drywall panels joined together. The seams are the places where two panels meet. Ideally, these seams are hidden by tape and joint compound, then sanded smooth and painted. But sometimes, the seams become visible. This can happen for several reasons:
- Poor taping or mudding: If the tape or joint compound isn’t applied smoothly, seams will show.
- Insufficient sanding: Not sanding enough leaves ridges or bumps.
- Structural movement: Ceilings flex as houses settle, making seams stand out.
- Lighting issues: Strong or angled lights can highlight even tiny flaws.
- Paint problems: Uneven paint or primer can expose seams.
Even skilled professionals sometimes miss details, especially under certain lighting or with low-quality materials. One non-obvious insight: Humidity fluctuations can make seams appear months after installation, even if the work was perfect.
Common Causes Explained
To fix drywall seams, you need to know what causes them. Here are the most frequent reasons:
Incorrect Joint Taping
Drywall tape is meant to cover the seams, then be hidden by mud (joint compound). If the tape isn’t pressed in firmly, or if the mud underneath is uneven, it can bubble or wrinkle. Paper tape can be tricky for beginners; mesh tape is easier but sometimes needs more mud. Many DIYers don’t realize that air bubbles under the tape cause seams to show later.
Uneven Application Of Joint Compound
Joint compound must be applied in thin, even layers. Thick layers crack or shrink, making seams obvious. Sometimes, the compound dries too quickly, leaving visible lines.
Inadequate Sanding
Sanding is what makes the surface smooth. If it’s rushed, the seams stay raised. The texture can catch light, making seams more visible. A common mistake: using coarse sandpaper, which leaves scratches that show through paint.
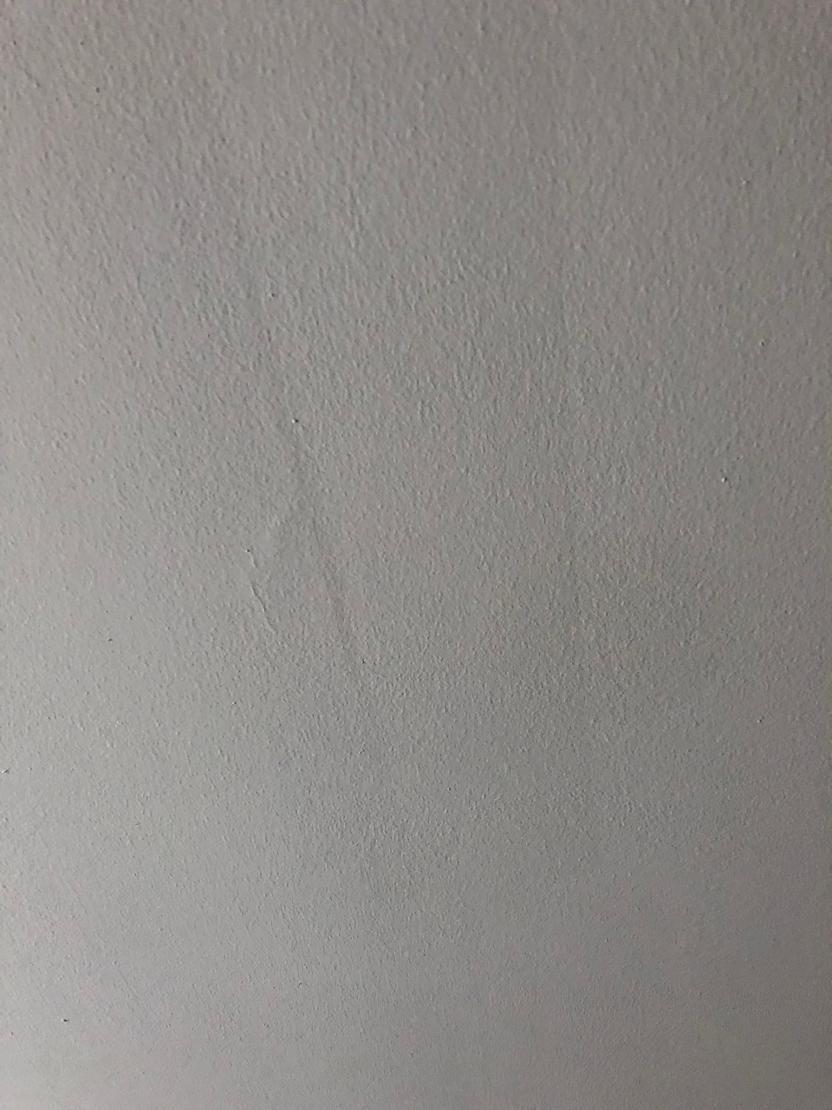
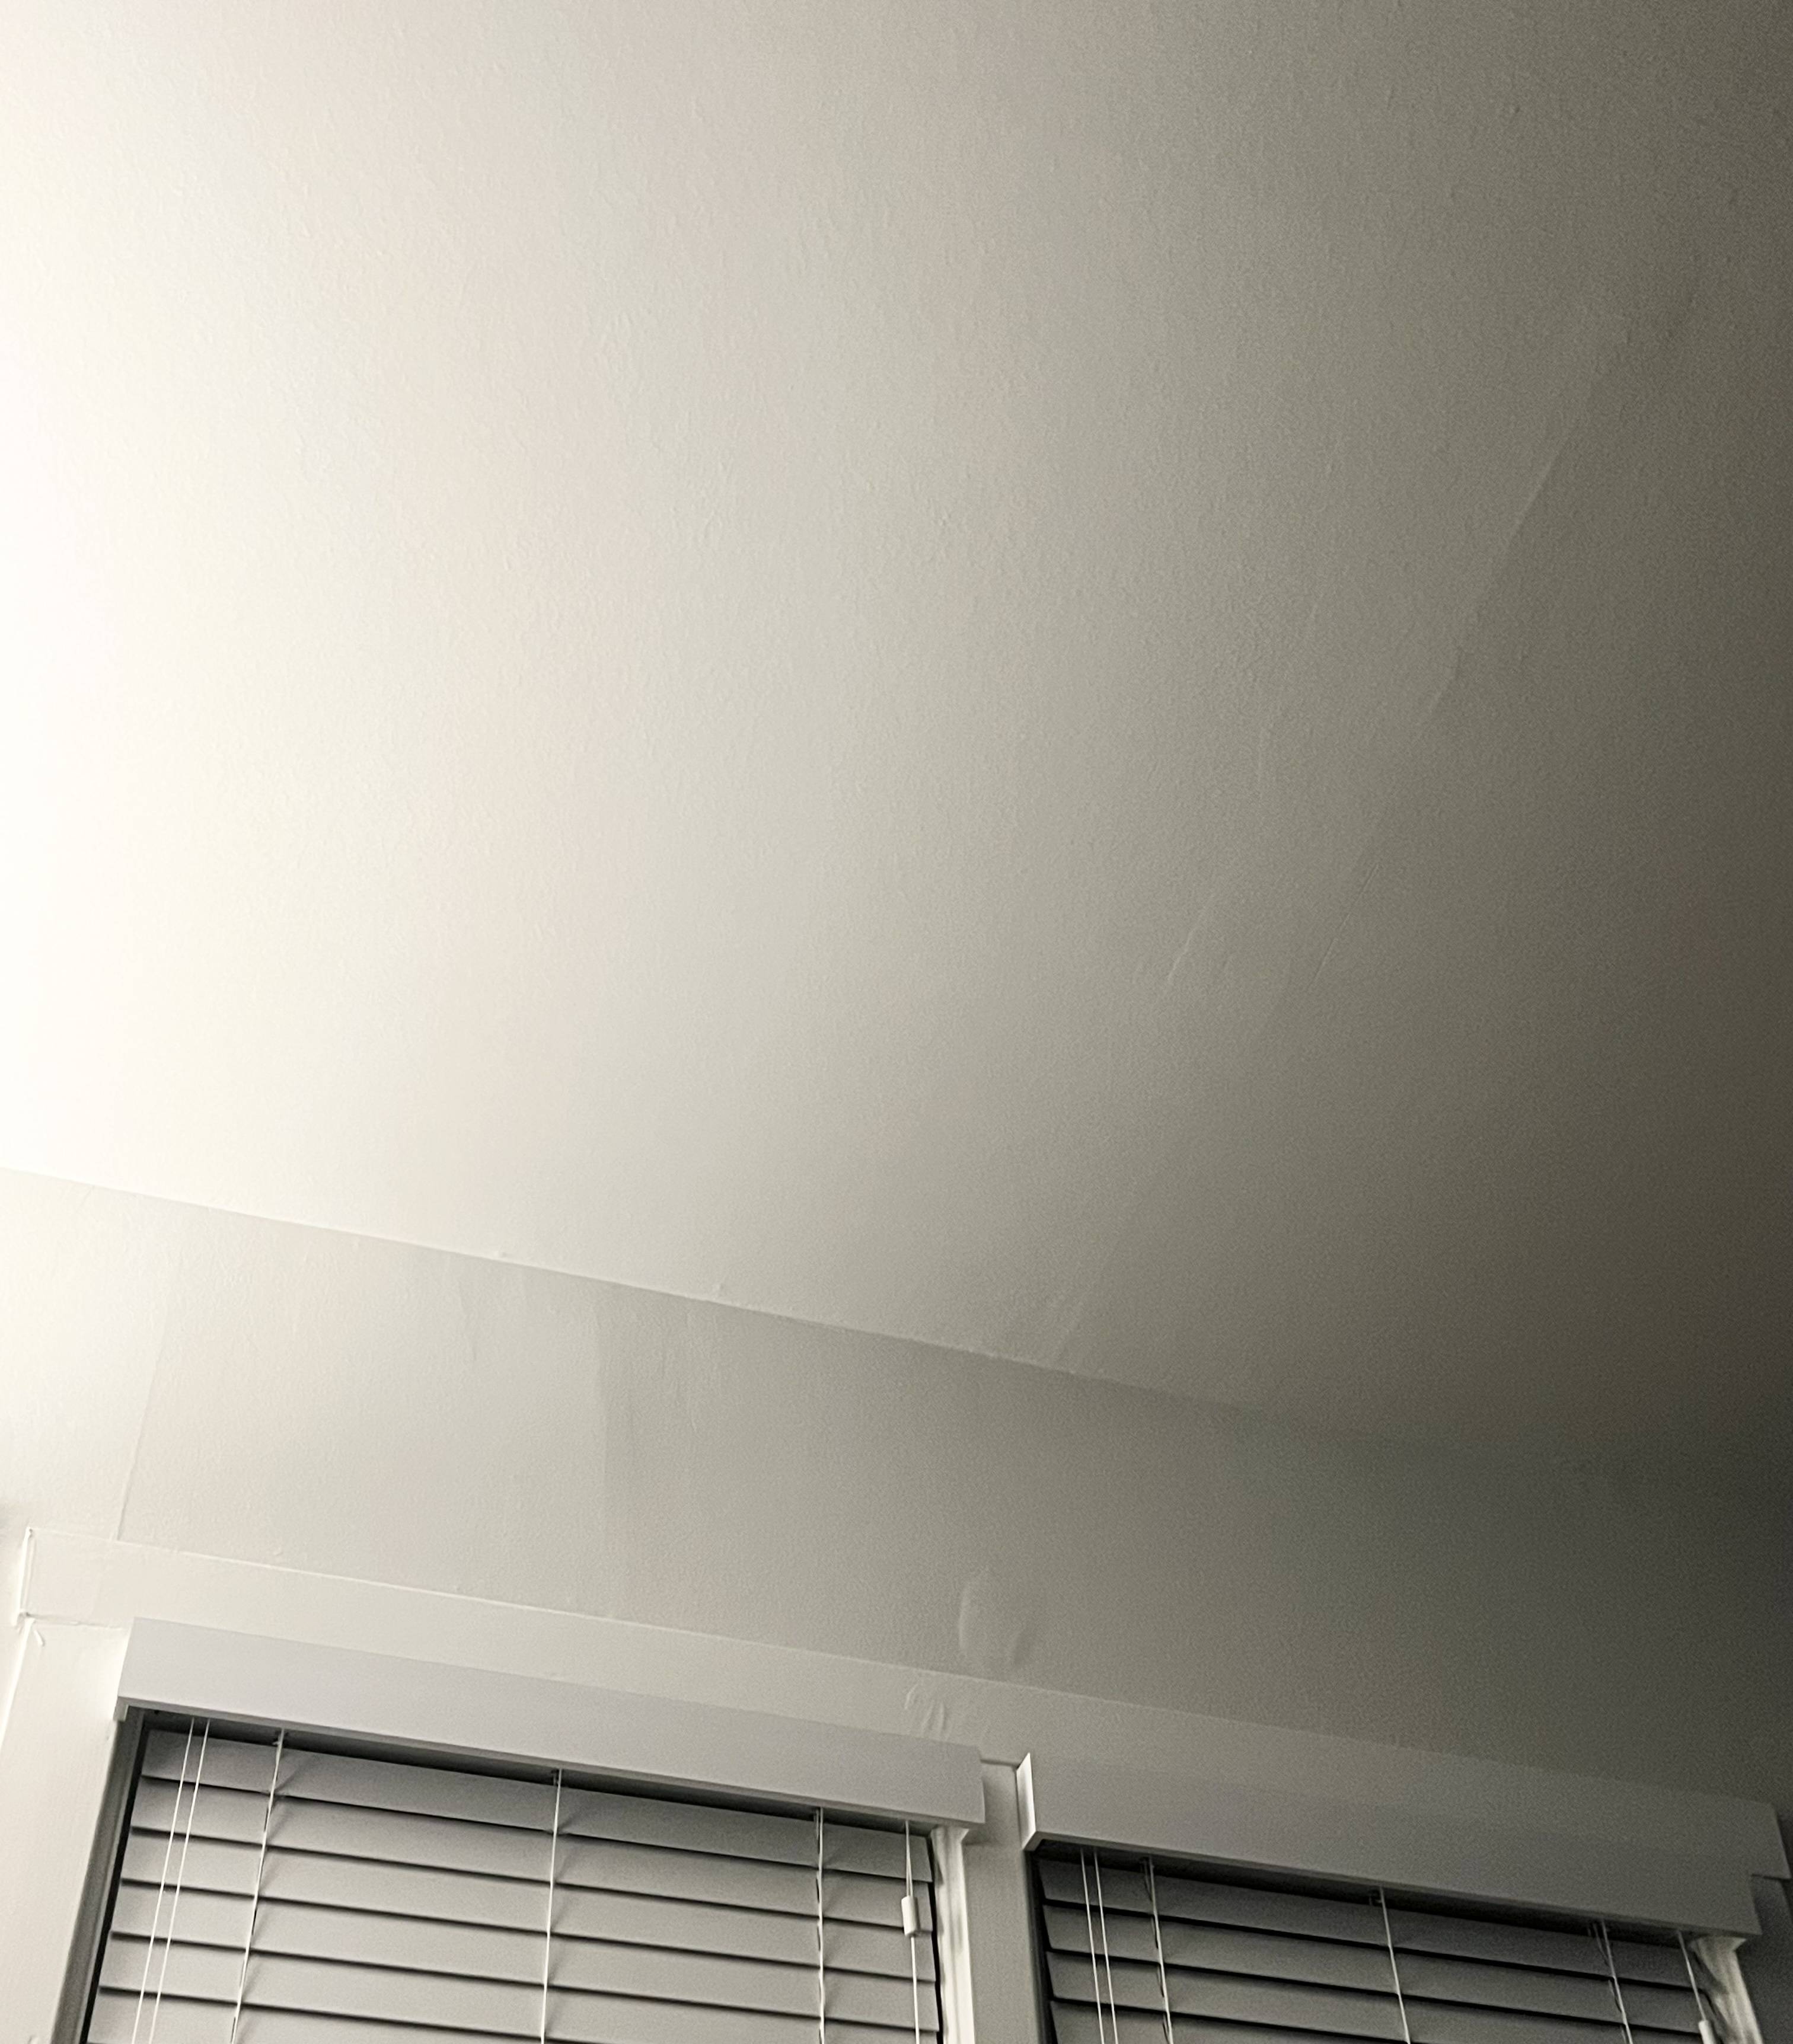
Movement In Ceiling Structure
Homes shift over time. If the ceiling joists move, even slightly, it can crack the seams. This is especially common in homes with truss roofs, where the structure is meant to flex. Seasonal changes in temperature and humidity can make the drywall expand and contract, revealing seams.
Lighting And Paint
Light from windows or fixtures can cast shadows on bumps or ridges. Glossy paint makes flaws stand out more than flat paint. Using a primer with poor coverage can also make seams visible.
Credit: www.doityourself.com
How To Fix Drywall Seams Showing In Ceiling
Fixing visible drywall seams can be simple or complex, depending on the cause. Here’s a step-by-step process for common cases:
1. Inspect The Seam
Look closely at the seam. Is it raised, cracked, or just visible under the paint? Sometimes, you can feel the seam with your hand.
2. Prepare The Area
Remove furniture and cover the floor with a drop cloth. Use a ladder for safe access.
3. Sand The Seam
Lightly sand the area with fine-grit sandpaper (220 grit works well). Remove any bumps or ridges. Be careful not to sand too hard—this can damage the tape.
4. Apply New Joint Compound
Use a wide drywall knife (at least 10 inches). Apply a thin layer of joint compound over the seam. Feather the edges so it blends with the rest of the ceiling.
5. Let It Dry
Joint compound needs to dry completely—usually 24 hours.
6. Sand Again
Once dry, sand lightly until smooth. Check with your hand for any bumps.
7. Prime And Paint
Apply a high-quality primer before painting. Use flat ceiling paint for best results.
8. Check Your Work
Look at the seam under different lighting to make sure it’s gone.
Materials And Tools You Need
Having the right tools makes the job easier and results better. Here’s what you need:
- Joint compound
- Drywall tape (paper or mesh)
- Wide drywall knife
- Fine-grit sandpaper
- Primer and paint
- Drop cloth
- Ladder
- Dust mask
Many beginners forget the dust mask, but sanding joint compound creates fine dust that can irritate your lungs.

Credit: forum.nachi.org
Comparison: Paper Tape Vs Mesh Tape
Choosing the right tape is important. Here’s how paper tape and mesh tape compare:
| Type | Strength | Ease of Use | Best For | Cost |
|---|---|---|---|---|
| Paper Tape | High | Medium | Standard seams | Low |
| Mesh Tape | Medium | Easy | Repairs | Medium |
Paper tape is stronger but needs more skill. Mesh tape is easier for beginners but can crack if not enough compound is used.
Tips For Preventing Drywall Seams From Showing
Prevention is always better than repair. Here are some tips:
- Use enough joint compound: Thin layers, but enough to cover the tape completely.
- Feather the edges: Blend the compound into the ceiling.
- Sand carefully: Use fine sandpaper and check with your hand.
- Prime thoroughly: Good primer hides minor flaws.
- Choose flat paint: Flat paint hides imperfections better than glossy paint.
- Control humidity: Keep indoor humidity stable, especially during installation and drying.
One non-obvious tip: Install drywall perpendicular to ceiling joists. This reduces the chance of seams cracking as the ceiling flexes.
Lighting Effects On Drywall Seams
Lighting can make seams look much worse. Direct or angled light highlights bumps and ridges. To minimize the effect:
- Use diffused lighting (like frosted bulbs)
- Avoid strong spotlights on the ceiling
- Paint ceilings with flat, light colors
Lighting designers often recommend indirect lighting for rooms with drywall ceilings. This makes the surface look smoother.
Professional Vs Diy Repair: What’s The Difference?
Should you fix drywall seams yourself or hire a pro? Here’s a quick comparison:
| Factor | DIY | Professional |
|---|---|---|
| Cost | Low | High |
| Skill Needed | Medium | Expert |
| Time | Several hours | 1-2 hours |
| Finish Quality | Varies | Consistent |
If you have patience and the right tools, DIY can work well. For larger or more visible seams, a professional can deliver a flawless finish.
Mistakes To Avoid When Repairing Drywall Seams
Many people make mistakes that can make seams worse. Here are some to avoid:
- Using too much mud: Thick layers take longer to dry and crack easily.
- Skipping sanding: Even minor bumps become visible after painting.
- Not priming: Paint alone doesn’t hide seams.
- Painting too soon: Wait until compound is fully dry.
- Ignoring humidity: Drywall needs stable humidity for proper curing.
A smart tip: After sanding, shine a flashlight at a low angle across the seam. This highlights any flaws before you paint.
Data: How Common Are Drywall Seams?
Drywall seams showing in ceilings are a frequent complaint. According to the National Association of Home Builders, about 35% of homeowners notice visible seams within five years of installation. Many report the issue after painting or changing lighting.
Older homes are more likely to have visible seams, especially if ceilings have settled or shifted. In new construction, seams often appear if contractors rush or use low-quality materials.
Credit: diy.stackexchange.com
Cost Of Repairing Ceiling Drywall Seams
How much does it cost to fix visible seams? Here’s a breakdown:
| Repair Type | DIY Cost | Professional Cost |
|---|---|---|
| Small Seam (under 3 ft) | $20-$40 | $80-$150 |
| Large Seam (over 6 ft) | $40-$60 | $150-$300 |
| Whole Ceiling | $100-$200 | $500-$1000 |
DIY repairs are much cheaper, but you need to buy tools and materials. Professionals charge for labor and guarantee the finish.
When To Call A Professional
If you see cracks wider than 1/8 inch, or if seams are showing throughout the entire ceiling, it’s best to call a drywall contractor. Professionals can fix structural issues, re-tape seams, and repaint for a uniform look. For ceilings higher than 10 feet, safety is a concern—pros have the right equipment.
Additional Practical Tips
- Always work in good light. Natural daylight shows flaws better than artificial light.
- Clean dust before painting. Dust can ruin the finish.
- Use a damp sponge after sanding to smooth minor scratches.
- If you see seams reappearing, check for leaks or structural movement.
Many homeowners don’t realize that water leaks above the ceiling can make seams appear. Fix leaks first, then repair the drywall.
Expert Advice For Long-lasting Results
For a ceiling that stays flawless:
- Use the best materials you can afford.
- Apply joint compound in three thin layers, sanding between each.
- Let each layer dry fully.
- Prime twice if needed.
- Inspect your work carefully in daylight.
Experienced contractors recommend buying extra joint compound—running out mid-job is a common mistake.
Frequently Asked Questions
Why Do Drywall Seams Become Visible After Painting?
Drywall seams can show up after painting because paint highlights any uneven surface. If the joint compound wasn’t applied smoothly or sanded well, painting reveals these flaws. Glossy paint makes seams more visible than flat paint.
Can I Fix Visible Seams Without Re-taping?
Yes, you can often fix minor visible seams by sanding and applying a thin layer of joint compound. If the tape is loose or bubbling, you may need to remove it and re-tape the seam for a permanent fix.
What Type Of Paint Hides Seams Best?
Flat or matte paint hides seams better than glossy or satin finishes. Flat paint does not reflect light, which helps mask minor imperfections. Always use ceiling-specific paint for best results.
How Long Does Drywall Repair Take?
For a small seam, the repair process (including drying time) takes about 2-3 days. The first day is for sanding and applying compound, then you need to let it dry overnight. The second day is for sanding and painting.
Are Visible Seams A Sign Of Structural Damage?
Usually, visible seams are not a sign of serious structural damage. However, if you see cracks, water stains, or if the seams keep coming back after repairs, it’s best to check for structural movement or leaks. A professional can inspect and advise.
If you want more detailed drywall repair techniques, visit This Old House for expert guidance.
Fixing drywall seams showing in your ceiling takes patience and attention to detail. With the right tools and careful work, you can achieve a smooth, flawless ceiling that stays beautiful for years. Remember, prevention—good technique, materials, and lighting—makes all the difference.