
Many people depend on dryers to save time and keep clothes fresh. But when the dryer’s moisture sensor stops working correctly, it can be frustrating. Wet clothes come out dry, or dry clothes come out damp. Sometimes, the dryer runs too long and wastes energy. Understanding these problems helps you fix them faster and avoid bigger issues.
Dryer moisture sensors are designed to detect how wet your laundry is. This sensor tells the machine when to stop drying. If it fails, your laundry routine is affected. You may waste money, time, or even damage your clothes. Let’s explore why these sensors fail, how to spot problems, and what you can do to keep your dryer working well.
How Dryer Moisture Sensors Work
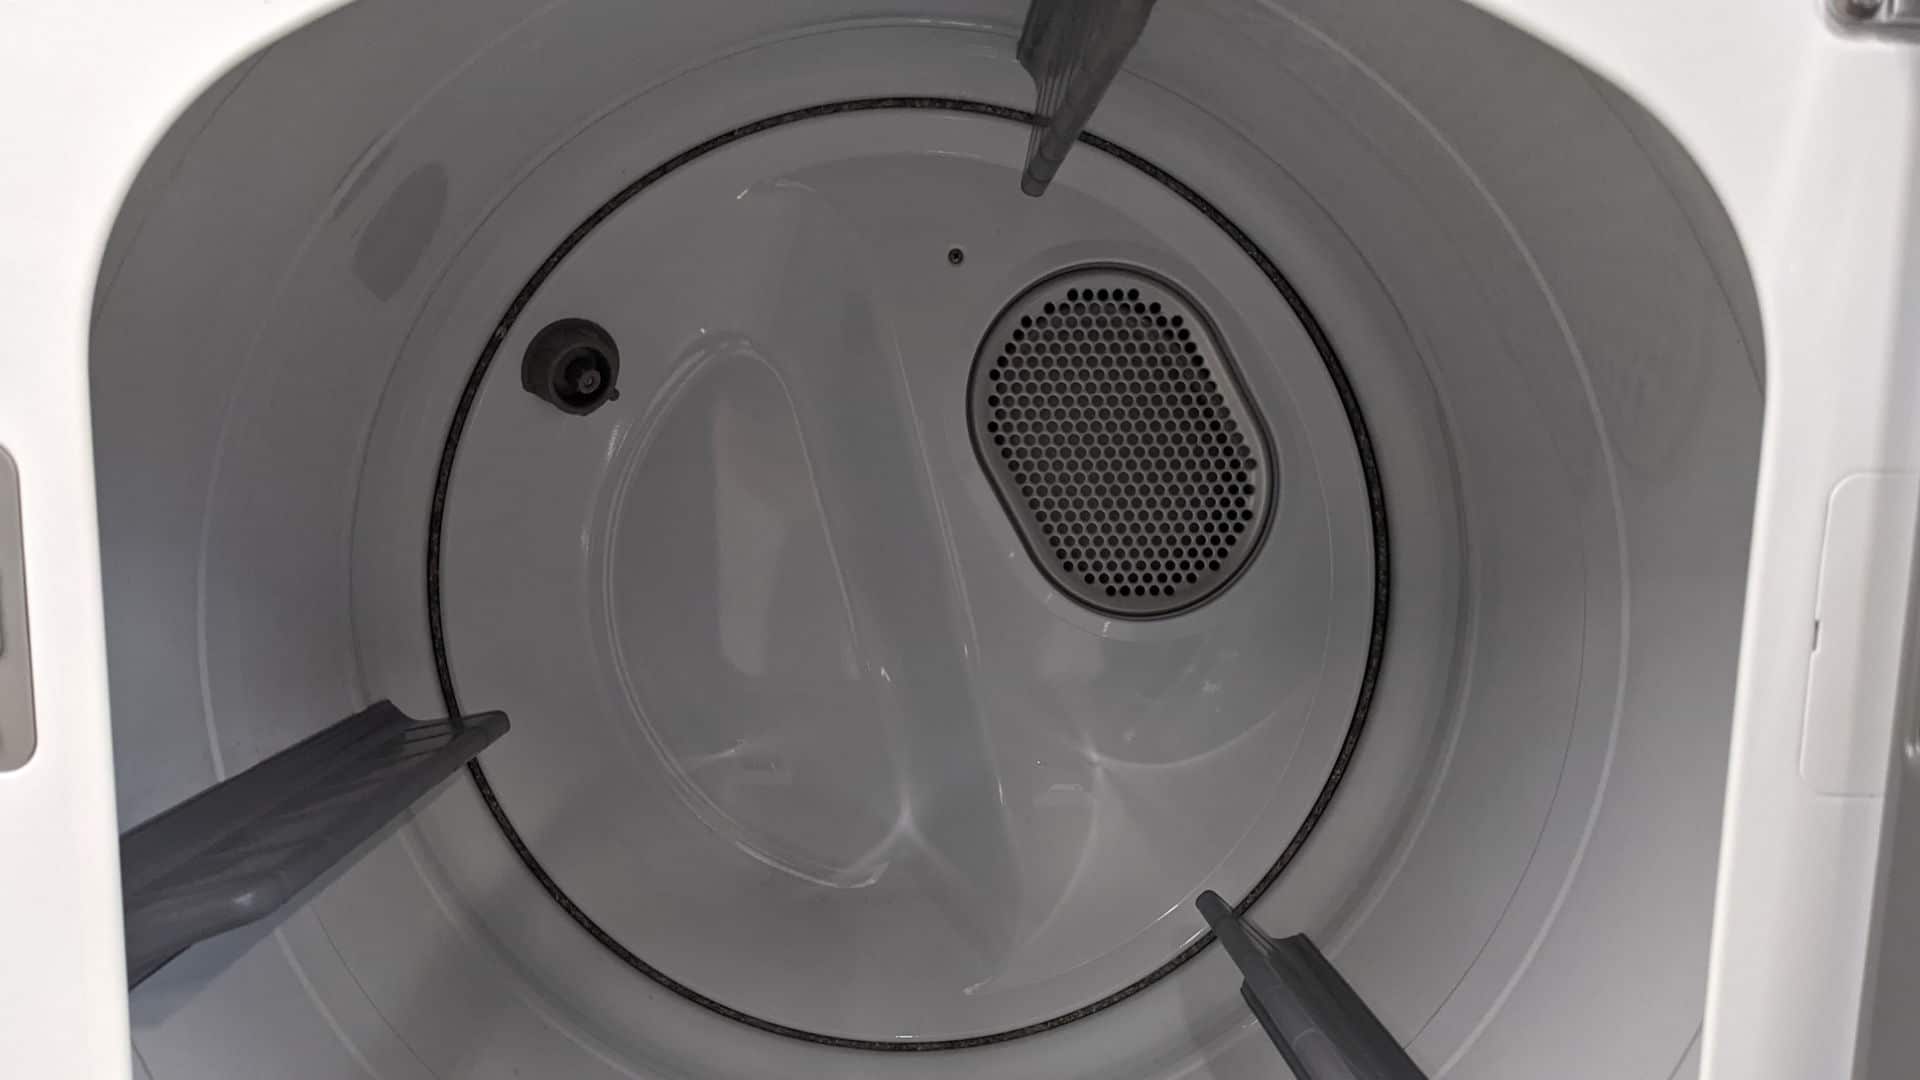
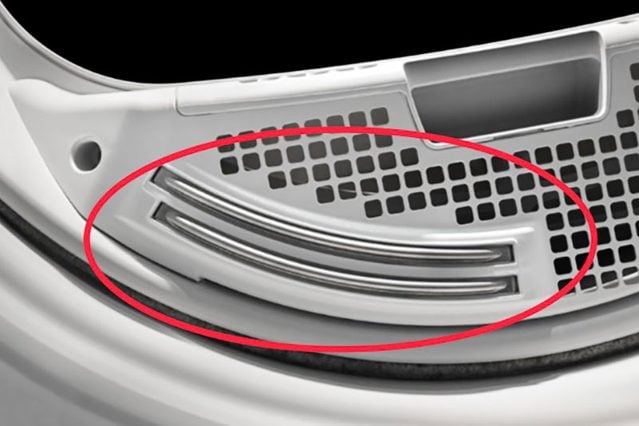
The moisture sensor is a small part inside the drum of your dryer. Usually, it looks like two metal strips. As your clothes tumble, they touch these strips. If the clothes are wet, the sensor reads higher moisture. When clothes are dry, the sensor reads less moisture. The dryer then decides when to stop.
Most modern dryers use electrical resistance to measure moisture. Wet fabric conducts electricity better than dry fabric. The sensor sends a weak electric current through the strips, and the dryer measures the resistance. If resistance is low, there’s moisture. If resistance is high, clothes are dry.
Some dryers use humidity sensors instead, which measure the air’s moisture inside the drum. But metal strip sensors are more common in home dryers.
Common Dryer Moisture Sensor Problems
1. Dryer Stops Too Early
One of the most frequent complaints is the dryer ending the cycle before clothes are dry. You find damp towels or jeans, and must run another cycle.
Causes:
- Sensor strips are dirty: Fabric softener and dryer sheet residue can coat the strips, blocking moisture detection.
- Sensor wires are loose: If the wiring is damaged, signals won’t reach the control board.
- Defective control board: The computer inside the dryer sometimes misreads sensor data.
2. Dryer Runs Too Long
Sometimes, the dryer keeps running even when clothes are dry. This wastes energy and can shrink or damage fabrics.
Causes:
- Sensor strips are broken: Physical damage means the sensor never detects dryness.
- Sensor circuit failure: If internal circuits fail, the dryer ignores sensor readings.
- Incorrect sensor placement: Some models have sensors in poor locations, so not all clothes touch the strips.
3. Dryer Doesn’t Start Or Shows Error Codes
A broken sensor can prevent the dryer from starting or cause error messages. Some dryers have a safety feature that stops operation if sensor circuits are open.
Causes:
- Sensor short circuit: Damaged wires can create faults.
- Control board issues: The dryer may misinterpret signals and block operation.
4. Dryer Leaves Clothes Unevenly Dry
Sometimes, some clothes are dry while others are still damp. This usually happens with mixed loads (heavy and light fabrics together).
Causes:
- Sensor only touches some items: If lighter items dry faster and stop touching the sensor, the dryer may shut off.
- Sensor calibration issues: The machine may not be set up to handle mixed loads.
Signs Your Moisture Sensor Is Failing
Knowing the symptoms helps you act quickly. Watch for these signs:
- Dryer shuts off early, leaving wet clothes
- Dryer runs much longer than needed
- Clothes feel burnt or damaged
- Error codes or flashing lights
- Dryer doesn’t start on auto-dry setting
- Dryer works fine on timed cycles but not auto-dry
Why Moisture Sensor Problems Matter
Dryer moisture sensor issues aren’t just annoying. They can lead to:
- Higher energy bills: A dryer running too long wastes electricity.
- Damage to clothes: Overdrying can shrink or weaken fabric.
- Safety risks: Sensors prevent overheating, which can cause fires.
- Shorter dryer lifespan: Overworking the dryer can wear out parts.
According to the U.S. Department of Energy, clothes dryers use about 6% of household electricity. A faulty sensor can increase this by up to 30%.
Credit: oceanapplianceservice.com
How To Test A Dryer Moisture Sensor
Testing the sensor helps you confirm the problem. Here’s a simple way:
- Unplug the dryer before testing.
- Locate the sensor strips inside the drum.
- Clean the strips with rubbing alcohol and a soft cloth.
- Set the dryer to auto-dry and run with a few wet towels.
- Observe if the dryer shuts off at the right time.
For a deeper test, use a multimeter:
- Remove the sensor strips (usually a few screws).
- Touch the multimeter probes to each strip.
- If resistance is very high or infinite, the sensor is faulty.
Many people skip cleaning the strips, thinking the issue is always electrical. But residue is a common cause and easy to fix.
How To Fix Dryer Moisture Sensor Problems
Cleaning The Sensor Strips
Most sensor problems come from buildup. Dryer sheets and fabric softeners leave a waxy coating.
- Use rubbing alcohol or vinegar to clean the strips.
- Avoid harsh chemicals or abrasive pads, which may scratch the metal.
Checking Sensor Connections
Loose or damaged wires can cause erratic readings.
- Inspect the back panel for disconnected wires.
- Look for burned spots or corrosion.
Replacing The Sensor
If cleaning doesn’t help, the sensor may need replacement.
- Order the correct part for your model.
- Remove the old sensor (usually with screws).
- Install the new sensor and reconnect wires.
Resetting The Control Board
Some dryers need a reset after sensor replacement.
- Unplug the dryer for five minutes.
- Plug it back in and run a test cycle.
Professional Repair
If you’re not comfortable with repairs, call a technician. They can test and replace parts safely.
Preventing Moisture Sensor Problems
Taking care of your dryer helps avoid sensor failures.
- Clean the sensor strips monthly.
- Avoid using too many dryer sheets or fabric softeners.
- Wash the lint filter regularly.
- Don’t overload the dryer.
- Use proper drying settings for mixed loads.
Many users don’t realize that using liquid fabric softener in the washer also leaves residue in the dryer. This can lead to sensor problems over time.
Comparing Dryer Models: Sensor Reliability
Different dryer brands use different sensor designs. Here’s a comparison of sensor reliability in popular models:
| Brand | Sensor Type | Average Lifespan (years) | Common Issues |
|---|---|---|---|
| LG | Metal Strip | 7 | Residue buildup |
| Samsung | Metal Strip | 8 | Loose connections |
| Whirlpool | Humidity Sensor | 6 | Calibration errors |
| Maytag | Metal Strip | 7 | Physical damage |
Troubleshooting Moisture Sensor Problems: Quick Guide
If your dryer isn’t working as expected, use this troubleshooting guide:
- Clean the sensor strips
- Check sensor wiring
- Test sensor with multimeter
- Reset the control board
- Replace the sensor if needed
Here is a simple comparison of troubleshooting steps and their effectiveness:
| Step | Success Rate (%) | Time Required |
|---|---|---|
| Cleaning strips | 60 | 10 min |
| Checking wiring | 20 | 15 min |
| Replacing sensor | 15 | 30 min |
| Resetting board | 5 | 5 min |
Practical Tips For Better Dryer Performance
- Don’t overload the dryer: Large loads may prevent clothes from touching the sensor.
- Separate heavy and light fabrics: Drying similar fabrics together improves sensor accuracy.
- Check lint filter often: A blocked filter reduces airflow and affects drying.
- Avoid excessive dryer sheets: Use only one per load, or switch to dryer balls.
- Clean sensor strips regularly: Even if the dryer works well, regular cleaning prevents issues.
A non-obvious tip: If your dryer often leaves towels damp but dries shirts well, try drying towels separately. Heavy fabrics dry slower and can block airflow to the sensor.

Credit: www.youtube.com
When To Replace Your Dryer
Sometimes, sensor problems are a sign of deeper issues. If your dryer is over 10 years old, or repairs cost more than half the price of a new one, consider replacement. Newer models have improved sensor technology and energy efficiency.
According to the Consumer Reports, most dryers last 8-10 years. If your dryer is older and has frequent sensor problems, upgrading may save money in the long run.
Professional Vs Diy Repair: What’s Better?
You can fix some sensor problems yourself, but others need expert help.
- DIY: Cleaning strips, checking wires, resetting board.
- Professional: Replacing sensors, fixing control boards, diagnosing complex faults.
Here’s a quick comparison:
| Repair Type | Cost ($) | Success Rate (%) | Risk |
|---|---|---|---|
| DIY cleaning | 0-10 | 60 | Low |
| DIY sensor replacement | 20-50 | 40 | Medium |
| Professional repair | 80-200 | 90 | Low |
Useful Resources
If you need detailed guides or troubleshooting help, visit the official dryer manufacturer sites or reliable appliance forums. For general information about home appliances and sensor technology, you can check Wikipedia.
Frequently Asked Questions
What Causes Dryer Moisture Sensors To Fail Most Often?
The most common cause is residue buildup from dryer sheets or fabric softener. Dirt or lint can also block the sensor. Sometimes, wires get loose, or the sensor strips break.
Can I Fix A Moisture Sensor Problem Myself?
Yes, in many cases. Cleaning the sensor strips solves most issues. If the problem is wiring or a broken sensor, you may need basic tools and replacement parts. For control board faults, it’s better to call a professional.
How Often Should I Clean The Moisture Sensor?
Clean the sensor strips once a month. If you use dryer sheets or softener, clean more often. Regular maintenance keeps the sensor accurate and extends dryer life.
Will A Faulty Moisture Sensor Increase My Energy Bill?
Yes. If the sensor fails, your dryer may run longer than needed. This wastes electricity and can increase your bill by up to 30%. Fixing the sensor saves money in the long term.
Should I Replace My Dryer If The Sensor Keeps Failing?
If repairs cost more than half the price of a new dryer, or if your machine is older than 10 years, consider replacement. New dryers have better sensor technology and lower energy use.
Dryer moisture sensor problems can be annoying, but they are fixable with a little know-how. Most issues come from simple buildup and can be solved without expensive repairs. If you take care of your sensor and dryer, you’ll save time, money, and keep your clothes in great shape.
Understanding these problems lets you make smarter decisions about maintenance and replacement.
Credit: www.familyhandyman.com