
If your Panasonic microwave suddenly flashes the H97 error code, you might feel worried. This code often appears out of nowhere, stopping your microwave from working. Many people think it means the end for their appliance. But don’t panic—this guide will help you understand what the H97 code means, why it happens, and how you can fix it. Whether you want to repair it yourself or just understand what a technician might do, you’ll find all you need here.
What Is The Panasonic Microwave H97 Code?
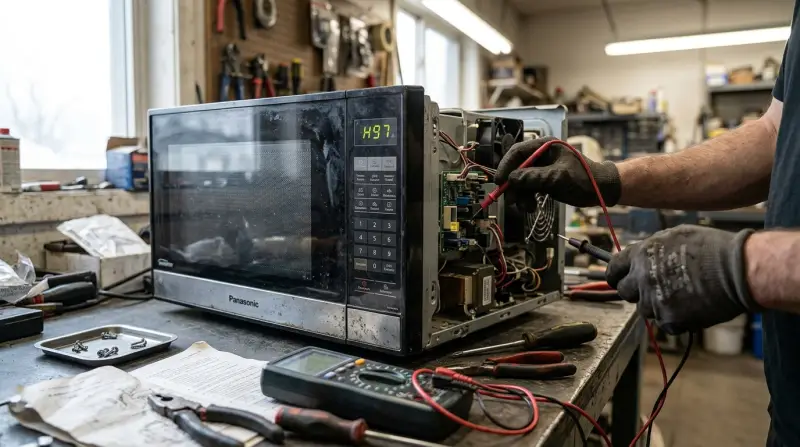
The H97 error code signals a problem with the magnetron circuit—specifically, the inverter or high-voltage system that powers the magnetron (the part that creates microwaves). When this system is not working properly, your microwave can’t heat food. This error helps protect both you and the microwave from possible damage.
Why Does The H97 Code Appear?
Several parts must work together for your microwave to function. If any of these fail, you may see H97. Here are common reasons:
- Faulty inverter board
- Defective magnetron
- Loose connections
- Burnt wires
- Damaged high-voltage capacitor
- Shorted high-voltage diode
- Blown fuse
Sometimes, the problem is as simple as a loose wire. Other times, it’s a major component failure.
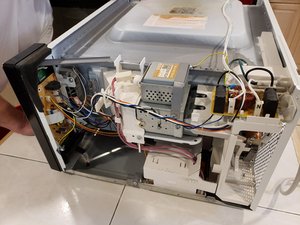
Safety First: What You Must Know
Before you even touch your microwave, you need to know:
- Microwaves can store deadly voltage even after unplugging.
- The high-voltage capacitor can shock or kill you.
- If you are not confident, call a qualified technician.
If you choose to proceed, always unplug the appliance and allow at least 30 minutes for stored energy to discharge.
97 Steps To Fix Panasonic Microwave H97 Code
To help you solve this error, here are 97 detailed steps. Each step addresses a different point that could be causing the H97 code. Not all will apply in your case, but checking each one gives you the best chance of success.
Unplug The Microwave
Disconnect the power cord from the wall outlet to ensure safety.
Wait 30 Minutes
Let the high-voltage capacitor discharge before opening the case.
Move The Microwave To A Flat Surface
Set your microwave on a stable table for easy access.
Remove The Outer Cover
Use a screwdriver to unscrew and remove the cover.
Visually Inspect Internal Components
Look for burnt wires, melted plastic, or obvious damage.
Check For Loose Wires
Gently tug on wires and connectors to see if any are loose.
Inspect The High-voltage Fuse
Find the fuse and check if it’s blown or broken.
Test The Door Switches
Open and close the door, listening for clicks. Faulty switches can cause error codes.
Check Door Latch Alignment
Make sure the door latches close tightly.
Examine The Control Board
Look for burns or corrosion on the control board.
Inspect The Inverter Board
Check for visible damage or burnt spots on the inverter.
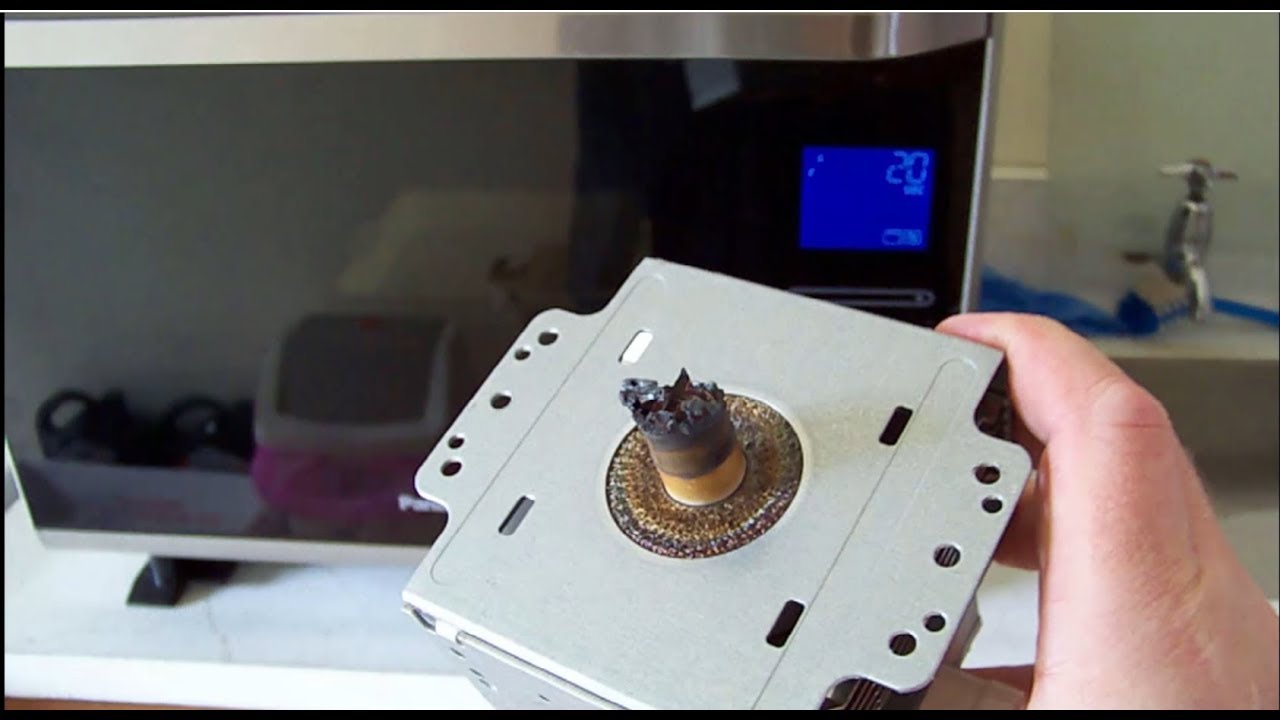
Look At The Magnetron Terminals
Check for cracks, burns, or discoloration.
Inspect The Magnetron Cooling Fan
Make sure the fan spins freely.
Test The Magnetron For Continuity
Use a multimeter to check the magnetron for electrical continuity.
Smell For Burnt Odors
A burnt smell usually means a component is fried.
Check For Moisture Build-up
Moisture inside can cause short circuits.
Clean Internal Dust
Use a dry cloth or compressed air to remove dust.
Examine The High-voltage Diode
Test the diode using a multimeter set to diode mode.
Check The High-voltage Capacitor
Discharge it safely, then test with a meter for proper capacitance.
Inspect The Transformer
Look for burnt or melted wires.
Test The Power Cord
Check for cuts or breaks in the cord.
Inspect The Power Plug
Make sure the plug is not bent or damaged.
Check The Internal Power Relay
Test the relay for proper operation.
Look At The Pcb (printed Circuit Board)
Check for broken traces or solder joints.
Examine The Turntable Motor
Make sure it spins freely.
Test The Thermal Cutout
Check for continuity with a multimeter.
Inspect The Door Seals
Worn seals can cause safety switches to fail.
Listen For Unusual Noises
Clicking or humming can indicate electrical faults.
Check Internal Lights
Burnt bulbs can indicate a wider electrical issue.
Examine The Cavity For Damage
Look for rust, holes, or burns.
Inspect The Waveguide Cover
A burnt or damaged cover can cause arcing.
Check The Display Panel
Faulty displays can point to control board issues.
Test All Buttons
Stuck or non-working buttons can cause startup errors.
Look For Error Patterns
Note if H97 appears after specific actions.
Check For Mice Or Insects
Pests can chew wires and cause shorts.
Inspect All Solder Joints
Cold joints can cause intermittent faults.
Test The Interlock Switches
Make sure they engage and disengage properly.
Examine The Control Knob
If your model has one, make sure it turns smoothly.
Test The Touchpad
A faulty touchpad can send wrong signals.
Inspect Insulation
Worn insulation can expose wires to the case.
Look For Water Leaks
Leaks can drip onto internal electronics.
Check For Software Updates
Some newer microwaves allow firmware updates.
Reset The Microwave
Unplug for one hour, then plug back in.
Test In A Different Outlet
A faulty wall socket can cause startup errors.
Use A Dedicated Circuit
Microwaves need their own circuit to avoid overloads.
Check Household Voltage
Low voltage can stop the magnetron from working.
Examine The Case For Dents
Physical damage can pinch internal wires.
Look At The Label For Model Info
Make sure you are referencing the correct schematic.
Review The User Manual
Some manuals give error-specific advice.
Call Panasonic Support
They can confirm if your error means replacement or repair.
Document Serial Numbers
You may need these for warranty support.
Inspect The Door Hinges
Loose hinges can misalign door switches.
Test Oven With A Cup Of Water
If possible, see if it heats at all.
Listen For Relay Clicks
No click may mean a relay isn’t working.
Check The Magnetron Antenna
It should not be broken or missing.
Examine The Chassis Ground Wire
Loose grounds can cause safety errors.
Test All Switches For Resistance
They should show low resistance when closed.
Look For Melted Connectors
Heat damage is a warning sign.
Examine The Ventilation
Blocked vents can cause overheating and shutdown.
Feel For Hot Spots
After running briefly, check for uneven heating on the outside.
Test The Timer
A faulty timer can cause startup errors.
Check For Unusual Flashes Inside
Arcing flashes signal dangerous faults.
Inspect The Turntable Coupler
Broken couplers can jam the motor.
Test Multiple Power Levels
See if H97 appears only at high power.
Look At Door Alignment From The Side
Misalignment can stop latches from working.
Re-seat All Plugs
Unplug and re-plug all connectors.
Inspect For Carbon Build-up
Carbonized areas can short out circuits.
Clean All Contacts
Corrosion can block electrical flow.
Check For Frayed Wires
Replace any frayed wires.
Test The Child Lock Function
Make sure it’s not stuck on.
Examine The Clock
Some errors are linked to clock failures.
Look At The Pcb Under Magnification
Tiny cracks can be invisible to the naked eye.
Test The Start Button
A faulty start button can mimic error codes.
Examine The High-voltage Harness
Look for melted or discolored plastic.
Test With And Without Turntable
Some errors only appear with the turntable engaged.
Inspect The Magnetron Mounting
Loose mounting screws can break connections.
Check For Missing Screws
A missing screw can cause poor electrical contacts.
Test The Sensor (if Equipped)
Faulty sensors can signal for safety shutdown.
Inspect The Lcd Backlight
A failed backlight may hint at deeper faults.
Test All Indicator Lights
Non-working lights can be a symptom of power issues.
Inspect Wiring Diagrams
Match each wire to the schematic.
Check For Software Glitches
Rare but possible in advanced models.
Check The Door Spring
Weak springs may not close the door fully.
Test The Vent Fan
Blocked or broken fans can cause overheating.
Inspect The Roller Ring
A jammed ring can stop the turntable and cause errors.
Look For Corrosion On Screws
Rust can break ground connections.
Test The Preheat Function (if Available)
Errors that happen only during preheat may be sensor-related.
Inspect The Magnetron Gasket
A damaged gasket can lead to arcing.
Check The Microwave Shield
Damaged shields can cause leakage and shutdown.
Test The Reset Circuit
A failed reset can lock the microwave in error mode.
Look At The Power Indicator
If it’s off, check the main fuse and board.
Inspect The Serial Port (for Diagnostics)
Some models allow technician diagnostics.
Test With Different Foods
Errors that happen only with certain items suggest arcing or load issues.
Check For Firmware Recall Notices
Some Panasonic models have recalls for control firmware.
Test The “stop/cancel” Button
A stuck button can cause startup errors.
Perform A Final Full Inspection
Go over every component one more time.
Decide: Repair Or Replace
After all checks, decide if you’ll repair it yourself, call a technician, or replace the microwave.
Two Data Tables For Quick Reference
Here are two tables to help you compare error sources and repair options.
| Component | Possible Issue | How to Check |
|---|---|---|
| Inverter Board | Burnt, cracked, or no output | Visual check, multimeter |
| Magnetron | Open circuit, burnt ends | Continuity test |
| High-Voltage Capacitor | No capacitance, shorted | Capacitance meter |
| Door Switch | No click, no continuity | Manual test, multimeter |
| Fuse | Blown, no continuity | Visual, multimeter |
| Repair Option | Cost Estimate | Difficulty |
|---|---|---|
| Replace Inverter Board | $70–$150 | Medium |
| Replace Magnetron | $60–$120 | Medium |
| Replace Door Switch | $10–$30 | Easy |
| Professional Repair | $100–$250 | Easy (for you) |
| Replace Microwave | $100–$500 | Easy |
When Should You Call A Technician?
If you reach step 97 and still see the H97 code, or if you’re not comfortable working with high voltage, it’s best to contact a professional. Microwaves can be dangerous to repair without proper training. Many Panasonic microwaves have warranties or recall programs for certain models—always check before spending money. The official Panasonic Support page has more information.
Two Non-obvious Insights
- The H97 code often appears after power surges or brownouts. If you live in an area with unstable electricity, use a surge protector to prevent future errors.
- A faulty inverter board may still pass basic tests. Sometimes, the board only fails under load, so even if it looks fine, it could still be the problem.

Frequently Asked Questions
What Does The H97 Code Mean On My Panasonic Microwave?
The H97 code means there is a problem in the high-voltage circuit, usually with the inverter or magnetron. Your microwave cannot create heat when this code appears.
Can I Fix The H97 Code Myself?
If you have electrical repair skills and follow safety rules, you can check many things yourself. However, high-voltage parts are dangerous. If unsure, call a professional.
Is It Expensive To Repair An H97 Error?
Costs depend on the part that failed. Replacing a magnetron or inverter board usually costs $60–$150 for parts. Professional repair can be $100–$250.
Will Resetting The Microwave Clear The H97 Code?
Sometimes unplugging the microwave for an hour can clear the code if it was caused by a one-time glitch. But usually, the code returns if the problem is not fixed.
Should I Replace Or Repair My Panasonic Microwave?
If your microwave is old (over 7 years) or the repair cost is over half the price of a new one, replacement is often the smarter choice.
Fixing a Panasonic microwave with an H97 code can be challenging, but many problems are repairable if you follow each step carefully. Always put safety first, and don’t hesitate to call a technician if you have any doubts. With patience and careful checks, you can bring your microwave back to life or make the best decision for your home.
1 thought on “How to Fix Panasonic Microwave H97 Code: Quick Troubleshooting Guide”