
Building your own cubby storage shelves is one of the most rewarding DIY projects for homes, schools, and offices. These shelves help you organize shoes, toys, books, and many other items. They add style, reduce clutter, and can be customized to fit your space perfectly. Even if you’re not a professional carpenter, you can build durable cubby shelves with a basic set of tools and some patience. This guide will walk you through the process, from planning and materials to finishing touches, so you’ll know exactly what to do—even if you’re a beginner.
Why Build Cubby Storage Shelves?
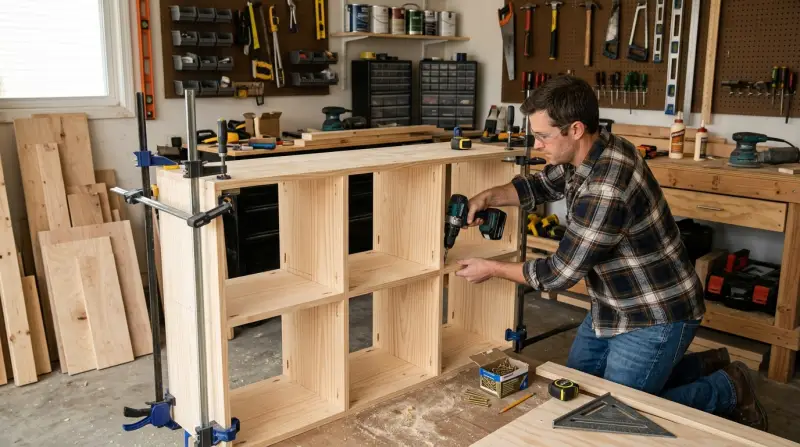
Cubby storage shelves are popular because they are versatile and practical. You can use them in entryways for shoes and bags, in children’s rooms for toys and books, or in offices for files and supplies. Building your own lets you:
- Save money compared to buying pre-made units
- Customize size, shape, and color to fit your space
- Choose higher-quality materials
- Learn useful DIY skills
A custom cubby shelf can also increase your home’s value and make daily life less stressful by keeping things organized.
Planning Your Cubby Storage Shelf
Before you start cutting wood, careful planning will save you time and money. Think about:
- Location: Where will your shelf go? Measure the space carefully.
- Purpose: What will you store? Shoes, baskets, books, or something else?
- Size and Number of Cubbies: How many cubbies do you need? What should their size be?
Example Cubby Dimensions
Here’s a quick comparison of common cubby sizes for different uses:
| Use | Width (inches) | Height (inches) | Depth (inches) |
|---|---|---|---|
| Shoes | 8-12 | 6-8 | 12-14 |
| Toys/Books | 12-15 | 12-15 | 12-16 |
| Office Files | 14-16 | 10-12 | 14-16 |
Always allow a little extra space inside each cubby for easy access.
Sketch Your Design
Draw your shelf on paper or use a free online design tool. Label all measurements. Planning ahead helps you avoid mistakes later.

Credit: www.justmeasuringup.com
Choosing Materials
The materials you pick will affect the look, strength, and cost of your cubby shelves. The most common options are:
- Plywood: Strong, affordable, and easy to cut. Great for most DIY shelves.
- MDF (Medium Density Fiberboard): Smooth surface, good for painting, but heavier and not as strong as plywood.
- Solid wood: Looks great but is more expensive and can warp if not treated well.
You’ll also need:
- Wood glue
- Wood screws or nails
- Sandpaper (120 and 220 grit)
- Paint, stain, or sealant
Material Comparison
Here’s a quick look at how common materials compare:
| Material | Strength | Cost | Finish Quality | Weight |
|---|---|---|---|---|
| Plywood | High | Medium | Good | Medium |
| MDF | Medium | Low | Excellent | High |
| Solid Wood | Very High | High | Excellent | Medium |
Tools You’ll Need
You don’t need a workshop full of tools—just the basics:
- Measuring tape
- Pencil
- Circular saw or table saw
- Drill and drill bits
- Screwdriver (manual or electric)
- Carpenter’s square
- Clamps
Optional but helpful:
- Kreg jig (for pocket holes)
- Miter saw (for cleaner cuts)
- Orbital sander
Always wear safety glasses and follow tool instructions.
Credit: learn.kregtool.com
Step-by-step Building Instructions
Let’s get practical. Follow these steps to build a classic cubby storage shelf with 6 to 9 compartments.
1. Cut Your Wood
Based on your design, cut panels for:
- Top and bottom
- Two sides
- Vertical dividers
- Horizontal shelves (if needed)
For example, for a 3×2 cubby shelf (3 columns, 2 rows), you’ll need:
- 2 pieces for top/bottom (e.g., 36″ x 14″)
- 2 pieces for sides (e.g., 28″ x 14″)
- 2 vertical dividers (e.g., 28″ x 14″)
- 1 horizontal divider (e.g., 36″ x 14″)
Non-obvious tip: Number your pieces with a pencil for easy assembly later.
2. Sand And Prep The Wood
Smooth all surfaces with 120-grit sandpaper. Pay extra attention to edges—sharp edges can splinter or hurt hands. Wipe away dust with a clean cloth.
3. Assemble The Outer Box
Lay the top and bottom pieces flat. Attach the two side panels using wood glue and screws. Use a carpenter’s square to keep corners at 90 degrees. Clamps help hold pieces while the glue dries.
4. Install Dividers
Mark where vertical dividers will go. Apply wood glue to the divider’s edge and slide it in place. Secure with screws through the top and bottom.
Add the horizontal divider(s) the same way. Double-check all angles to keep cubbies neat.
5. Reinforce The Structure
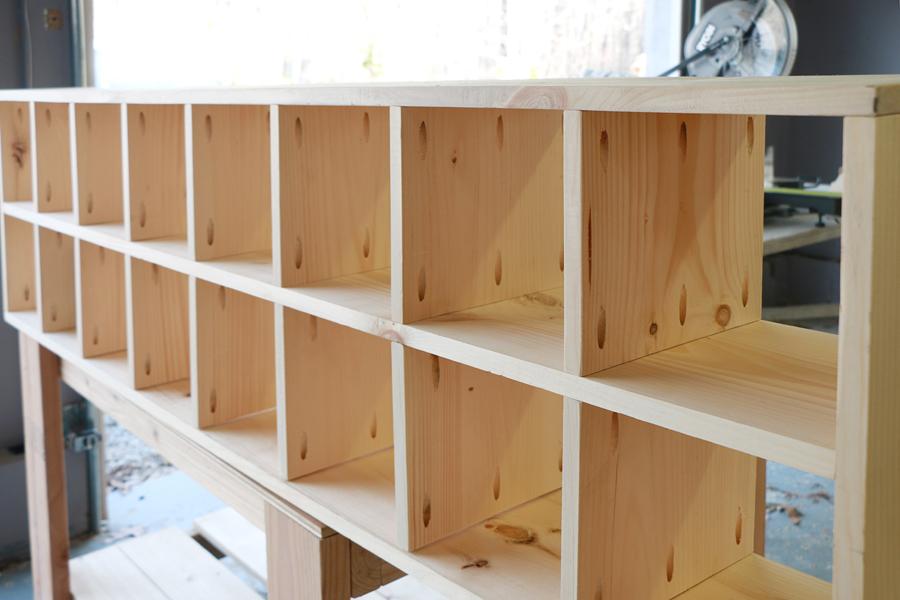
For added strength, use pocket holes (made with a Kreg jig) or drive screws at an angle. This prevents wobbling, especially for larger shelves.
Beginner mistake: Skipping reinforcement can make shelves sag over time.
6. Attach Back Panel (optional)
A thin plywood back panel adds stability and stops items from falling through. Attach with finishing nails or small screws.
7. Fill Holes And Final Sanding
Fill any screw holes with wood filler. Let dry, then sand again with 220-grit sandpaper for a smooth finish.
8. Paint Or Stain
Choose a color or wood stain that matches your room. Apply 1–2 coats, letting each dry completely. Use a clear sealant for extra protection, especially for kids’ rooms.
9. Install In Place
Move your finished shelf to its new spot. Secure it to the wall with brackets if there’s a risk of tipping, especially in homes with children.
Customizing Your Cubby Shelves
You can add many personal touches to make your shelves stand out.
- Add baskets or bins: Makes cleaning up toys or shoes quick and easy.
- Label each cubby: Stickers, chalk paint, or small tags help everyone remember where things go.
- Include hooks: Perfect for keys, small bags, or headphones on the side of the unit.
- Add a cushion: If the top is strong enough, add a soft cushion to turn it into a bench.
Unique insight: Leaving one cubby open (no divider) gives you a spot for taller items or decor.

Credit: www.youtube.com
Common Mistakes And How To Avoid Them
Even experienced DIYers make mistakes. Here’s how to avoid the most common ones:
- Incorrect measurements: Always measure twice before cutting.
- Skipping sanding: Rushed sanding leads to rough surfaces and paint problems.
- Weak joints: Always reinforce with glue and screws or pocket holes.
- Forgetting the wall anchor: Tall shelves can tip over—secure them if needed.
- Overloading cubbies: Know the weight limit for your materials and don’t overload.
Maintenance And Care Tips
To keep your cubby shelves looking and working great:
- Wipe with a damp cloth regularly to remove dust.
- Check screws and joints every few months—tighten if needed.
- Repaint or reseal if the finish starts to wear, especially in high-use areas.
A well-built cubby shelf can last for many years with minimal care.
Cost Breakdown
Here’s a typical cost estimate for a 3×2 cubby shelf using plywood:
| Item | Estimated Cost (USD) |
|---|---|
| Plywood (1–2 sheets) | $40–$60 |
| Screws, glue, filler | $10–$15 |
| Paint or stain | $15–$30 |
| Back panel (optional) | $10 |
| Wall brackets (optional) | $5–$10 |
| Total | $80–$125 |
Costs can vary by location and material quality.
When To Buy Instead Of Build
Building your own cubby shelves is rewarding, but buying a pre-made unit can make sense if:
- You need shelves quickly
- You don’t have time or tools
- You want a unique material or style not possible in DIY
For a look at different styles and ready-made options, check out the IKEA shelving collection.
Frequently Asked Questions
How Strong Are Diy Cubby Shelves?
With good materials and proper assembly, DIY cubby shelves can hold 20–40 lbs per cubby. Always check the strength of your materials before loading heavy items.
Can I Build Cubby Shelves Without Power Tools?
It’s possible, but using a circular saw and drill makes the job much easier and results in cleaner cuts. Hardware stores can often cut wood for you if you provide measurements.
How Do I Make My Shelves Safe For Kids?
Use rounded corners, avoid sharp edges, and always secure tall shelves to the wall with anchors or brackets. Choose non-toxic paints or finishes for extra safety.
What’s The Best Way To Paint Cubby Shelves?
Sand all surfaces, use a primer if painting MDF or plywood, then apply two thin coats of paint. Let each coat dry completely for a smooth, durable finish.
How Can I Add Doors Or Drawers To My Cubby Shelves?
You can attach small cabinet doors with simple hinges, or slide-in bins as drawers. Measure carefully and leave enough space for hardware or movement.
Building cubby storage shelves is a practical project that can improve any room. With careful planning, basic tools, and attention to detail, you’ll end up with storage that’s both functional and attractive—plus, you’ll enjoy the satisfaction of making it yourself.