
You can stop a Toilet Leaking from Tank Bolts by tightening the internal nuts or replacing the rubber washers that have become brittle over time. This leak usually starts because the tank moves slightly when you sit or lean against it, which loosens the seal between the bolt head and the porcelain. If the leak is slow, try a simple quarter-turn on the nuts inside the tank first. If the water continues to drip, you’ll need to replace the bolt kit entirely to restore a watertight seal.
Causes of leaking tank bolts
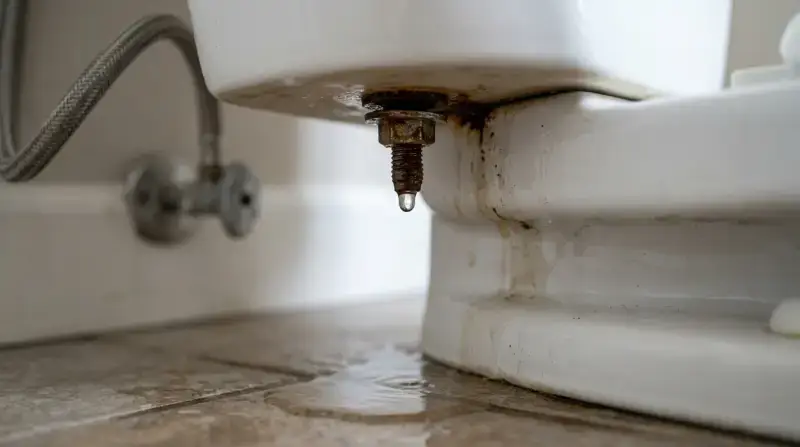
This issue almost always stems from the failure of the rubber gaskets or the natural loosening of metal parts over many years. Porcelain is hard but brittle, and the constant movement of a toilet tank puts stress on the connection points. When these bolts move, the rubber washers underneath them lose their shape. Once that rubber hardens, it can no longer keep water inside the tank, and it begins to seep through the bolt hole.
Another common cause is corrosion. If you have hard water, mineral deposits can build up around the bolts and eat away at the metal or the rubber. This is a common issue in many homes, as noted in the Environmental Protection Agency’s guidance on water efficiency, which highlights how even small leaks can waste significant amounts of water over a year. If the metal bolts are rusted, they may snap when you try to tighten them. This is a sign that the material has reached the end of its life and must be replaced.
Finally, the tank might be loose because the nuts underneath have vibrated loose from regular use. If the tank wobbles, it breaks the seal immediately. This varies by model — check your tank to see if it uses a standard two-bolt system, as the size of the washers may vary by manufacturer.
Tighten the existing hardware
This fix is for you if the bolts are still in good shape and the leak is very minor. First, turn off the water supply valve located behind the toilet. Flush the toilet to drain the water from the tank, then use a sponge to remove any remaining water. You need to reach inside the tank to hold the bolt head steady with a large screwdriver while you use a wrench to turn the nut on the underside of the tank.
Only turn the nut a quarter-turn at a time. Don’t force it, as porcelain cracks easily under too much pressure. If the bolt spins freely, the nut is stripped or the bolt is rusted through. If you feel the porcelain cracking or hear a crunching sound, stop immediately. This is a trade-off: you want a tight seal, but you must avoid breaking the tank, which would require a full replacement.
Use this decision rule: if the nut resists turning after one full rotation, stop. Further force will likely shear the bolt or crack the tank base. If you reach this point and the leak persists, the internal gasket has lost its elasticity.
After tightening, turn the water back on and watch the bolts for ten minutes. If you see water droplets forming, the washers are likely too old to save. This is a common mistake people make; they try to overtighten old, hard rubber, which only makes the leak worse by damaging the porcelain surface. Replacing the rubber washers is a five-dollar fix, while a cracked tank costs hundreds.
Replace the tank bolt kit
If tightening doesn’t work, you must replace the hardware. You can buy a universal toilet tank bolt kit at most hardware stores. This fix isn’t for those who are uncomfortable working with plumbing, as it requires removing the tank from the bowl. If you aren’t confident in your ability to disconnect the water supply or handle the heavy tank, call a licensed plumber to avoid flooding your bathroom.
To start, disconnect the water supply line and drain the tank completely. Unscrew the nuts holding the tank to the bowl and lift the tank carefully. Place it on a towel to protect the porcelain. Remove the old bolts and clean the holes thoroughly with a mild cleaner to remove mineral buildup. Install the new bolts, ensuring the rubber washers are placed on the inside of the tank to create the seal. Tighten the nuts by hand first, then use a wrench to give them one final turn. If you tighten these too much, you’ll crack the tank. The goal is to make them snug so the tank doesn’t move. Once reattached to the bowl, reconnect the water and check for leaks. If the tank still wobbles, re-adjust the nuts until it’s stable.
Use a thread sealant or plumber’s putty
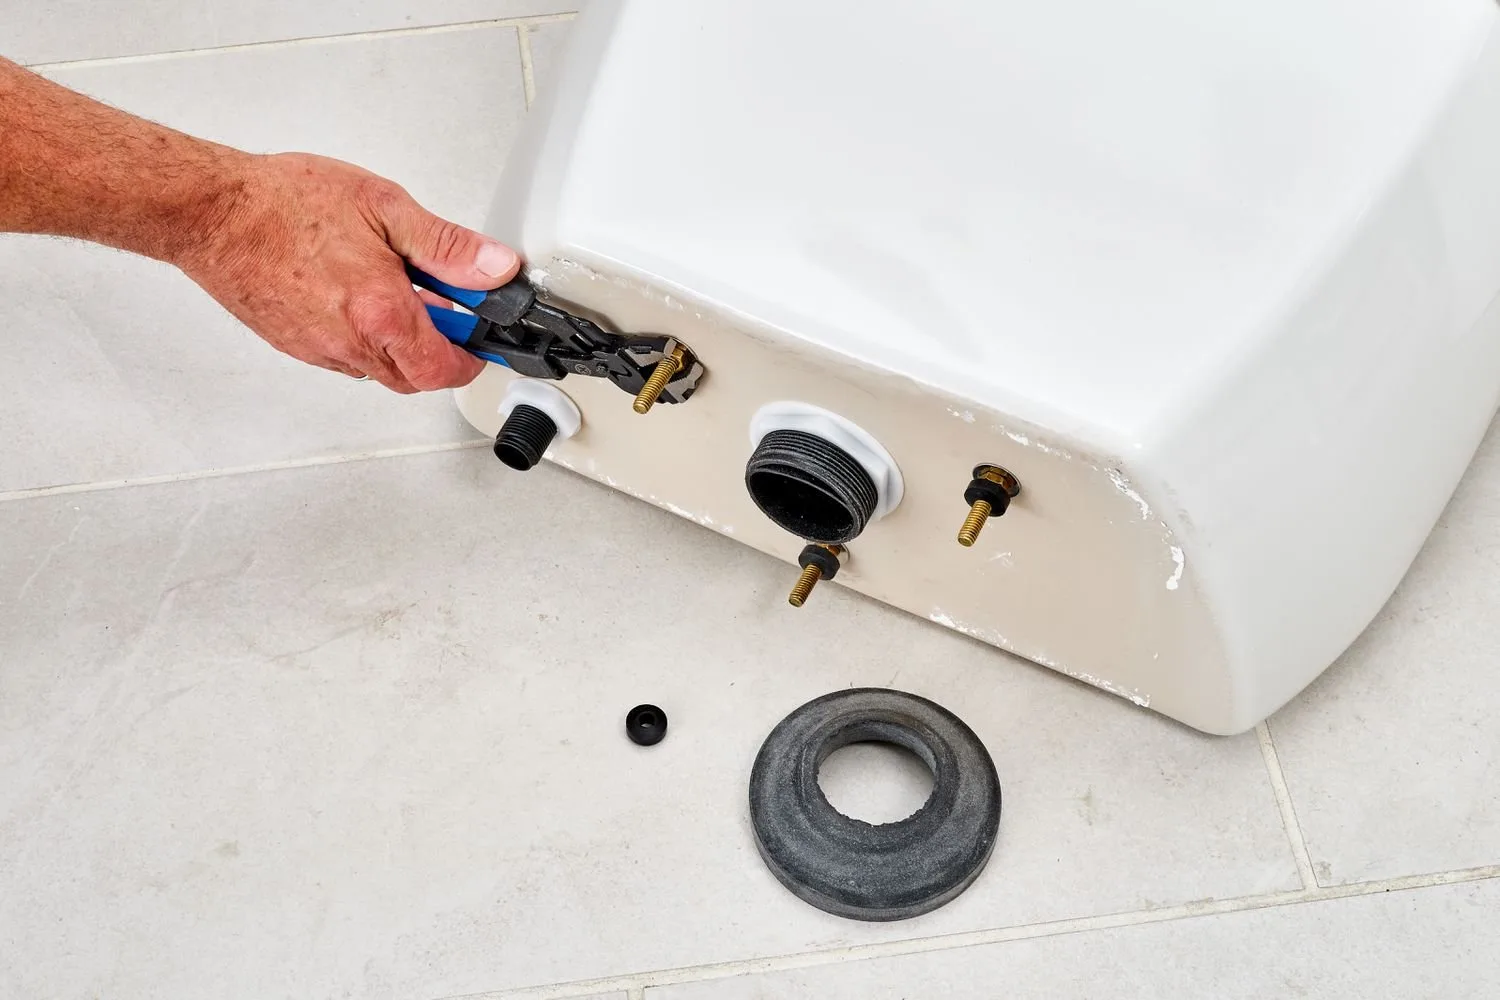
This approach is for the hardest cases where the bolt hole in the porcelain might be slightly uneven or worn. If you have already replaced the bolts and still see a small drip, you can apply a thin layer of plumber’s putty or a silicone-based sealant around the washer before inserting the bolt into the tank. This provides an extra layer of protection against water seepage.
It’s worth the extra effort if you have an older toilet with a rough or uneven porcelain surface that prevents a flat rubber gasket from sealing perfectly. However, don’t use heavy-duty glues or permanent adhesives. If you use a permanent bond, you’ll never be able to remove the bolts again without breaking the tank. This is a task that requires patience; if you rush the application, you’ll create air pockets that allow water to bypass the seal. If you’re unsure about the type of sealant to use, ask an associate at a local plumbing supply store for a product labeled as safe for toilet repairs. If the leak persists after using a sealant, the porcelain itself may have a hairline crack that you can’t see. In that case, the tank is compromised and must be replaced by a professional to ensure your home remains safe from water damage.
What not to do
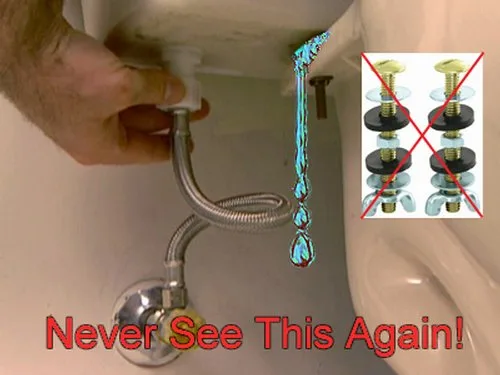
Don’t use standard metal washers or metal nuts without a rubber gasket. Metal against porcelain creates localized stress points that almost certainly cause a hairline crack. Always ensure a flexible buffer exists between the hardware and the ceramic surface.
Don’t overtighten the nuts to stop a heavy leak. This is the most common way people destroy their toilet tanks. If a leak persists after tightening by hand plus a quarter-turn, the fault lies with a misaligned gasket or a warped tank, not a lack of torque.
Don’t use liquid pipe thread sealants designed for iron pipes. These chemicals can degrade rubber washers and cause them to fail prematurely. Use only the rubber gaskets provided in the bolt kit.
Don’t ignore a leak that seems to stop on its own. Moisture trapped under the base will eventually rot subfloor joists or trigger hidden mold growth. If the floor feels soft or damp, pull the toilet immediately to inspect the flange.
How to stop it happening again
Regular inspection is the only way to prevent this from becoming a major repair. Check the base of your tank as part of your usual clean for dampness. If you see a bead of water, act immediately before the moisture causes floor rot or subfloor damage.
| If you’re doing this | Do this instead | Why |
|---|---|---|
| Ignoring a wobbly tank | Tighten the mounting bolts | Prevents seal damage |
| Overtightening bolts | Use hand-tighten plus a quarter-turn | Protects porcelain integrity |
| Cleaning with harsh acids | Use mild soap and water | Prevents rubber degradation |
| Using old, cracked gaskets | Replace the entire bolt kit | Ensures a reliable, long-term seal |
Most homeowners make the mistake of waiting until a leak is visible on the floor. This leads to expensive potential water damage. If the tank wobbles, check the bolts today. If the tank is steady but still leaks, the gasket must be replaced; a new kit is a cheap part that saves the floor.
Frequently asked questions
Can I fix a leaking toilet tank without turning off the water?
You can’t safely fix a leak without turning off the water first. Turning the shut-off valve clockwise prevents a flood while you swap the hardware. Always flush the toilet to empty the tank before beginning any work.
Why is my toilet leaking from the bottom of the tank?
The leak is likely caused by hardened rubber washers or loosened bolts. Constant movement of the tank puts pressure on these components, causing the rubber to lose its elasticity over time. Corroded bolts may also fail to hold the tank securely against the bowl.
Is it safe to use silicone on toilet tank bolts?
You may use a small amount of water-resistant silicone sealant to help create a better seal, but it isn’t a replacement for gaskets. Apply only a thin bead around the rubber washer before tightening. Avoid permanent adhesives that prevent future removal.
How long does a toilet bolt kit last?
A high-quality rubber and brass bolt kit typically lasts for five to ten years. Hard water is the primary cause of premature failure, as mineral deposits wear down rubber and corrode metal. Inspect your bolts periodically for signs of rust or brittleness.
What happens if I break the porcelain while tightening?
If you break the porcelain, you must stop using the toilet and replace the entire tank immediately. Cracks are structural failures that can’t be repaired with glue or putty. Continued use of a damaged tank can lead to a major flood.
Final Thoughts
Once you’ve finished the repair, wipe the area completely dry with a paper towel and watch it for a few minutes. If the floor stays bone-dry, you’re all set. Keep an eye on the tank over the next week, as it’s always good to double-check that everything’s holding up perfectly.
Related guides
- Toilet Tank Not Filling With Water: Quick Fixes and Expert Tips
- Toilet Bowl Slowly Loses Water: Causes and Quick Fixes
- Whirlpool Refrigerator Leaking Water Inside: Causes and Fixes