Most people do not think about the condenser coils in their refrigerator. You might clean the inside of your Whirlpool fridge often, but the coils are easy to forget. Yet, dirty coils are a leading cause of refrigerators losing cooling power, running louder, or wasting energy. With time, dust and pet hair build up on these coils, making your fridge work harder and use more electricity. If you want your Whirlpool refrigerator to last longer and keep food cold, learning how to clean the condenser coils is a smart move.
This guide will show you step by step how to clean the coils safely. You will also learn why this matters, what tools you need, how often to clean, and some tips most people miss. If you have never done this before, do not worry.
You can handle it yourself in under 30 minutes, even with no special skills.
Why Condenser Coils Matter In A Whirlpool Refrigerator
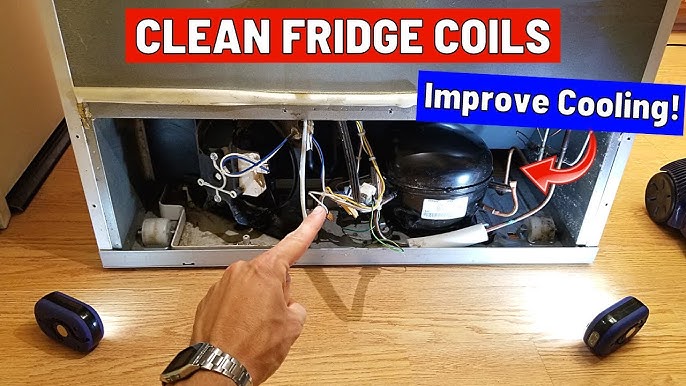
The condenser coils are metal tubes, often found at the back or bottom of the fridge. Their job is to release heat taken from inside your refrigerator. When these coils are covered in dust, the heat cannot escape easily. The fridge’s compressor has to work harder, which causes several problems:
- Higher energy bills: Dirty coils can increase power use by up to 30%.
- Less cooling: The fridge may not stay cold enough, risking spoiled food.
- Shorter fridge life: The motor and compressor wear out faster.
A clean set of coils can help your Whirlpool refrigerator run efficiently and quietly.
Where To Find Condenser Coils In Your Whirlpool Refrigerator
Not all Whirlpool models are the same. The location of the condenser coils depends on the model and style:
| Refrigerator Type | Coil Location | Access Method |
|---|---|---|
| Top-freezer models | Back of fridge | Pull fridge out from wall |
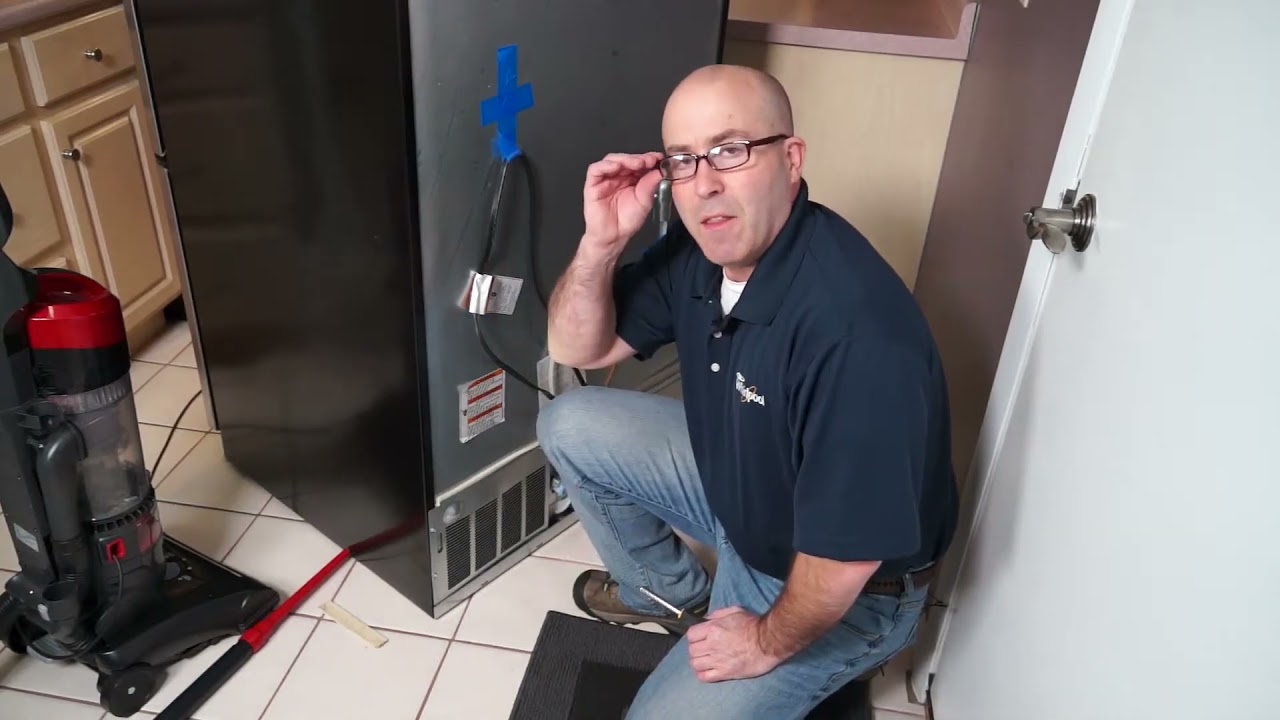
| Side-by-side | Bottom, behind front grille | Remove lower front grille |
| French door | Bottom, behind front grille | Remove lower front grille |
Most modern Whirlpool models have coils at the bottom, hidden behind a kick plate or grille. Older models may have them exposed on the back.

Tools And Supplies You Will Need
Cleaning the coils is simple if you have the right items ready. Here is what you should gather:
- Vacuum cleaner with hose and brush attachment
- Coil cleaning brush (or a long, flexible bottle brush)
- Screwdriver (if your grille needs to be unscrewed)
- Dust mask (optional, but useful if you have allergies)
- Flashlight to see dust in dark areas
- Soft cloth for wiping
A coil cleaning brush is a cheap tool, sold at most hardware stores. It is designed to fit between coil rows and loosen dust.
How Often Should You Clean Refrigerator Coils?
Experts recommend cleaning the condenser coils every 6 to 12 months. If you have pets, or your kitchen is dusty, do it every 3 to 6 months. People often forget about this task, but setting a reminder on your phone or calendar makes it easier to remember.
Step-by-step Guide To Cleaning Condenser Coils
Cleaning the coils is not complicated, but it is important to follow the correct steps for safety and best results.
Unplug The Refrigerator
Always unplug your Whirlpool refrigerator before starting. This protects you from electric shock and keeps the compressor from running while you clean.
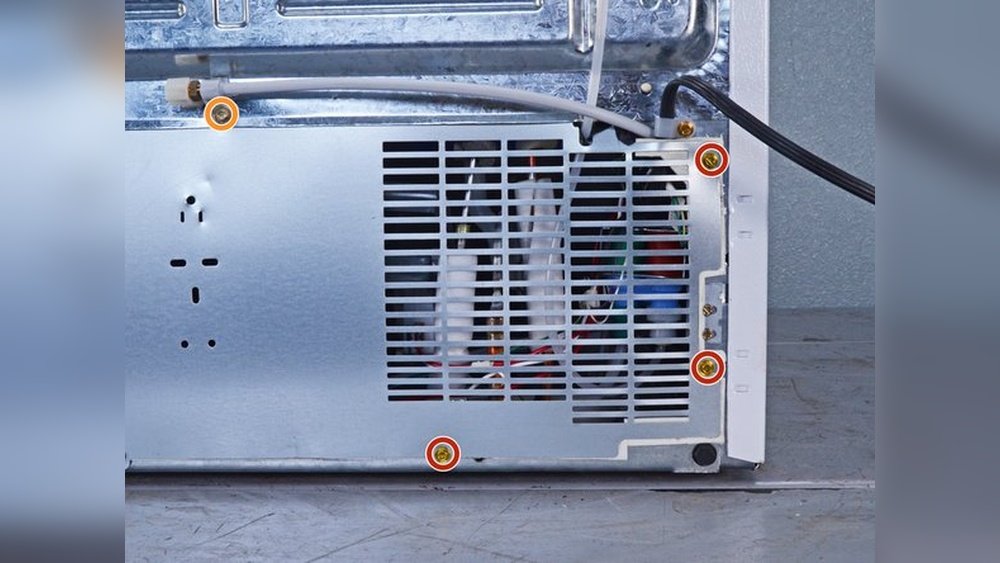
Locate And Access The Coils
Depending on your model, you may need to:
- Pull the fridge away from the wall (for back coils)
- Remove the lower front grille (for bottom coils). This usually snaps out, but some models have screws.
Use a flashlight to see the coils clearly. They may look like a grid of thin tubes or wires.
Remove Surface Dust And Loose Debris
Start with the vacuum cleaner’s brush attachment. Gently run it over the coils to pick up loose dust, dirt, and hair. Move slowly to avoid bending the coils.
Use A Coil Cleaning Brush
For stuck-on dirt, use the coil brush. Insert it between the rows of coils and twist gently to dislodge dust. Pull out the brush and vacuum up the debris that falls.
Vacuum The Area Around The Coils
Vacuum any dust on the floor, under the fridge, or near the fan. Dust in these areas can get sucked up and land on the coils again.
Wipe Surrounding Surfaces
Use a damp cloth to wipe the grille, the cover, and the space around the coils. Make sure everything is dry before reattaching any covers.
Replace The Grille And Plug In
Snap or screw the grille back in place. Plug the fridge back into the outlet. Listen for the compressor starting up—it should sound quieter now.
Here is a summary of the cleaning process:
| Step | Action | Why It Matters |
|---|---|---|
| Unplug fridge | Disconnect power | Safety from shock |
| Access coils | Remove grille or pull out fridge | Reach dusty coils |
| Vacuum dust | Use brush attachment | Remove loose debris |
| Brush coils | Loosen stuck dust | Improves cooling |
| Vacuum again | Clean dropped dust | Prevents re-dirtying |
| Wipe surfaces | Use cloth | Finishing touch |
| Replace grille, plug in | Restore to use | Fridge works safely |
Extra Tips Most People Miss
Cleaning coils is not just about removing visible dust. Here are some insights even experienced homeowners may overlook:
- Check the fan: Many Whirlpool fridges have a cooling fan near the coils. If it is dusty, wipe it gently too. A dirty fan reduces airflow and cooling.
- Mind the fins: Coils often have thin metal fins. Do not bend them—they help transfer heat. If you accidentally bend a fin, straighten it with a dull knife or fin comb.
- Watch for water: If you see water or ice under the fridge, this can signal a blocked drain line or other issues. Cleaning coils will not fix leaks, but cleaning helps you spot problems early.
- Don’t use water sprays: Never hose the coils or use wet sprays inside the fridge. Moisture can cause rust and electric problems.
- Keep the area clear: Do not store items behind or under the fridge—good airflow prevents future dust buildup.
What Happens If You Don’t Clean The Coils?
Skipping coil cleaning leads to more than just higher energy bills. Over time, these problems may develop:
- Longer run times: The compressor works harder, shortening its life.
- Less cooling: Food spoils faster, and ice cream may melt.
- Possible breakdown: In some cases, the compressor overheats and fails, leading to expensive repairs.
- Warranty issues: Some warranties require regular maintenance, and neglect can void coverage.
In hot climates, dirty coils can push a fridge past its limits in just a few months.
Comparing Do-it-yourself Vs. Professional Coil Cleaning
Some people wonder if they should hire a pro or do it themselves. Let’s compare the two approaches:
| Factor | DIY Cleaning | Professional Service |
|---|---|---|
| Cost | Low (mostly free if you have tools) | High ($75–$150 per visit) |
| Time Needed | 20–30 minutes | 30–45 minutes |
| Skill Level | Easy for most people | Not required |
| Thoroughness | Varies by person | Usually thorough |
| Peace of Mind | DIY satisfaction | Pro guarantees |
For most Whirlpool fridges, DIY cleaning is safe and effective. Call a pro if you see oil leaks, electrical damage, or if your fridge is still not cooling after coil cleaning.
How To Tell If Your Coils Need Cleaning
Besides putting coil cleaning on your calendar, look for these signs that it’s time:
- The fridge feels warm or does not cool as well as before
- The compressor runs more often or makes more noise
- You see dust buildup behind or under the fridge
- Your energy bill goes up for no clear reason
If you notice any of these, clean the coils as soon as possible.
How Cleaning Coils Helps Save Money
According to the U.S. Department of Energy, a fridge with dirty coils can use up to 30% more energy. For an average U.S. home, this could mean $20–$40 per year in wasted electricity per refrigerator. Over 10 years, that’s hundreds of dollars—plus the cost of early repairs or a new fridge if yours fails.
When To Call A Technician Instead
While coil cleaning is a basic maintenance task, some problems need a technician:
- The compressor is hot and the fridge does not cool after cleaning
- You hear clicking or buzzing even after dust is removed
- You see oil stains near the coils (a sign of a refrigerant leak)
- You smell burning or see sparks
In these cases, unplug the fridge and call a Whirlpool-certified repair service.
Where To Learn More
For detailed maintenance guides and model-specific instructions, check the Whirlpool official support page or the owner’s manual that came with your fridge. For more about refrigerator energy use, see this Energy Department resource.
Frequently Asked Questions
How Long Does It Take To Clean Whirlpool Refrigerator Condenser Coils?
Most people can finish the job in 20 to 30 minutes. If it is your first time, allow a little longer to get comfortable with the process.
Can I Clean The Coils Without Unplugging The Refrigerator?
No, always unplug the refrigerator before you start. This keeps you safe from electric shock and prevents the compressor from turning on during cleaning.
What Kind Of Brush Should I Use For The Coils?
A coil cleaning brush is best. These are long, flexible, and made to fit between coil rows. If you do not have one, a soft paintbrush or bottle brush can work, but avoid anything metal.
Do All Whirlpool Refrigerators Have Coils In The Same Place?
No. Some models have coils at the back, while most new models have them at the bottom behind a grille. Check your owner’s manual or look under the fridge.
Will Cleaning The Coils Fix A Fridge That Is Not Cooling?
Cleaning can help, but if your fridge still does not cool after cleaning the coils, there may be another problem. Check the door seals and temperature settings. If it still does not work, call a technician.
Keeping your Whirlpool refrigerator’s condenser coils clean is a simple way to save money, avoid breakdowns, and keep your food cold. With just a few basic tools and a little time, you can help your fridge last for years.