
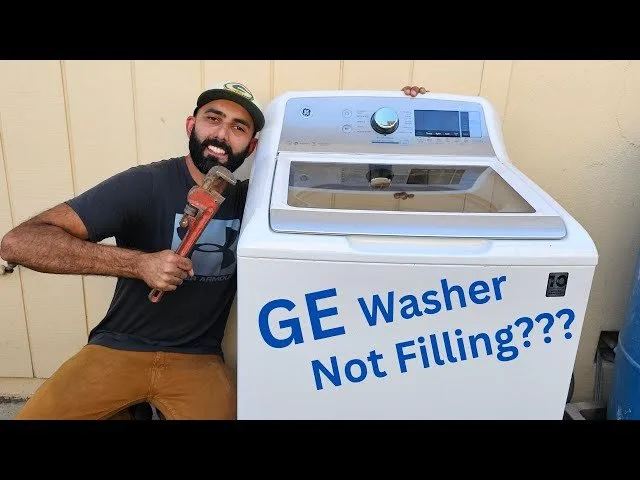
The most common reason for a Ge Washer Not Filling With Water is a restricted or closed water supply valve behind the machine. In most cases, the valves are simply turned off or the hoses are kinked, preventing water from reaching the drum. You can confirm this by pulling the machine away from the wall to inspect the intake hoses and the faucets for any physical blockages or closed handles.
Why your washer isn’t filling with water
| Cause | How common | How to confirm it | Fix it yourself? |
|---|---|---|---|
| Closed supply valves | Very common | Check handles behind unit | Yes |
| Kinked intake hoses | Common | Inspect hoses for bends | Yes |
| Clogged inlet screens | Common | Remove hose, check mesh | Yes |
| Failed water valve | Occasional | Listen for humming noise | No |
| Lid switch failure | Rare | Check for error code | Yes |
| Faulty control board | Rare | Look for blank display | No |
Most homeowners overlook the inlet screens until the flow slows to a trickle. If your machine fills slower than usual, mineral deposits are likely blocking the mesh. Simply shut off the water, unscrew the hose, and scrub the screen with a stiff brush.
Distinguishing between a failed valve and a control board error is vital. If the machine hums but stays dry, the valve is jammed or broken. If the machine remains completely silent, the control board is likely failing to send the signal.
Never ignore a kinked hose. A sharp bend restricts pressure, which causes the internal timer to stall during the fill cycle. If your cycle hangs indefinitely, straighten the line to ensure proper water flow. This simple adjustment prevents the machine from timing out during the fill cycle.
Water supply valve issues
A closed or partially closed water supply valve is the most frequent reason for this issue. These valves are located behind your machine where the hoses connect to the wall pipes. If the handles are turned perpendicular to the hose, the water flow is stopped completely. Even if the handles appear open, they might be broken internally, meaning the valve core isn’t actually moving.
To test this, turn the handles to the “off” position, disconnect the hoses, and place them into a bucket. Turn the valves back on slowly. If water doesn’t spray out with force, the issue is with your home plumbing or the valve itself. If water flows fine into the bucket, the blockage is within the washer.
This check takes about 10 minutes. If you find the valves are the problem, you must replace the hardware. If you aren’t comfortable working with home plumbing, contact a professional plumber. If you aren’t comfortable working with home plumbing, contact a professional plumber or your appliance technician. Always remember that if you have a high-efficiency model, these machines require a specific water pressure to trigger the sensors; GE Appliances’ support guide confirms that low pressure can prevent the cycle from starting. If your pressure is low, contact your local water utility to ensure your home supply is within the recommended range.
Clogged inlet hose screens
Your washer has small mesh screens inside the ends of the intake hoses where they connect to the machine. These screens catch sediment from your water pipes. Over time, these screens get clogged with mineral deposits or debris, which slows or stops the water flow.
You can identify this by checking the water pressure at the faucet first. If the faucet pressure is strong, but the water barely enters the drum, the screen is likely blocked. To fix this, turn off the water supply and unscrew the hoses from the back of the washer. Use needle-nose pliers to gently pull out the mesh screens. Clean them under a running tap using a soft brush to remove any buildup.
If the screen is damaged or the debris is stuck inside the plastic frame, you need a replacement part. This is a simple repair that takes about 15 minutes. However, this isn’t for you if you have limited space behind your machine or if you can’t safely move the unit. If you find the hoses are brittle or leaking, you must replace them entirely. Never force the hose connections, as the plastic threads on the inlet valve can crack easily. If you cross-thread the connection, you’ll cause a leak that could damage your flooring.
Failed lid or door switch
A faulty lid switch tells the machine that the door is open, so the washer stops filling to prevent flooding. If the machine does not “see” that the lid is closed, it will simply sit idle or flash an error code.
You can confirm this by checking your user manual for the specific error code pattern for your model. If the washer makes no sound when you start a cycle, but the lights on the console are on, the switch is a prime suspect. To test this, locate the switch near the lid hinge. Press it manually with a finger to see if it clicks. If it feels mushy or doesn’t click, the internal spring is likely broken.
Replacing a lid switch varies by model — check the label on your control panel for the part number. This repair requires taking off the top panel or console. If you aren’t confident removing screws and clips, this is a job for a professional. If you decide to do it, always unplug the machine first. If you don’t have the right tools, stop and call a technician to avoid breaking the plastic housing or damaging the delicate wiring harness.
The less likely causes
- Failed water inlet valve: The solenoid inside the valve has burned out, which is confirmed if the machine hums but no water enters; this requires a technician.
- Control board error: The main computer has stopped sending power to the valves, which is confirmed by a total lack of response from the buttons; this requires a professional.
- Drain pump siphon: The drain hose is pushed too far into the standpipe, causing the water to drain out as fast as it fills; check that the hose end isn’t submerged.
- Water pressure drop: Your home’s main pressure regulator may be faulty, which is confirmed if other faucets in the house also have low flow; call a plumber.
What a fix usually involves
Fixing these issues depends on whether you’re dealing with plumbing or electrical components. Simple fixes like cleaning a screen or unkinking a hose require only basic tools like pliers and a bucket. These tasks cost nothing if you have the tools at home. If you need a new inlet valve or a lid switch, these are specific parts that you must order for your model. You can find the correct part number on the manufacturer’s website by entering your serial number.
The cost of parts ranges from a small part for a switch to a significant portion of the price of a new one for a main control board. If you choose to hire a professional, you’ll pay for their time, a service call fee, and the markup on the parts. Before you commit to a repair, ask for a written quote. If the technician suggests a repair that costs more than half of a new machine, consider if a replacement is better. Always check your warranty status first, as some repairs might be covered.
Frequently asked questions
Can I fix a washer that won’t fill myself?
Yes, you can fix many common filling issues yourself if the cause is a closed valve, a kinked hose, or a dirty inlet screen. These tasks require basic tools and don’t involve opening the internal electrical housing. If the problem is an internal valve or a control board, you should call a professional, as these parts require specialized knowledge to install safely.
Why is my washer making a humming sound but not filling?
A humming sound often means the machine is trying to open the water valve but can’t pull water through. This happens because the supply valve is closed, the screen is blocked, or the valve solenoid has failed. Check your water supply faucets first to ensure they’re fully open, then inspect the inlet hoses for any bends that might be stopping the flow of water.
How long does it take to clean the inlet screens?
Cleaning the screens usually takes about 15 to 20 minutes. You need to pull the machine out, turn off the water, unscrew the hoses, and scrub the mesh filters. If you have tight space behind the machine, allow extra time to move it safely. Always check that the water is fully off before you disconnect the hoses to prevent a flood.
Is it safe to leave the water valves open all the time?
Yes, it’s standard practice to leave the hot and cold water supply valves open while the machine is installed. These valves are designed to stay open until the machine’s internal valve signals for water. If you’re going away for a long time, turning them off is a good way to prevent potential leaks while you aren’t home to monitor the area.
What happens if I use the wrong hose for my washer?
Using a non-standard or damaged hose can lead to leaks or restricted water flow. Always use the braided stainless steel hoses recommended by the manufacturer to ensure they can handle the pressure of your home plumbing. If you use a thin rubber hose, it may kink or burst over time. Check your manual for the exact hose specifications required for your specific model.
Does it matter if the water is cold or hot?
No, the machine will still fill even if one of the supply lines is closed, but you won’t be able to achieve the correct temperature for your cycle. If the machine detects no water flow from the selected valve, it may pause or show an error code. Ensure both hot and cold lines are connected and the valves are fully open for the best performance.
Final Thoughts
If these simple checks don’t resolve the issue, there’s likely a problem with the inlet valve or the control board itself. Since these parts involve electrical components, it’s best to contact a professional repair technician. They’ll have the right tools to get your laundry routine back on track quickly.
Related guides
- Freezer Leaking into Fridge: Top Fixes to Stop Water Damage
- Whirlpool Refrigerator Leaking Water Inside: Causes and Fixes
- Electrolux Washer Not Filling With Water: Top Fixes and Tips