
You can often resolve your issue when you find your Oticon charger not working by cleaning the charging contacts or ensuring a secure power connection. Most power problems stem from debris blocking the connection or a loose cable rather than a total hardware failure. If your device remains unresponsive after these basic checks, it’s time to contact your hearing care professional for further diagnosis.
Why your Oticon charger not working
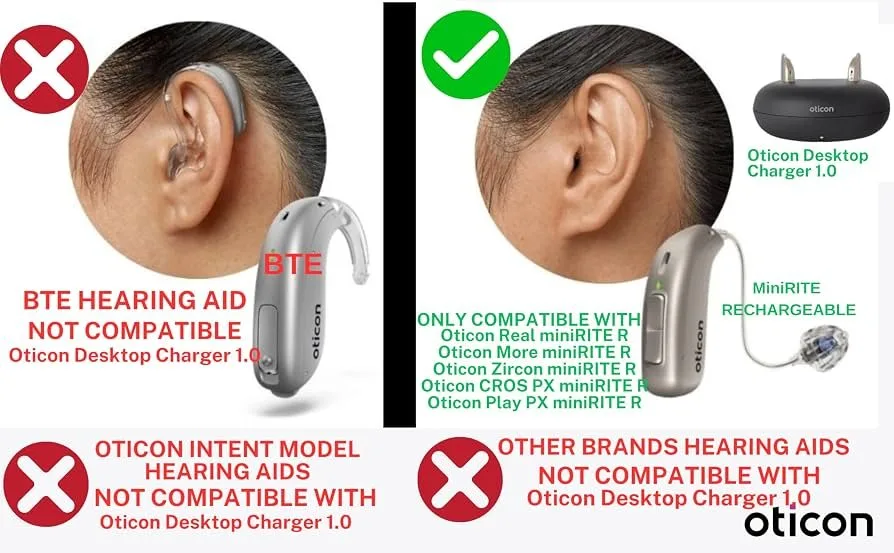
Hearing aid chargers are precision devices that rely on clean, metal-to-metal contact to transfer energy. The most common reason for a failure is the buildup of earwax, skin oils, or dust on the charging pins. These tiny particles act as an insulator, preventing the electrical current from reaching the hearing aid battery. Because the contacts are recessed, they’re easy to overlook during your daily cleaning routine.
Another frequent cause involves the power source itself. If you’re using a third-party wall adapter or a computer USB port, the power output may be insufficient for the charging cycle. Oticon chargers require a stable voltage to initiate the handshake process between the charger and the hearing aid. If the voltage drops during this initial phase, the charging lights will remain dark or blink in an error pattern.
Finally, internal hardware degradation can occur if the unit has been exposed to extreme temperatures or moisture. While these chargers are designed for daily use, they aren’t waterproof. If the internal electronics sustain damage from humidity, the unit will stop recognizing the hearing aids entirely. Always verify your specific model’s requirements by checking the official Oticon support resources to ensure you’re using the correct power adapter and cable provided with your device.
Clean the charging contacts
If your charger isn’t responding, start by inspecting the charging wells for visible debris. You should use a dry, soft-bristled brush or a clean cotton swab to gently remove any wax or dust from the metal pins. Never use liquid cleaners, alcohol, or sharp metal tools, as these can permanently damage the sensitive gold plating on the contacts.
If you see a dark film or corrosion on the pins, gently rub them with a dry, lint-free cloth. Once the contacts look clean, place your hearing aids back into the wells and press down firmly to ensure they’re seated. If the LED indicators remain off, try plugging the charger into a different wall outlet. If you have a second cable that matches the specifications, swap the cable to rule out a broken wire.
This fix is intended for users who can see clear obstructions in the charging bay. If you don’t see any debris and the charger still doesn’t power on, you shouldn’t attempt to force the hearing aids into the wells. Forcing them can bend the charging pins, turning a simple power issue into a hardware repair. If you’re unsure about the condition of the pins, stop immediately and visit your local hearing clinic.
Verify the power source
A common mistake is plugging the charger into a low-power USB port on a computer or an old phone charger. These ports often don’t provide the constant current needed for the charging process to complete. You should always use the original wall plug that came with your Oticon system. If you have lost the original plug, verify that the replacement adapter provides the exact voltage and amperage listed on the bottom of your charging case.
If you’re using a power strip or a surge protector, try moving the charger directly to a wall outlet. Sometimes, the internal breaker in a power strip can trip if it detects a minor power fluctuation, which cuts off the flow to smaller devices. If the charger light flashes orange or red immediately after plugging it in, the unit is detecting a power error. Unplug the unit for sixty seconds to reset the internal controller before trying again.
This step is for users who suspect a power supply issue. If the charger remains dead after testing a different, manufacturer-approved wall outlet, the fault likely lies within the charger’s internal circuitry. At this point, the device has reached its limit for home troubleshooting.
Seek professional support
When the charger shows no lights despite being plugged into a verified power source, the internal components have likely failed. Attempting to open the casing will void your warranty and may cause permanent damage to the device. If you have tried different outlets and confirmed the contacts are clean, your next step is to call your audiologist or hearing care professional.
They have specialized equipment to test the current flow of the charger. If the unit is still under warranty, they can facilitate a replacement through the manufacturer. If it’s out of warranty, they can determine if a repair is cost-effective or if you need a new unit. Don’t buy a generic replacement online, as these often lack the specific safety protocols required to manage lithium-ion batteries safely.
This is the right path if you have exhausted your own diagnostic checks. It’s worth the time to have a professional verify the hardware, as they can sometimes perform a factory reset on the charging unit that isn’t available to the public. If the cost of the repair exceeds the price of a new unit, they will advise you on the best path forward.
What not to do
Never use a metal needle or a pin to scrape the charging contacts. This scratches the protective rhodium or gold plating, exposing the base metal to sweat and humidity, which causes permanent rust.
Don’t submerge the charger in water or use wet wipes to clean the wells. Liquid easily wicks into the housing, triggering a short circuit that fries the internal motherboard. If the wells are visibly dusty, use only a dry, soft-bristled brush or a blast of compressed air.
Never force a hearing aid into a port if it resists. You risk snapping the delicate charging pins, a mechanical failure that usually requires a complete unit replacement. If the device doesn’t seat, check for debris or earwax buildup first.
Avoid using generic, high-speed phone charging bricks. These often lack the voltage regulation required for sensitive medical electronics. If your charger gets hot to the touch during use, switch to a lower-wattage adapter immediately.
How to stop it happening again
Establish a routine to keep your equipment clean and powered correctly to prevent future service interruptions.
| If you’re doing this | Do this instead | Why |
|---|---|---|
| Cleaning with a damp cloth | Use only a dry, soft brush | Moisture causes electrical shorts |
| Leaving the charger in the sun | Store in a cool, dry place | Heat degrades internal battery cells |
| Using any random USB cable | Use only the provided cable | Prevents voltage mismatch issues |
| Leaving the unit plugged in 24/7 | Unplug during long absences | Protects against power surges |
Switch immediately to the original manufacturer cable to avoid frying the internal logic board. A simple rule applies: if the cable didn’t come in the box, don’t trust it for long-term power delivery.
Frequently asked questions
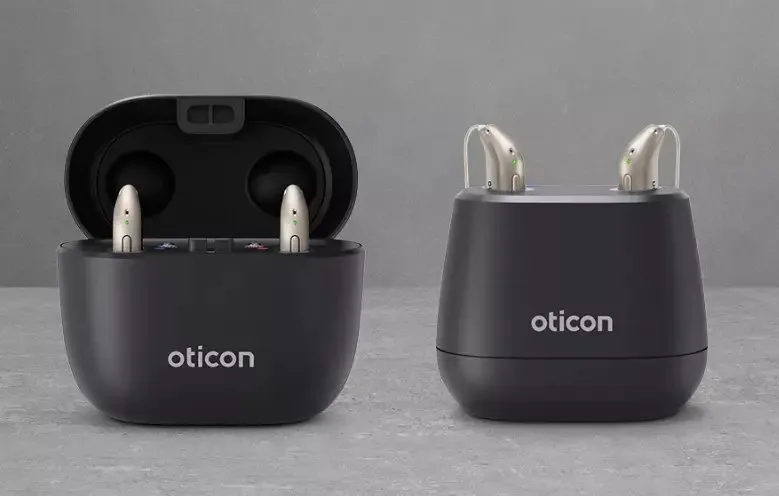
Can I use a different charger for my Oticon hearing aids?
No, you must use the charger specifically designed for your hearing aid model. Each charger is calibrated to provide the exact voltage and current your battery requires. Using an incompatible charger may cause improper charging or overheating.
Why is my charger light flashing red?
A red flashing light indicates a communication error or dirty charging contact. Wipe the bottom of your hearing aid with a clean, dry cloth and reinsert it firmly. If the light persists, the unit can’t establish a stable connection.
How long should an Oticon charger last?
These chargers generally last for several years with proper care. Longevity depends on keeping the contacts clean and protecting the unit from extreme temperatures. If your hearing aids fail to hold a charge, the issue may be the batteries themselves.
Is it safe to leave my hearing aids in the charger overnight?
Yes, it’s safe to leave your hearing aids in the charger overnight because modern models stop drawing power once full.
What happens if I get water inside the charging wells?
If water enters the charging wells, immediately unplug the device and turn it upside down. Allow the unit to air dry in a well-ventilated area for twenty-four hours. Don’t use external heat sources, as they can warp the housing.
Final Thoughts
If you’ve tried these fixes and the lights still won’t turn on, don’t worry. You shouldn’t have to struggle with your hearing aids alone. Reach out to your local clinic to schedule a quick inspection; they’ll be happy to help you get back to clear, effortless listening as soon as possible.