
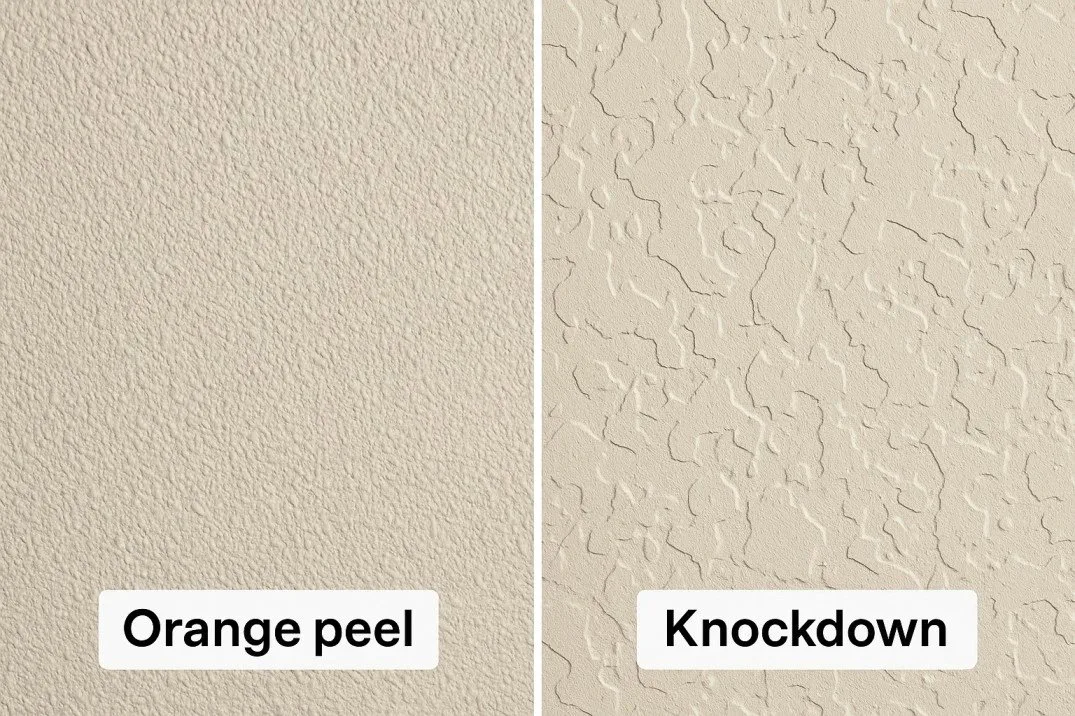
The best choice for your home depends on your budget and wall condition, but Orange Peel Vs Knockdown finishes are the two industry standards for hiding imperfections. Orange peel is the better pick for high-traffic areas because it’s easier to touch up and hides small surface flaws without extra labor. Knockdown is the superior choice if you prefer a modern, subtle look that adds visual depth to large, flat walls. If you have deep cracks or poor drywall seams, knockdown covers these better than the lighter orange peel texture.
Orange Peel Vs Knockdown: Which Texture to Choose
| Method | How long | Effort | Cost | Best for |
|---|---|---|---|---|
| Orange Peel | 1–2 hours | Low | Low | High-traffic areas |
| Knockdown | 3–4 hours | Medium | Medium | Large, flat walls |
| Smooth Wall | 6+ hours | High | High | Modern, minimalist |
The time estimates above assume a standard 10×12 foot room. Orange peel is a simple spray-on finish, while knockdown requires spraying and then waiting for the compound to set before you manually flatten the peaks with a trowel.
Choose orange peel if you have imperfect drywall, as the texture hides minor dings. Use knockdown for high ceilings to mask uneven lighting shadows. Reserve smooth wall finishes for rooms with direct, low-angle sunlight, as any imperfection will be glaringly obvious.
A common mistake is underestimating the drying time for smooth walls. If you rush the skim coat, moisture trapped underneath will cause bubbles later. If you’re a beginner, stick to orange peel. It’s the only method that allows for easy spot-patching without redoing the entire wall. If you have a professional sprayer, knockdown is the fastest way to cover a large basement. If you’re working by hand, avoid knockdown entirely.
Spraying a fine texture
This method uses a hopper gun to create a light, bumpy surface that looks like the skin of an orange. It’s the most common way to finish residential walls because it’s fast and cheap.
Mix joint compound with water until it reaches the consistency of thin pancake batter. If the mixture drips off your mixing paddle too quickly, it’s too thin and will run down the wall. If it clings in thick clumps, add more water.
Fill your spray hopper and set your air compressor to 25–30 PSI for a fine mist. Keep the nozzle about 18–24 inches from the wall, moving in a steady, circular motion to ensure even coverage.
Test your pattern on a scrap piece of drywall first. If the texture looks too coarse, increase the air pressure by 5 PSI. If it looks too sparse, tighten the hopper orifice.
Let the texture dry for 24 hours before you apply any primer or paint.
This finish is excellent for hiding minor drywall tape lines or small dings. It’s very forgiving for beginners because you don’t need perfect technique to get a decent result. However, it can look dated compared to smoother finishes. If you’re working in a room with high humidity, always ensure your ventilation prevents mold growth on porous wall textures. Moisture trapped in the crevices of the texture can lead to long-term surface degradation.
Flattening the wet texture
Knockdown creates a unique, mottled appearance by taking a heavy spray texture and pressing it flat. It’s more sophisticated than orange peel but takes more patience to master.
-
Spray a heavy, thick layer of joint compound onto the wall using a larger nozzle setting on your hopper gun. You need a consistency similar to pancake batter to ensure the peaks hold their shape before the blade hits them.
-
Wait 10–20 minutes until the surface peaks begin to lose their shine and look dull. If you start while the compound is still glossy, the knife will smear the texture rather than flatten it.
-
Drag a wide, flat knockdown knife across the wall at a 30-degree angle to flatten the peaks without removing the base. Keep the knife edge clean by wiping it every three passes; dried buildup on the blade causes unsightly streaks.
-
Allow the wall to dry completely, usually 24 hours, before sanding down any sharp edges.
This method is great for adding character to a room and covering larger surface imperfections. It isn’t for people who want a perfectly smooth, modern look. If you lack a steady hand, you risk gouging the base coat, which forces a time-consuming re-skim of the entire wall.
Simple manual application
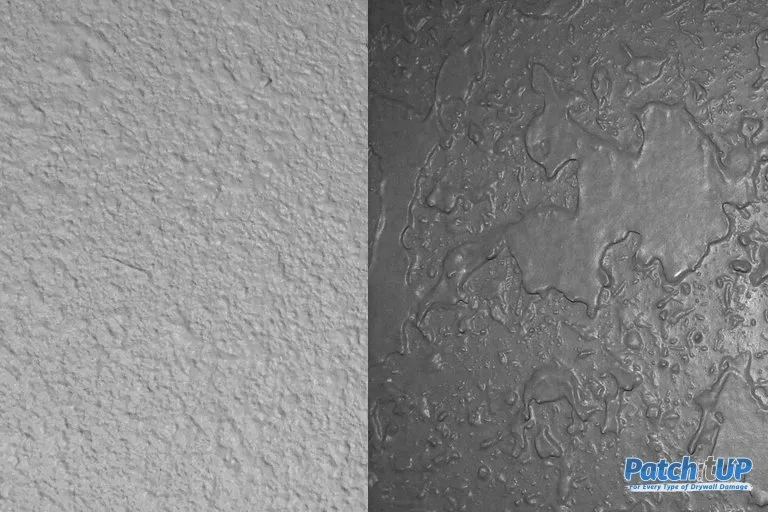
This approach involves using a roller to apply a thick coat of texture rather than spraying it. It’s the only way to add texture if you don’t own an air compressor or a hopper gun.
- Use a 3/4-inch or 1-inch nap roller cover to apply joint compound directly to the drywall. A thinner nap will fail to hold enough material to create a distinct, raised pattern.
- Press the roller firmly into the wet compound to create irregular peaks and valleys.
- Lightly go over the area again to break up any large clumps and create a uniform pattern.
- Let the wall dry for 24 hours and then lightly sand the high points to create a softer finish.
This is the best method for small patch jobs where setting up a spray rig is too much work. It’s very affordable but can be physically tiring for large rooms. If you try to do a whole house this way, you’ll likely find the texture inconsistent across different walls.
The primary mistake is over-thinning the compound. If the mixture drips off the roller like paint, it will flatten out before it sets. Aim for the consistency of thick cake batter. If you’re covering a patch larger than four square feet, switch to a hopper gun; otherwise, the compound will begin to dry unevenly, leaving visible lap marks where your sections meet.
Which one should you use?
If you’re in a hurry, choose orange peel. It goes on quickly and doesn’t require the extra step of flattening the peaks with a knife. You can spray a room in minutes and paint it the next day.
If you’re doing this for the first time, choose orange peel. The margin for error is much higher because the spray pattern is random. If you miss a spot, you can easily spray over it without the texture looking strange. Knockdown requires you to time the “knockdown” step perfectly; if you wait too long, the compound becomes too hard to flatten, and if you go too early, you’ll smear the whole wall.
Knockdown can be performed by one person by spraying a manageable section and then immediately flattening it before moving to the next section. If you try to manage both steps solo, the compound will dry unevenly, leaving you with a patchy, unprofessional finish that’s difficult to sand down.
If you want the best possible result whatever it takes, choose knockdown. It provides a high-end, custom look that hides imperfections better than any other texture. It creates a professional, artistic finish that makes a room feel finished and intentional. The trade-off is clear: orange peel is for speed and ease of maintenance, while knockdown is for aesthetic impact and covering deep wall flaws.
The rules that apply whichever way you choose
Regardless of your chosen method, you must prepare the surface properly. Ensure the drywall surface is clean and dust-free before spraying; if the drywall is bare, a coat of primer can help with uniform suction, but it isn’t strictly required for adhesion. Check your local building codes regarding fire-rated walls, as adding heavy layers of compound can sometimes change the fire-resistance rating of a partition in specific commercial or multi-family buildings.
You must also protect your floors and trim with heavy-duty plastic sheeting and painter’s tape. If you aren’t comfortable using power tools or working at heights, hire a licensed contractor who specializes in drywall finishing. The biggest mistake people make is thinning the compound too much; if it’s too runny, it will drip down the wall and create a mess that’s impossible to fix without scraping it off and starting over.
Always test your spray pattern on a scrap piece of cardboard before you touch the actual wall. This allows you to adjust your air pressure and nozzle size until you get the look you want. If you’re working in an older home, inspect the walls for lead paint before sanding, as disturbing hazardous materials requires professional abatement according to local environmental regulations.
Frequently asked questions
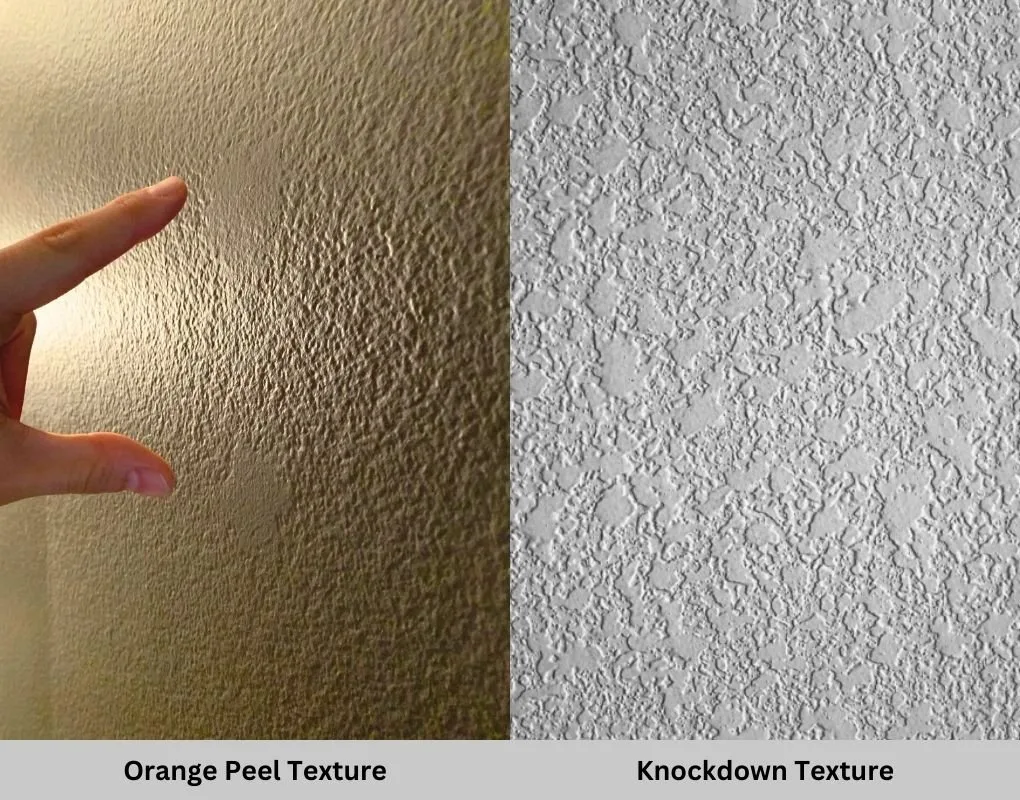
Can I spray texture over painted walls?
Yes, you can spray texture over painted walls, but you must clean the surface and apply a bonding primer first. If the old paint is glossy, the new compound won’t stick well and might flake off later. A clean, dull surface is necessary to ensure the new texture stays in place for years.
How long does texture take to dry?
The texture needs 24 hours to dry completely before you can safely paint it. This assumes you’re working in a room with standard temperature and humidity levels. If the room is cold or damp, you should wait at least 48 hours to avoid trapping moisture under the paint.
Is it safe to do this myself?
Yes, it’s safe if you use proper safety gear like a dust mask, goggles, and a long-sleeved shirt. The primary risks are inhaling drywall dust and getting compound in your eyes. If you aren’t confident handling a hopper gun or working on ladders, consult a professional finisher to avoid injury or damage.
What happens if I make a mistake?
If you make a mistake, you can scrape the wet compound off with a wide drywall knife and re-spray the area immediately. If the compound has already dried, you’ll need to sand it down or use a damp sponge to soften the texture before you can fix it.
How do I match an existing texture?
To match an existing texture, test different nozzle sizes and air pressures on a piece of cardboard until the pattern looks identical. It’s almost impossible to get a perfect match on the first try, so keep adjusting your settings until the sample matches the wall’s current finish.
Final Thoughts
Choosing between these textures really comes down to your personal style and how much effort you want to put into maintenance. Once you’ve decided on the right look for your space, grab a small piece of scrap drywall to practice your technique. You’ll feel much more confident before you start the real project.