
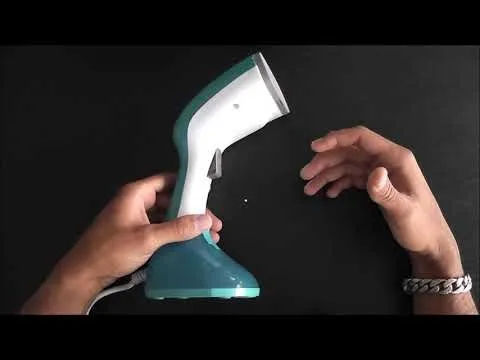
A Beautural steamer not working is usually caused by mineral buildup from hard tap water or a lack of water reaching the pump. Occasionally, the issue stems from a faulty power connection or a tripped safety sensor. Check the reservoir for debris and verify your power outlet. If the unit remains silent, the internal heating assembly may require professional service.
Why your Beautural steamer stopped working

| Cause | How common | How to confirm it | Fix it yourself? |
|---|---|---|---|
| Mineral scale buildup | Very common | Check tank for white flakes | Yes |
| Air lock in pump | Common | Listen for pump noise | Yes |
| Damaged power cord | Occasional | Inspect wire for cuts | No |
| Tripped thermal sensor | Occasional | Let unit cool down | Yes |
| Faulty power outlet | Occasional | Test with another device | Yes |
| Failed heating element | Rare | No heat after reset | No |
Mineral scale is the primary culprit in hard water regions. Use a vinegar soak to dissolve these flakes.
Air locks often occur after a water refill. If you hear a high-pitched whine or the pump runs dry, tilt the unit 45 degrees to release trapped bubbles.
A tripped thermal sensor is a safety feature, not a failure. If the unit shuts down during heavy use, wait 30 minutes. If it trips again immediately upon restart, the sensor is likely failing and requires professional replacement.
Distinguish a failed heating element from a tripped sensor by checking the power light. If the light remains on but the water stays cold, the element is dead. If the unit is completely dark, focus on the power cord or the outlet instead.
Mineral deposits blocking water flow
Mineral scale is the primary reason your steamer stops producing steam. When you use tap water, minerals like calcium and magnesium remain inside the heating chamber as the water evaporates. Over time, these minerals form a hard, white crust that blocks the tiny tubes where water should pass. If the water can’t reach the heating element, the machine won’t produce steam.
To confirm this, remove the water tank and inspect the intake area. If you see white or gray crusty deposits, scale is the culprit. You can fix this by performing a descaling process. Fill the reservoir with a mixture of half white vinegar and half distilled water. Plug the unit in and let it run for about 5 minutes on the highest setting in a well-ventilated area. If the steam begins to flow, the blockage is cleared. If it does not, the buildup is too dense for a simple rinse.
This process assumes the heating element is still functional; if the unit stays completely cold, the internal fuse may have blown due to the blockage. This varies by model—check the label on the base for specific voltage requirements and maintenance instructions. If you ignore the scale, the pump will eventually burn out from trying to push water through a closed system. This costs you the entire appliance, as replacing internal pumps is rarely economical. Use distilled water in the future to prevent this from happening again.
Air trapped inside the pump
An air lock occurs when air bubbles get trapped in the intake line, preventing the pump from drawing water into the heating chamber. This is common if you have recently run the steamer until the tank was completely empty. You’ll know this is the cause if the steamer makes a loud, buzzing, or grinding noise but no steam comes out. The pump is running, but it has nothing to push.
To fix an air lock, try to “prime” the pump. Fill the water tank to the maximum line. Hold the steamer in a horizontal position for a few seconds, then tilt it vertically while gently shaking it. This movement helps shift the air bubble out of the intake tube. If the machine begins to sputter and then produces a steady stream, the air lock is gone.
If this happens, don’t keep the power on for more than 30 seconds if no steam appears, as running the pump dry can cause it to overheat. This is a trade-off; you need the pump to run to clear the air, but running it dry too long will damage the motor. If you have done this for years, you know the sound of a healthy pump versus a dry one. If the noise doesn’t change after one minute of trying, the issue is likely a mechanical failure rather than an air lock.
Power and connection failures

A lack of power is a frequent, simple cause for a steamer that shows no signs of life. If the indicator light doesn’t turn on and there’s no sound from the motor, the unit isn’t receiving electricity. This is often not the steamer’s fault but an issue with the wall outlet or the power cable.
To confirm this, plug a different appliance, like a small lamp, into the same outlet. If the lamp doesn’t turn on, the outlet or the circuit breaker is the problem. If the lamp works, inspect the steamer’s power cord. Look for any fraying, kinks, or exposed wires, especially near the base of the handle where the cord enters the unit. If you find damage, stop using the device immediately.
Electrical safety is regulated strictly to prevent fires, and you should always follow the guidelines provided by the Consumer Product Safety Commission regarding damaged cords. Never attempt to splice or tape a damaged power cord yourself. If the cord looks perfect but the unit still won’t power on, the internal thermal fuse has likely tripped. This fuse is a safety feature that cuts power if the unit gets too hot. If this happens, you can’t reset it yourself. It’s a permanent safety break that requires a professional repair, which is often more expensive than buying a new unit.
The less likely causes
- Damaged heating element: If the unit powers on and the pump works but the steam remains cold, the heating element has likely failed and requires a professional technician to replace.
- Loose internal connection: A wire may have vibrated loose inside the housing, but since opening the casing voids the warranty and carries a risk of shock, this isn’t a do-it-yourself repair.
- Cracked water tank seal: If you notice water leaking from the bottom of the reservoir rather than flowing into the steamer, the seal is broken and the tank needs a replacement part.
- Safety switch failure: Some models have a tip-over sensor that prevents the steamer from working if it isn’t upright; if this sensor is stuck, the steamer will stay off even when standing correctly.
What a fix usually involves
Fixing a steamer depends entirely on the nature of the failure. Descaling the unit with vinegar and water takes about 15 minutes of your time and costs almost nothing, as it only requires household supplies. If the issue is an air lock, the fix is free and takes only a minute of effort. However, if the cause is a faulty internal component like a heating element or a tripped thermal fuse, the repair becomes much more difficult.
Parts for these devices are rarely sold to consumers, and professional labor costs often exceed most of the price of a new one. Before committing to a repair, check the manufacturer’s official website for your specific model to see if it’s still under warranty. If it is, contact their support team for a replacement or a factory-authorized repair. If the unit is out of warranty, it’s usually better to buy a new steamer rather than paying a technician to troubleshoot small internal parts. Always check the user manual for the specific descaling schedule for your model to avoid future repair costs.
Frequently asked questions
Can I use tap water in my steamer?
No, you should avoid using tap water because the minerals in it cause scale buildup. These minerals create a hard crust inside the heating chamber that eventually blocks the water flow. Using distilled water prevents this issue and keeps the internal parts clean. If you must use tap water, you’ll need to perform the descaling process much more frequently to keep the system running.
How long does a steamer last?
There’s no fixed lifespan for a garment steamer, as it depends on how often you use it and the water quality in your area. If you use distilled water and descale the unit every 20 to 30 uses, it can last for many years. Neglecting maintenance or using hard water will significantly shorten the life of the pump and the heating element.
Is it safe to open the steamer to fix it?
No, you should never open the housing of your steamer. Opening the unit voids your warranty and exposes you to live electrical components that carry a risk of shock. If the problem isn’t resolved by external cleaning or priming the pump, the device requires a professional technician. Attempting repairs yourself on internal electrical parts is dangerous and rarely results in a working unit.
Why does my steamer spit water?
Spitting happens when the heating element isn’t hot enough to turn all the water into steam. This is often caused by trying to steam too quickly or by scale buildup that prevents the water from reaching the correct temperature. Try waiting an extra minute for the unit to fully preheat before you begin. If it continues to spit, the internal thermostat may be failing.
What happens if I run the steamer dry?
Running the steamer without water will cause the pump to overheat and likely fail permanently. Running the pump dry can cause it to overheat and fail. Once the pump motor burns out, the steamer will no longer be able to pull water into the heating chamber. Always monitor your water levels to prevent this damage.
Does it matter if I use vinegar to clean it?
Yes, using white vinegar is the standard way to remove mineral deposits from the heating system. The acidity of the vinegar breaks down the calcium and magnesium deposits that block the internal tubes. Always rinse the reservoir and run a full cycle of fresh water through the unit after descaling to ensure no vinegar residue remains before you steam your clothes.
Final Thoughts
If these quick fixes don’t get your device steaming again, don’t worry. Check your purchase receipt to see if you’re still covered by the manufacturer’s warranty. It’s often better to reach out to their support team for a replacement than to risk taking the unit apart yourself. You’ll be back to wrinkle-free clothes soon.