
A coffee maker leaking from bottom components usually means a seal has failed or a hose has come loose inside the machine. You should immediately unplug the device to avoid an electrical short circuit or water damage to your countertop. This issue often stems from mineral buildup that forces internal connections apart or causes rubber gaskets to dry out and crack over time.
Reasons your coffee maker is leaking
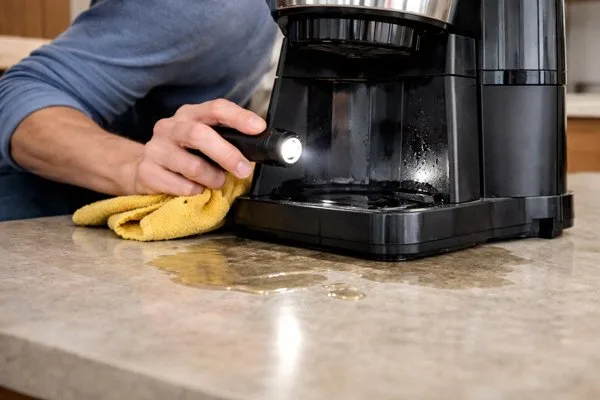
The primary cause of water collecting under your machine is the degradation of internal seals. Most modern brewers use silicone or rubber O-rings to keep water lines tight. When these materials age, they lose their flexibility and can no longer stop water from escaping under pressure. This varies by model — check the label or your manual for the specific material used in your unit’s internal plumbing.
Another frequent cause is limescale accumulation. If you live in an area with hard water, minerals like calcium and magnesium build up inside the heating element and tubes. This buildup restricts water flow, which can cause the pump to work harder or water to back up. This restriction can cause water to overflow or leak from overflow ports.
You might also have a cracked water tank. Even a tiny, invisible fracture at the base of the reservoir will slowly drip water down the internal chassis until it pools at the bottom of the unit. If you see water only when the tank is full, the reservoir itself is the most likely culprit. If the leak starts only when the machine is brewing, the issue is almost certainly a pressurized internal hose or a failing pump seal.
Check the reservoir and seals
This fix is for users who suspect the leak originates from the water tank or the connection point where the tank meets the base. First, remove the water reservoir and inspect the plastic for any visible cracks or chips. If you find a crack, you must replace the reservoir, as glue or tape won’t hold under the heat and pressure of a brewing cycle.
If the tank looks fine, check the valve at the bottom of the reservoir. This valve usually has a rubber gasket that keeps water contained until it locks into the machine. If the gasket is dirty, wipe it with a damp cloth to remove any coffee oils or scale. If the gasket is torn or missing, it will leak constantly. You can often find replacement valves or seals through the manufacturer’s official support page for your specific machine model.
If the valve is clean and intact, look at the base of the machine where the reservoir clicks into place. Ensure the receiving port is free of debris. If the machine still leaks, the internal seat for the valve might be warped. This is a common point of failure for brewers used in high-heat environments. If the plastic seat is warped, the unit requires a professional repair, as opening the base to reach internal components often voids your warranty.
Tighten internal hose connections
This fix is for users who have determined the leak happens only during the heating or brewing cycle, suggesting an internal pressurized hose has shifted. You’ll need a screwdriver to remove the outer casing of the machine. Before you start, ensure the machine is completely cool and unplugged. Never attempt to open the base while the unit is plugged in, as internal capacitors can hold a dangerous electrical charge even when the power is off.
Once the casing is off, look for signs of water tracks or white mineral crusts on the internal tubes. These crusts often highlight exactly where a slow leak has been occurring. If a hose is loose, push it firmly back onto its barbed fitting. If the hose looks stretched or brittle, you should replace that section of tubing with new food-grade silicone hose of the exact same diameter.
If the connection is tight but still drips, the hose clamp might have lost its tension. You can replace the spring clamp with a small stainless steel zip tie or a new hose clamp. If you aren’t comfortable working with electrical components near water, stop here and contact a small appliance repair shop. Attempting to force parts or using incorrect sealant can create a fire hazard or cause the machine to malfunction during the next heat cycle.
Replace the pump or heating unit
Photo: www.youtube.com on Google
This fix is for advanced cases where you have ruled out loose hoses and tank issues, and the leak is coming from the pump or the heater. This is usually not worth the effort if your machine is out of warranty, as the cost of replacement parts and your time often nears the price of a new, entry-level brewer. If you decide to proceed, you must be prepared to source specific parts from the manufacturer.
If the pump is leaking, you’ll see water dripping from the pump housing itself rather than from the tubes. Pump seals are rarely sold separately from the pump unit. You’ll need to remove the pump, disconnect the electrical leads, and install a matching unit. If the heating element is leaking, you’ll see water coming from the boiler assembly.
Don’t attempt to solder or patch a leaking boiler. The pressure inside a coffee boiler is high, and a failed repair can lead to a burst pipe or steam burn. If the boiler or pump is the source of the leak, the unit has reached the end of its safe, functional life. If you’re unsure about the electrical safety of your specific model, consult your owner’s manual for the manufacturer’s recommended service life.
What not to do
- Don’t use standard household glue or duct tape to fix cracks in the water reservoir or internal hoses. These materials can’t withstand the high temperatures of a coffee maker and will quickly degrade, leading to a larger, messier leak.
- Don’t attempt to bypass a safety thermal fuse if you find one while inspecting the internal components. These fuses prevent the machine from overheating if the water flow is blocked; removing them turns the brewer into a significant fire risk.
- Don’t leave the machine plugged in while you investigate the source of the water. Even a small amount of moisture inside the base can track across electrical contacts and cause an immediate short circuit or trip your home’s breaker.
- Don’t ignore a “slow” leak by just putting a towel under the machine. Constant moisture inside the base will eventually corrode the wiring and the internal circuit board, turning a simple seal repair into a total electronic failure.
How to stop it happening again
Regular maintenance is the most effective way to prevent seal degradation and pressure-related leaks.
| If you’re doing this | Do this instead | Why |
|---|---|---|
| Using tap water | Use filtered water | Reduces mineral buildup |
| Leaving the tank full | Empty after each use | Reduces pressure on seals |
| Cleaning with soap | Rinse with vinegar | Protects rubber gaskets |
Most users fail by only cleaning the exterior. Internal components accumulate scale that can interfere with proper gasket seating. In this case, don’t simply tighten the housing. You must replace the gasket immediately.
Frequently asked questions
Can I use a coffee maker that’s leaking from the bottom?
No, you shouldn’t use a coffee maker leaking from the bottom. Water inside the base can reach electrical components, creating a significant risk of short circuits or electric shock. Always unplug the unit and address the leak before attempting to brew again.
Why is my coffee maker leaking only when it’s off?
If your machine leaks while idle, the issue is likely a faulty reservoir valve or a cracked tank. Gravity pulls water through a compromised seal or hole when the pump is inactive. Check the rubber gasket at the tank base to ensure it’s clean and seated correctly.
How long does it take to fix a leaking coffee maker?
Minor repairs like cleaning a valve or tightening a hose typically take 30 to 45 minutes. You must safely open the casing to locate and adjust the source of the drip. If you require replacement parts, the repair process will take several days to complete.
Is it safe to use silicone sealant on a leaking coffee maker?
No, you shouldn’t use standard silicone sealant on a coffee maker. Most consumer-grade sealants aren’t rated for the high heat or food-contact safety standards required for brewing equipment. Always use official replacement parts designed for your specific brewer’s internal plumbing.
What happens if I ignore a small leak?
Ignoring a small leak will eventually cause internal metal components to rust and electrical connections to corrode. A minor drip can quickly lead to a total failure of the heating element or control board. It’s much cheaper to fix a loose hose than to replace a corroded machine.
Final Thoughts
If the leak persists after you’ve checked the internal seals, it’s likely time to contact the manufacturer or a professional repair service. Don’t risk using a faulty machine, as it won’t get any safer on its own. Replacing the unit might be the most cost-effective way to keep your kitchen dry and safe.
Related guides
- Ge Washer Leaking from Bottom: Causes and Quick Fixes
- Cuisinart Coffee Maker Buttons Not Working? Easy Fixes Inside
- How to Clean a Ninja Coffee Maker: Easy Steps for Fresh Coffee