
A Brita Pitcher Light Not Working is almost always caused by a dead battery or a sensor that has lost its connection to the filter lid, and you can usually resolve this by resetting the indicator or replacing the electronic unit. The most common cause is simply a battery that has reached the end of its typical lifespan, which occurs after about six months of regular use. If the light doesn’t flash after a reset, the internal electronics have likely failed, which means the indicator will no longer track your filter life.
Why your Brita pitcher light not working
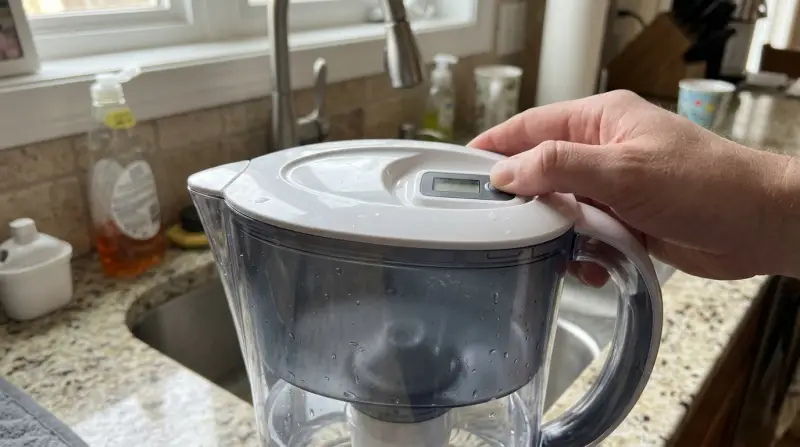
The indicator on your pitcher is a simple electronic timer rather than a flow-based sensor. It relies on a small, sealed battery and a button-activated circuit to track time. When you press the reset button, you’re telling the device to start a new countdown of approximately two months, which is the recommended lifespan for a filter.
The primary reason for failure is battery exhaustion. Because these units are sealed to prevent water damage, you can’t replace the battery manually. Once the power cell dies, the display goes blank and stays that way. Another frequent cause is moisture ingress. Even though the lids are designed to be water-resistant, repeated washing in a dishwasher—which isn’t recommended by the manufacturer—can force water into the electronic housing. This corrodes the delicate contacts or shorts the circuit board, causing the display to flicker or stop working entirely.
Some models require a specific sequence to reset the light. If you don’t hold the button for the duration required by your manual, the chip won’t recognize the command. Check the official Brita filter care instructions to confirm if your indicator is timer-based or electronic.
Reset the electronic indicator
This fix is for users who have just changed their filter but see no light or a blinking red light that refuses to turn green. To reset the system, press and hold the status button on the lid for 5 to 10 seconds. You’ll see the indicator light blink three times; this confirms the device has reset to its starting position.
If you hold the button and nothing happens, check if the electronic unit is pushed fully into the slot. Sometimes, the unit shifts during cleaning, breaking the physical contact needed for the button to register your press. If it’s seated correctly but the display remains dead, the battery is likely depleted. This fix isn’t for pitchers that have visible cracks or water trapped inside the display window, as those units are permanently damaged. If you don’t see a response after holding the button for 10 seconds, don’t force it. Applying excessive pressure can snap the plastic tabs that hold the indicator in place. If the light stays off, the electronics are likely at the end of their service life, and you’ll need to manually track your filter usage by marking a calendar or using a smartphone reminder.
Inspect for moisture damage
This fix is for pitchers that were recently submerged or run through a dishwasher cycle. If you suspect water has entered the lid, remove the electronic indicator unit from the lid assembly. Gently shake the unit to see if water droplets come out of the small gap near the buttons. If you hear sloshing or see condensation inside the clear plastic window, place the unit in a dry, warm area for 24 to 48 hours.
Don’t use a hair dryer or any high-heat source, as this will melt the plastic housing and destroy the internal components. Once the unit is completely dry, try pressing the reset button again. If the display returns, you have successfully cleared the moisture. However, if the screen remains blank or shows distorted segments after drying, the internal circuit has likely suffered permanent corrosion. This varies by model — check the label on your lid for a serial number, as some older versions have non-removable indicators. If your model doesn’t allow for the removal of the indicator unit, you shouldn’t attempt to pry it open with a screwdriver or blade. Doing so will void your warranty and likely snap the fragile plastic casing, making the lid unusable for filtration.
Replace the indicator unit

If the light is permanently off and the reset steps fail, you may need to purchase a replacement indicator unit. This is worth the effort if your pitcher is in good condition, but it isn’t recommended if the pitcher body is damaged, as a new lid can cost nearly as much as a basic replacement pitcher.
To determine if a replacement is possible, look for a small tab or slot on the underside of the lid where the electronic unit sits. If the unit slides out, you can order a replacement part directly from the manufacturer. When the new unit arrives, simply slide it into the existing slot until it clicks.
If your specific model has a molded, non-removable indicator, you can’t replace the electronics individually; you must replace the entire lid. Before buying a replacement, verify your pitcher’s model number, as these units are rarely universal.
Check the base of the pitcher or the underside of the handle for a stamped alphanumeric code. Using a part designed for a different model will often lead to a poor fit. This mistake allows unfiltered water to bypass the filter or causes the lid to sit incorrectly on the pitcher rim. If the lid doesn’t create an airtight seal, the gravity-fed filtration process will slow significantly or fail to engage entirely. Always cross-reference your specific batch code with the manufacturer’s compatibility chart before finalizing your checkout.
What not to do
Don’t place the lid in the dishwasher. The high heat and intense water pressure will force moisture into the sealed electronic housing, permanently destroying the battery and circuit board. Once the seal is compromised by heat, the unit will fail within three cycles.
Don’t use a pin or needle to press the reset button. This can puncture the rubberized button cover, creating a permanent entry point for water that will cause the unit to fail within weeks. If the button is stuck, use only a soft, rounded plastic stylus to apply pressure.
Don’t attempt to open the electronic housing with tools. The internal battery is soldered to the board; trying to pry it open will lead to a broken case and potentially sharp plastic edges that make the lid dangerous to handle. This action immediately voids your warranty.
Don’t ignore a blinking red light. While the water may still be filtered, a blinking red light indicates the filter is past its capacity, which means the carbon and resin are no longer effectively removing contaminants. If you see this light, replace the filter as soon as possible to ensure optimal filtration performance. Replace the filter cartridge before your next use to ensure safety.
How to stop it happening again
The best way to keep your indicator working is to treat the lid as a hand-wash-only component. By keeping the electronics dry, you extend the life of the battery and the integrity of the seal.
| If you’re doing this | Do this instead | Why |
|---|---|---|
| Washing in the dishwasher | Hand wash with warm, soapy water | Prevents heat and pressure damage |
| Ignoring the reset button | Reset every time you change the filter | Maintains accurate tracking cycle |
| Forcing the button | Press firmly but gently | Protects the fragile internal switch |
| Storing in direct sunlight | Keep away from windows | Prevents plastic brittleness and fading |
Most users make the mistake of submerging the entire lid during cleaning. This mistake costs you the internal timer, which often fails within three months if water ingress occurs. If you notice the display flickering or showing ghost numbers, stop using it immediately. Place the lid in a dry, ventilated area for forty-eight hours. If the display returns to normal, you have avoided permanent corrosion. If the screen remains blank, the seal has already failed.
Frequently asked questions

Can I change the battery in my Brita indicator?
No, the battery is permanently sealed inside the unit to protect it from water damage. Because the unit must remain waterproof to function, the manufacturer doesn’t design it for user service. Attempting to open the casing will destroy the seal and ruin the internal electronics.
How long should the indicator light last?
The battery is designed to last approximately six months under normal household conditions. This estimate is based on the standard filter replacement schedule of 40 gallons of water. If you use your pitcher more frequently, the battery or timer may expire sooner than expected.
Is it safe to drink the water if the light is off?
Yes, it’s safe to drink the water as long as your filter is within its effective lifespan. The indicator light is only a convenience tool and doesn’t monitor actual water quality. If the light fails, track your filter changes manually to ensure replacement every two months.
What happens if I ignore the filter change?
Using a filter past its capacity means the media will become saturated and stop removing contaminants. Once the carbon and resin are full, they can no longer trap impurities like chlorine or heavy metals. It’s best to replace the filter on time regardless of the indicator light.
How do I know if my filter is actually working?
You can determine if a filter is working by the water flow speed and taste. A fresh filter provides a steady drip rate, while a clogged filter slows to a trickle. If the water tastes like tap water again, your filter has reached its limit and needs replacement.
Final Thoughts
If you prefer not to replace the electronic part, you can simply track your usage with a calendar or a reminder app on your phone. It’s a reliable way to ensure you don’t forget to swap your filter. You’ll still enjoy fresh, clean water without needing to worry about the blinking light.
Related guides