
A door saddle and a threshold are often used as the same term in common speech, but the primary distinction is that a door saddle sits directly under the door to block drafts, while a threshold is the full assembly that bridges the gap between different floor levels. You’ll find that Door Saddle Vs Threshold is a distinction based on function, as a saddle is a specific type of threshold designed for weather sealing, whereas a threshold refers to any transition piece at a doorway.
Door Saddle Vs Threshold: Key Differences
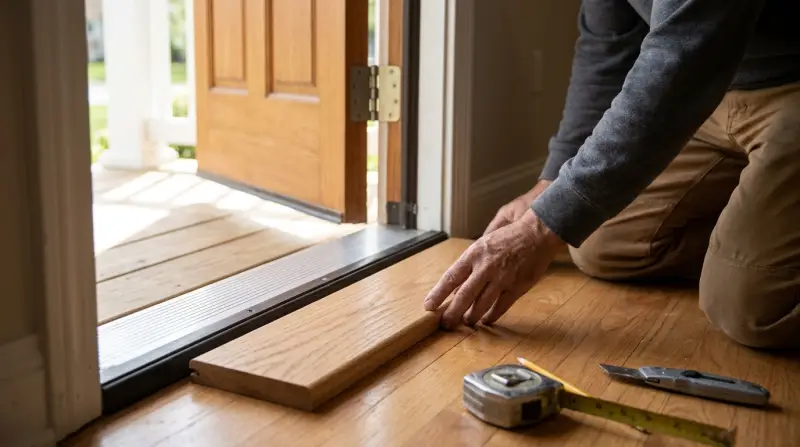
The following table outlines the differences between these doorway components based on their primary installation purpose and design.
| Method | How long | Effort | Cost | Best for |
|---|---|---|---|---|
| Standard Saddle | 30 minutes | Low | Low | Draft sealing |
| Full Threshold | 1-2 hours | Medium | Medium | Floor transitions |
| Adjustable Sill | 1 hour | High | High | Uneven gaps |
Choose the Standard Saddle if your floor is perfectly level and you only need to block light or air. If your flooring material changes at the threshold, such as moving from hardwood to tile, use a Full Threshold to hide the seam.
The most common mistake is installing an Adjustable Sill on a flat, even floor. This adds unnecessary cost and complexity. You should only select this option if your door gap varies by more than a quarter-inch across the frame. In that case, the mechanical adjustment is the only way to ensure a weather-tight seal. If the gap is uniform, stick to the simpler options to avoid future maintenance headaches.
Installing a sealing saddle
A door saddle functions as a barrier against air and moisture infiltration. It’s a simple, raised piece of material that provides a landing for the door bottom to press against when closed.
- Measure the width of your door frame from jamb to jamb using a steel tape measure.
- Cut the saddle material to length using a hacksaw or miter saw, ensuring the ends fit snugly against the door stops.
- Apply a thin bead of silicone sealant to the underside of the saddle to prevent water from seeping underneath the material.
- Secure the saddle to the subfloor with countersunk screws, ensuring the heads are flush so they don’t catch on the door bottom.
- Test the door swing to ensure the weatherstrip on the bottom of the door makes firm contact with the top of the saddle.
This method is excellent for upgrading an old exterior door that lets in cold air. It’s simple to install for anyone with basic hand tools. However, if the floor is significantly uneven, you may find that a rigid saddle leaves gaps at the corners. This varies by model — check the label for specific height requirements, as some saddles are too tall for standard interior door clearances.
Installing a transition threshold
A threshold bridges the gap between two different flooring types, such as tile and hardwood. It prevents tripping and creates a clean visual finish at the doorway.
Measure the exact distance between the two floor surfaces. If the gap exceeds one inch, a standard threshold will fail to bridge the span securely.
Choose a profile that matches the height difference, as specified by ANSI/BHMA A156.21 standards. If the height difference is greater than 1/4 inch, you must use a beveled transition to comply with ADA accessibility guidelines.
Trim the threshold to length. Cut the edges at a 45-degree angle if you’re working around door casing. A common mistake is cutting the threshold flush to the door jamb, which leaves a visible gap; always undercut the door casing so the threshold slides underneath for a seamless look.
Use construction adhesive for concrete subfloors or mechanical fasteners for wood. If you’re installing over radiant heating, avoid screws entirely to prevent puncturing the lines. Use a high-tack polyurethane adhesive instead.
Check for rocking by stepping on the ends. If it moves, add extra adhesive to the loose sections before the cure time expires.
This approach provides a durable, professional finish that hides raw floor edges. It’s ideal for high-traffic areas where you need to protect flooring materials from wear. One limitation is that a standard threshold doesn’t provide a weather-tight seal. Don’t use these for exterior doors where rain or wind is a concern, as they lack the necessary thermal break.
Installing an adjustable sill

An adjustable sill uses a mechanical screw system to move the top plate up or down. This allows you to create a perfect seal even when the door bottom isn’t perfectly parallel to the floor.
- Remove the existing door sweep or threshold piece to expose the subfloor.
- Position the sill base and ensure it’s level, using shims if necessary to account for floor dips.
- Fasten the sill base securely into the subfloor using the manufacturer’s provided screws.
- Place the door in the closed position and use a screwdriver to adjust the top plate height until it touches the door bottom.
- Verify the seal by sliding a piece of paper between the door and the sill; it should offer slight resistance when you pull.
Most installers make the mistake of over-tightening the screws. This binds the mechanism and prevents the plate from moving freely during seasonal shifts. If the plate doesn’t rise when you turn the screw, back it off a quarter turn.
This is the most effective way to eliminate drafts in older homes where the foundation has settled over time. It isn’t for the person who wants a “set it and forget it” solution, as you’ll need to re-adjust the height if the wood door expands or contracts with the seasons.
If your door has a metal bottom, you must ensure the sill plate is set low enough to prevent scratching. If the door drags, you have set the plate too high. If you aren’t confident in your ability to level the base, hire a professional carpenter to avoid creating a trip hazard.
Which one should you use?
If you’re in a hurry, use a standard saddle. It’s the fastest to install because it usually comes in pre-cut lengths and requires only basic drilling and screwing into place. This is your best choice for a rental property or a low-traffic utility closet where a perfect seal is secondary to time.
If you’re doing this for the first time, use a transition threshold. It’s the most forgiving method, as it doesn’t rely on the door’s position for its effectiveness and is generally easier to cut and fit than a mechanical sill. If your floor transitions between two different materials, like tile to hardwood, this style bridges the height gap without requiring precise shimming.
If you want the best possible result whatever it takes, use an adjustable sill. While it requires the most effort and precise calibration, it provides a superior seal against the elements that static saddles can’t match. Use this if you’re sealing an exterior door against drafts or water intrusion.
The trade-off is clear: simplicity and speed come at the cost of adjustability. A simple saddle is great for quick fixes, but it can’t fix a door that’s hanging unevenly or a floor that’s sloping. If your door has a visible gap of more than a quarter-inch at one corner, a static saddle will fail to stop air leaks.
If you choose a complex solution, you gain performance but increase the risk of an improper installation that could create a tripping hazard. Always check the manufacturer’s manual, as this varies by model. Check the label to ensure the product matches your specific door gap and floor material thickness.
The rules that apply whichever way you choose
Regardless of the method you pick, the door must still function smoothly. The most important standard is the clearance gap, which is governed by local building codes to ensure safe egress; if your threshold is too high, it may violate fire safety regulations. Always prepare the surface by removing old debris and adhesive residue, as any bumps underneath will prevent the new threshold from sitting flat.
Partway through the installation, check the door swing. If the door catches on the new threshold, don’t force it, as you’ll damage the door bottom or the hinge screws. At the end, verify that the threshold is fully supported by the subfloor along its entire length. If it sounds hollow or flexes when you step on it, add more support underneath before finishing.
If you need to cut into a metal door frame, this isn’t a do-it-yourself job. Consult a licensed contractor or a professional locksmith to ensure you don’t void your home warranty or compromise the security of your entryway. If the threshold is for a door that must meet ADA accessibility requirements, you must strictly follow the ramp slope and height limits set by the Americans with Disabilities Act.
Frequently asked questions

Can I install a door saddle over carpet?
No, a door saddle isn’t designed to sit on top of carpet. You should remove the carpet in the doorway area and install the saddle directly onto the subfloor to ensure it stays level and doesn’t become a trip hazard. If you must cross carpet, use a specific transition strip instead of a saddle.
Why is my door hitting the threshold?
Your door is hitting the threshold because the gap between the bottom of the door and the floor has decreased, likely due to door sagging or seasonal wood swelling. You can check the hinges first to see if they’re loose. If the hinges are tight, you may need to trim the bottom of the door or adjust the threshold height if you have an adjustable model.
How long does a threshold last?
A high-quality metal or hardwood threshold can last for many years with proper care.
Is it safe to glue a threshold down?
Yes, it’s safe to glue a threshold down if you use a high-strength construction adhesive intended for your specific floor material. Make sure the floor is clean, dry, and free of dust before applying the adhesive. For high-traffic areas, it’s often better to use screws in addition to glue to ensure the threshold doesn’t shift over time.
What happens if the threshold isn’t level?
If your threshold isn’t level, it will create a tripping hazard and may prevent your door from closing completely. You should use wooden or plastic shims underneath the threshold to fill any gaps before you fasten it down. If you don’t shim it correctly, the material will eventually crack or buckle under the weight of people walking over it.
Final Thoughts
Choosing the right piece for your home doesn’t have to be complicated. If you’re unsure which style fits your entryway, take a quick photo of your door frame and bring it to your local hardware store. They’ll help you pick the perfect fit so you don’t have to worry about drafts anymore.