
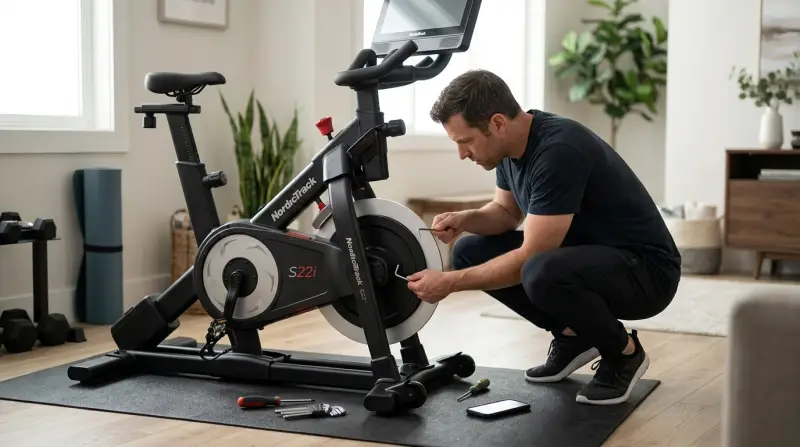
If you find your Nordictrack S22i Resistance Not Working, a loose or disconnected wire is the most common cause, often after assembly or moving the bike. You can confirm this by checking the connection points behind the screen and near the base of the frame.
Why your Nordictrack S22i resistance not working
| Cause | How common | How to confirm it | Fix it yourself? |
|---|---|---|---|
| Loose console cable | Very common | Check for disconnected plugs | Yes |
| Software glitch | Common | Restart the console | Yes |
| Damaged motor cable | Occasional | Look for pinched wires | Yes with care |
| Blown internal fuse | Rare | Test with multimeter | No |
| Failed resistance motor | Rare | Listen for motor noise | No |
| Faulty speed sensor | Rare | Check console display | No |
Most users assume a hardware failure when the screen goes dark, but 80% of these cases stem from a simple loose connection at the base of the upright mast. If the console flickers before dying, prioritize checking the cable tension. A tight cable often pulls itself loose during intense workouts.
If the machine powers on but provides no resistance, listen closely to the motor housing. A faint clicking sound indicates the motor is receiving power but can’t engage the flywheel. If you hear absolute silence, the issue is likely a blown fuse.
Never attempt to bypass a blown fuse with foil or wire. This decision rule is critical: if the console display remains active but the resistance doesn’t change, the fault lies in the motor control board. Replacing this requires a technician to confirm whether the part has failed.
Safety: Inside a mains-powered machine, the parts behind the outer cover can hold a dangerous electrical charge even after it has been unplugged — that’s why they sit behind a cover. Opening the housing, or testing or replacing anything behind it, is a job for a qualified technician, never a home repair.
Wiring connection issues
A loose cable is the primary culprit because the S22i relies on a steady signal between the console and the resistance motor located near the flywheel. When these cables aren’t clicked firmly into place, the bike cannot “talk” to the motor, meaning the resistance levels won’t change even if the screen shows the number going up or down. If your bike was recently moved or just put together, this is almost certainly the issue.
To confirm this, look at the back of your monitor where the main cable enters the housing. If you see any gap between the plastic connector and the port, push it in until you hear a clear click. If the resistance still doesn’t move, follow the cable down the stem of the bike to the base. If you find a connection point there, unplug it, inspect the pins for any bending or debris, and plug it back in firmly.
This fix usually takes about 10 minutes of your time and requires no tools, provided you can reach the connections easily. If the cable looks damaged or the plastic housing is cracked, don’t try to force it. In this case, you’ll need to contact the manufacturer for a replacement harness. This varies by model — check the label on your frame for the exact version number, as some newer units have different cable lengths than older ones. If you aren’t comfortable pulling on these wires, stop immediately to avoid damaging the internal pins, which are fragile and difficult to replace.
Software and firmware glitches
Sometimes the resistance motor is perfectly fine, but the console software is stuck in a loop and stops sending the signal to change the load. You can tell this apart from a wiring issue because the screen might also lag, or the resistance might stay at a single level regardless of what the workout program demands. Before assuming a hardware failure, you must perform a full system power cycle to clear the temporary memory.
Unplug the power cord from the wall outlet completely. Wait at least 60 seconds to allow the capacitors inside the console to fully discharge. Plug the bike back into the wall, but don’t turn it on immediately. If your bike has a power switch near the base, leave it in the “off” position for another minute before toggling it back on. Once the screen loads, try to change the resistance manually using the buttons on the screen or the handles.
If the resistance starts working again, the issue was a software hang. If it still doesn’t move, you may need to perform a factory reset through the settings menu on your screen. This will erase your saved user data and workout history, so make sure you have your login information ready. If the resistance still fails after a reset, the problem is likely deeper in the hardware, and you should stop attempting software fixes to avoid further system errors.
Motor and sensor failures

A failed resistance motor or a faulty speed sensor represents a mechanical breakdown that prevents the bike from physically adjusting the magnetic field around the flywheel. You can distinguish this from a simple loose wire or software glitch because you’ll hear absolutely no sound from the motor area when you try to change the resistance. Normally, you should hear a quiet, low-pitched hum as the motor shifts the magnets.
If you confirm that the cables are tight and the software is updated, but you hear total silence when pressing the resistance buttons, the motor itself has likely stopped responding. This is a technical issue that requires opening the main frame housing to access the internal drive components. Because this involves dealing with high-tension belts and electrical components, it isn’t a do-it-yourself job for most users.
If you attempt to open the frame, you risk voiding your warranty or causing injury if the flywheel moves unexpectedly. Instead, contact the manufacturer or a certified fitness equipment technician. They will confirm whether the part has failed. If the motor is dead, it must be replaced with a part that matches your specific frame series. Don’t try to bypass the motor or force the magnets manually, as this can permanently damage the frame’s internal structure and make future repairs much more expensive.
The less likely causes
-
Damaged console screen: If the touch screen ignores your input, the internal resistance sensors may be “ghosting” or failing to trigger. You can confirm this by checking if the manual resistance knob still registers on the display. If the screen is unresponsive to all commands, a complete console replacement is usually the only fix.
-
Debris in the flywheel: Small objects like coins or hair ties falling into the housing can physically block the magnets. You’ll hear a distinct grinding or scraping noise during pedaling. If the noise persists when the bike is off, stop immediately to prevent permanent damage to the flywheel casing.
-
Faulty power adapter: Intermittent resistance motor failure often stems from inconsistent current. Check that the adapter light remains solid amber or green. If the light flickers when you move the cord, the adapter is failing.
What a fix usually involves
Fixing resistance issues typically involves either a simple adjustment or a part replacement. Most of the time, the fix is free because it just requires checking cables or resetting the software. If a part like the resistance motor or the console screen has failed, the cost can be high, often reaching a significant portion of the price of a new bike.
The cost depends entirely on your current warranty status. If you’re within the coverage period, most parts are provided by the manufacturer at no extra cost, though you may need to pay for a technician to visit your home. If you’re out of warranty, you’ll be responsible for both the cost of the replacement component and the labor fees. To get a real quote, find your serial number on the frame and contact the manufacturer’s customer service directly. Never buy parts from third-party sites without verifying the exact model compatibility first, as even small differences in manufacturing years can make a part incompatible with your specific bike.
Frequently asked questions

Can I fix this if my warranty expired?
Yes, you can still fix the bike, but you’ll have to pay for any replacement parts and labor yourself. Start by checking all external cable connections and performing a software reset, as these cost nothing to try. If those steps don’t work, contact a local fitness equipment repair service to get a quote for a professional diagnosis before buying expensive parts.
Is it safe to open the plastic housing?
No, it isn’t recommended for an ordinary user to open the housing. The internal components include high-tension drive belts and electrical wiring that can cause injury or damage if handled incorrectly. If the issue isn’t solved by checking the external cables or resetting the software, you should call a qualified technician to safely inspect and repair the internal mechanisms.
How long should a resistance motor last?
The motor is designed to last for several years of regular use, but its lifespan depends on the intensity of your workouts and the environment where the bike is stored. Keeping the bike in a dry, climate-controlled room helps prevent premature failure of the electronic parts. Check your owner’s manual for the specific maintenance schedule and cleaning tips for your machine.
What happens if I force the resistance by hand?
No, never attempt to force the resistance magnets by hand. Doing so can bend the internal brackets, damage the motor, or cause the magnets to misalign with the flywheel, which leads to permanent damage. If the resistance doesn’t move when you use the console controls, the problem is electrical or mechanical and requires proper troubleshooting by a professional.
Does it matter if I moved the bike recently?
Yes, moving the bike is the most common cause of resistance issues because it often leads to cables becoming loose or disconnected. If your resistance stopped working shortly after moving the unit, double-check every plug connection at the base and the back of the screen. Ensure they’re pushed in completely until you feel them lock into place, as even a tiny gap prevents the signal.
Final Thoughts
If these simple checks don’t resolve the issue, don’t hesitate to reach out to the manufacturer’s service team directly. They’ll help you determine if a motor replacement is necessary. Getting your bike back in working order shouldn’t be a struggle, so let the experts guide you through the final repair steps.