
You can address most cooling or mechanical issues through Maytag Refrigerator Troubleshooting by checking the door seals, cleaning the condenser coils, and verifying your temperature settings before you call for service. The most frequent cause of a warm or noisy fridge is restricted airflow caused by dust buildup on the coils or a door that isn’t closing tightly. If your unit is less than a year old, check your official Maytag warranty information to see if the repair is covered before you attempt any manual adjustments.
Maytag Refrigerator Troubleshooting: Common Issues
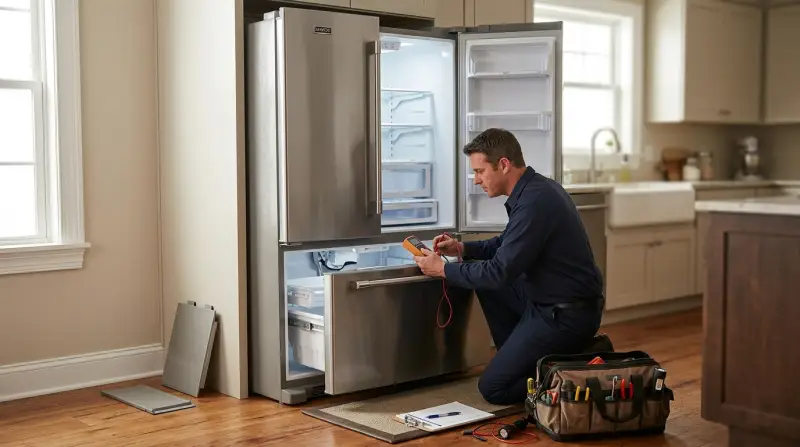
Most issues with these appliances stem from environmental factors or simple physical obstructions. A refrigerator works by moving heat from the inside to the outside through a series of coils. If these coils gather too much dust, the heat can’t escape, and the compressor must work harder. This leads to longer run times, higher energy bills, and eventual cooling failure.
Another common cause is the seal, or gasket, around the door. If this rubber strip becomes stiff, cracked, or dirty, cold air leaks out constantly. This forces the unit to run continuously to maintain a set temperature. You might notice frost buildup inside the freezer or water pooling under the unit when the gasket fails.
Finally, airflow inside the cabinet is essential. If you pack the shelves too tightly, you block the vents that circulate cold air from the evaporator fan. This creates warm spots in the fridge even if the freezer is working perfectly. In some cases, the problem is mechanical, such as a failing fan motor or a broken start relay. These parts wear out over time. If you hear a loud grinding noise or the unit is completely silent but the lights are on, the issue is likely electrical or mechanical. If you can’t identify the cause by cleaning the coils or checking the door, the system likely needs a professional diagnosis.
Adjust your temperature settings
If your food isn’t cold enough, start by checking the digital display or the manual dials inside the main compartment. Many users accidentally bump these controls while loading groceries. For a standard refrigerator, set the fridge to 37°F and the freezer to 0°F. If you change these settings, wait 24 hours for the appliance to stabilize before you judge the result.
If you have a digital control panel, check for error codes. A flashing light or a specific number on the display often indicates a sensor failure or a communication error between the control board and the cooling system. If you see an error code, look for your specific model number inside the door frame and search for the service manual online. This fix is for those who are comfortable navigating digital menus; if the controls are unresponsive or the display is blank, don’t attempt to open the control housing. That’s a task for a certified technician.
If the unit is too cold and food is freezing, lower the cooling intensity by one step. If the unit is too warm, increase it by one step. If these changes don’t affect the internal temperature after one full day, the issue is likely a faulty thermostat or a failing thermistor. Don’t attempt to replace these components yourself, as they require specialized knowledge of the appliance’s electrical system to avoid damage.
Clean the condenser coils
Cleaning the coils is an effective way to restore cooling performance if they have become obstructed by dust. The coils are usually located behind a kick plate at the bottom front or behind a panel at the rear. First, unplug the unit from the wall outlet to ensure your safety. Use a long-handled coil brush or a vacuum attachment to gently remove the dust, pet hair, and debris from the metal fins.
Be very careful not to bend the thin metal fins, as this can restrict airflow and actually make the cooling worse. If the coils are at the back, move the refrigerator slowly away from the wall to avoid kinking the water line that feeds your ice maker. Once you have removed the dust, vacuum the floor area under the unit as well. Plug the appliance back in and listen for the compressor to start.
This fix isn’t for everyone. If you have mobility issues or a heavy unit that’s difficult to slide, ask for help. If you notice any frayed wires or signs of burning while you’re cleaning, stop immediately and call a professional. Never use water or liquid cleaners on the coils or any electrical components, as this creates a serious shock hazard.
Check door seal integrity
A failing door seal is a common culprit for temperature fluctuations. To test the seal, place a thin piece of paper between the door and the cabinet and close the door on it. If you can pull the paper out with almost no resistance, the seal is too loose. Repeat this test every few inches along all four sides of both the fridge and freezer doors.
If you find a spot where the paper slides out easily, the gasket is likely warped or dirty. Start by cleaning the rubber gasket with a mixture of mild soap and warm water. Sometimes, a simple cleaning restores the tackiness and helps the door seal correctly. If the gasket is cracked or torn, it must be replaced.
This is a job you can do yourself by ordering the exact part for your model number. However, if the door itself is sagging or the hinge is bent, a new gasket won’t fix the problem. If you see the door is misaligned, don’t attempt to adjust the hinges if you lack the proper tools, as you can easily strip the screws or damage the door frame. If the door remains misaligned after you have tightened the hinge screws, it’s time to call a technician.
What not to do
Never use a sharp tool like a knife or screwdriver to chip away ice in the freezer. You’ll likely puncture the sealed refrigerant system, which requires a professional to repair and often costs more than the fridge is worth. If you accidentally pierce the line, you’ll hear a distinct hissing sound; immediately unplug the unit and leave the room to avoid inhaling refrigerant gases.
Don’t attempt to bypass the door switch or force the cooling to run by jumping electrical connections. This creates a severe fire risk and voids any existing manufacturer warranty. If the light stays on while the door is closed, replace the switch mechanism rather than taping it down.
Avoid using harsh chemicals or bleach on the interior plastic. These agents can cause the liner to become brittle and crack, eventually damaging the magnetic seals that keep cold air inside. Use only mild dish soap and warm water for interior surfaces.
Don’t leave the refrigerator running while deep-cleaning the coils if you must remove any panels. Always disconnect the power first to avoid accidental contact with high-speed fan blades.
Never attempt to “recharge” the refrigerant yourself. Federal law requires that only certified technicians handle sealed systems. You can’t legally purchase the necessary equipment or gas as an individual, and attempting to do so risks a hazardous pressure release.
How to stop it happening again
Regular maintenance keeps your appliance running efficiently and prevents small issues from becoming expensive repairs.
| If you’re doing this | Do this instead | Why |
|---|---|---|
| Ignoring dust buildup | Clean coils every 6 months | Prevents compressor overheating |
| Overloading the shelves | Leave space around vents | Allows cold air to circulate |
| Forcing the door shut | Check for items blocking it | Protects the rubber gasket seal |
| Leaving doors open | Close immediately after use | Stops moisture and temp spikes |
Most owners wait for an audible rattle before acting, but this is a mistake. By the time you hear noise, the compressor is already struggling against debris.
To determine if your unit is at risk, perform the “dollar bill test.” Place a bill halfway into the door seal and close it. If you can pull the bill out with zero resistance, your gasket is failing. Replace it immediately to prevent the motor from running continuously. If the bill stays firm, the seal is currently functioning.
Frequently asked questions
Can I fix a refrigerator that isn’t cooling?
You can fix minor cooling issues by cleaning the condenser coils, checking for airflow, and verifying temperature settings. These steps address most common performance problems. If the compressor fails to start or makes clicking sounds, contact a professional for a repair.
Why is my Maytag refrigerator making a loud noise?
Loud noises usually result from the evaporator fan hitting ice or the condenser fan hitting debris. Opening the doors helps isolate the source; if the noise stops, the evaporator fan is likely the culprit. Don’t remove the back panel to inspect the motor yourself.
How long should a refrigerator run?
A refrigerator should cycle on and off rather than running constantly. Constant operation often indicates a dirty condenser, a failing door seal, or low refrigerant. If the unit runs continuously and food isn’t cold, contact a professional to prevent motor burnout.
Is it safe to use a fridge that has a frost buildup?
Significant frost buildup indicates that moisture is entering the cabinet, usually due to a failing door seal or a blocked drain. While minor frost on the back freezer wall is normal, thick ice buildup reduces efficiency. If ice forms in the refrigerator section, the circulation system requires repair.
What happens if I ignore an error code?
Ignoring an error code can cause your refrigerator to run in a failsafe mode, potentially leading to food spoilage or permanent compressor failure. Most codes indicate specific sensor or control board faults that worsen over time. Consult your owner’s manual immediately to address the issue before the system shuts down.
Final Thoughts
If these simple fixes don’t restore your appliance’s performance, it’s best to contact a professional technician. Don’t let a minor problem turn into a costly breakdown. You’ll find it’s much easier to schedule a service visit online than to deal with spoiled food later. Keep your kitchen running smoothly by acting today.