
A Top Fin filter not working is usually caused by a clogged intake tube or debris in the impeller housing. Confirm this by checking that your tank water level covers the intake and listening for a humming motor. If the motor is silent, the unit may have suffered an internal electrical failure. Always check the official Top Fin product support page for specific troubleshooting steps for your model.
Why your Top Fin filter not working
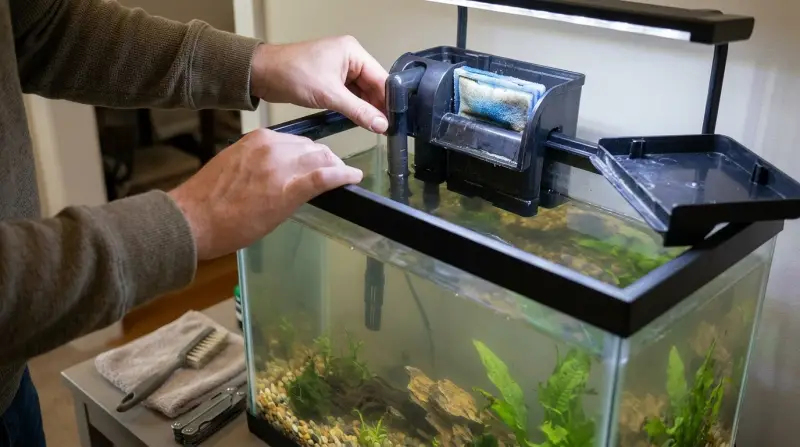
| Cause | How common | How to confirm it | Fix it yourself? |
|---|---|---|---|
| Clogged intake tube | Very common | Debris visible inside | Yes |
| Impeller jam | Common | Humming but no flow | Yes |
| Low water level | Common | Pump sucking air | Yes |
| Dirty filter media | Moderate | Very slow water flow | Yes |
| Damaged power cord | Rare | No power at all | No |
| Motor burn out | Rare | No sound, no flow | No |
Most intake clogs happen at the strainer grate. If you see debris, clear it by hand before disassembling the unit. A common mistake is ignoring the impeller shaft; if it feels gritty or resists rotation, clean it with a soft brush to prevent permanent motor seizure.
Low water levels often cause air locks. If the pump makes a sputtering noise, check your reservoir depth. It must stay at least one inch above the intake. If the water is deep enough but the flow remains weak, your filter media is likely saturated with bio-film. Replace it if it’s older than three months.
If the unit is silent and cold to the touch, test the outlet with a different appliance. If that appliance works, the pump’s internal fuse has likely tripped. Never attempt to bypass this fuse. If the cord shows any exposed copper, replace the entire unit immediately to prevent a short circuit.
Safety: Inside a mains-powered machine, the parts behind the outer cover can hold a dangerous electrical charge even after it has been unplugged — that’s why they sit behind a cover. Opening the housing, or testing or replacing anything behind it, is a job for a qualified technician, never a home repair.
Debris inside the intake tube
Clogged intake tubes prevent water from reaching the pump, which stops the filter from cycling. This usually happens because gravel, plant bits, or fish waste gets sucked into the tube during normal operation. You can confirm this by looking closely at the clear or plastic intake pipe; if you see dark matter blocking the path, the water can’t move.
To fix this, turn off the power and remove the intake tube from the filter housing. Rinse the tube under warm tap water until you see no debris remaining. This process takes about five minutes. If the tube is clear but flow remains weak, check the intake strainer at the bottom. If the strainer is covered in gunk, scrub it with a soft brush.
This assumes your tank is using the standard intake provided with the unit; if you have added extensions or pre-filter sponges, check those for clogs as well. A common mistake is leaving the strainer submerged in the gravel, which pulls in debris much faster than if it sits an inch above the bottom.
You can identify the source of the blockage by checking the flow rate immediately after clearing the tube. If the flow returns to normal, the tube was the culprit. If the flow remains sluggish, the issue likely resides within the impeller housing itself. Always verify that your intake strainer isn’t resting directly on the substrate to prevent rapid clogging. Placing it one inch above the gravel bed significantly extends the time between required cleanings.
Impeller blockage and housing buildup
Low water level in the tank

Filters require a specific water level to maintain a siphon and keep the pump primed. If the level drops below the intake strainer, the pump will begin to suck air instead of water.
You can distinguish this from a mechanical failure because the filter will make a loud, splashing, or sucking sound rather than a clean hum. If the motor remains silent but the filter is vibrating, air is trapped inside the impeller housing.
To fix this, add dechlorinated water until the level is at least one inch above the intake. This is a common issue in tanks without lids, where evaporation happens quickly. If you notice the level drops, check for small leaks along the silicone seams or increase the frequency of your top-offs as part of your usual clean.
A common mistake is ignoring these sounds, assuming the filter will self-correct once the water level rises. This costs you the pump’s lifespan. If the pump runs dry for more than one hour, the internal plastic parts can warp, which is a permanent failure.
Use this decision rule: if the water level is low and the filter is noisy, top it off immediately. If the water level is high but the filter remains noisy, you must manually prime the pump by pouring water directly into the intake chamber to force the air pocket out.
The less likely causes
-
Saturated filter media: The cartridge is so full of waste that water can’t pass through it. Replace the cartridge if it has been in use for more than four weeks. If you notice a sudden drop in flow rate before that deadline, check for a slimy, dark buildup on the intake grate.
-
Air lock in the pump: Air is trapped in the motor chamber. Tilt the filter unit slightly while it’s running to let the trapped air bubbles escape. You’ll know this is the culprit if the pump makes a grinding or rattling noise rather than a smooth hum.
-
Faulty power outlet: The wall socket has no power. Test the outlet with a lamp to ensure your electrical supply is functioning correctly. If the lamp works but the filter does not, check the GFCI reset button on the outlet or the circuit breaker in your home’s service panel, as moisture often trips these sensitive circuits.
-
Electrical cord damage: The wire is frayed or bitten by a pet. This is a safety hazard. Unplug the unit immediately and consult a professional electrician or replace the entire filter. Never attempt to patch a cord with electrical tape, as water will inevitably seep into the repair.
What a fix usually involves
Most fixes involve simple maintenance rather than expensive repairs. Clearing a clog requires only your time and access to a sink. If the impeller is broken, you may need a replacement part; these are usually a small part of the total price of a new filter.
If the motor itself has stopped working, you’ll likely need to replace the entire unit, as motor repairs are often not possible for home users. A common mistake is attempting to solder internal wiring; this rarely holds up against moisture and often voids your safety certification.
To get an accurate sense of cost, look at the manufacturer’s website for your specific model number to see if they sell individual replacement parts. If they do not, or if the part is nearly the price of a new filter, replacing the whole system is the better choice.
Always check your warranty status before buying parts, as some electrical failures are covered if you have your original purchase receipt. In that case, buy a new unit. If you’re unsure about the cost, search for your model online to compare the price of a new pump versus a replacement filter kit.
Frequently asked questions

Can I run my filter without the cartridge?
Running the filter without a cartridge isn’t recommended as it removes the biological and mechanical filtration necessary for water quality. The media is essential for keeping the internal components clean and protecting the pump from large particles. If your cartridge is clogged, rinse it gently in a bucket of tank water or replace it with a new one to ensure the motor stays protected.
How long does it take for a filter to prime?
About five minutes is usually enough for a filter to prime itself after you add water. If it doesn’t start moving water after this time, check the intake tube for air pockets or ensure the water level in the tank is high enough to reach the pump. If you still hear only a hum, the impeller likely needs a manual cleaning.
Is it safe to fix the motor housing?
No, it isn’t safe to open the sealed motor housing or attempt to repair internal electrical components. These parts are sealed at the factory to prevent water from reaching the electrical current. If you suspect an internal electrical fault, stop using the device immediately to prevent any risk of electric shock or short circuiting in your home.
Why is my filter making a loud grinding noise?
A loud grinding noise usually means the impeller is hitting debris or is misaligned inside the housing. Turn off the power, remove the impeller, and inspect it for any cracks or trapped gravel. If the impeller is clean and the noise continues, the shaft may be worn down, which means the motor unit needs to be replaced.
Does it matter if the water is cloudy?
Yes, cloudy water indicates that your filter isn’t cycling properly or the biological balance in the tank is off. If the filter isn’t moving water, waste builds up quickly and turns the water opaque. Address the filter issue first, then perform a partial water change to help restore the clarity of your aquarium environment.
How often should I clean the impeller?
Clean the impeller whenever you notice a decrease in flow rate or an increase in noise. This varies by model — check the label on your filter, as some high-flow units collect debris faster than smaller ones. If you notice the flow slowing down, clean it sooner to ensure the motor doesn’t have to work harder than it should.
Final Thoughts
If your filter still won’t start after you’ve cleaned the parts, it’s likely time to reach out to the manufacturer for a replacement. Don’t let your fish go too long without proper filtration. You’ll find that keeping a spare sponge or motor on hand makes these unexpected hiccups much easier to manage.
Related guides