
Chamberlain Garage Door Opener Troubleshooting is most effective when you first check the safety sensors and the wall control power status. If your door won’t close or the lights flash, the most common cause is a misaligned infrared sensor pair near the floor. These sensors must have a clear line of sight to signal that the path is safe. If the LED on either sensor isn’t glowing steadily, the door won’t move. This is a simple physical check that solves the majority of operation issues without needing special tools.
Chamberlain Garage Door Opener Troubleshooting: Common Causes
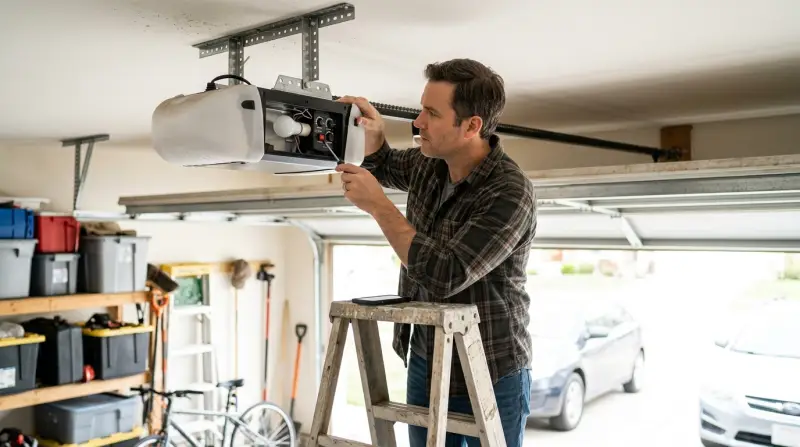
Most operational failures result from three common issues: sensor obstruction, power disruption, or mechanical resistance. The safety sensors rely on a narrow beam of light. If a box, broom, or even a spider web blocks this path, the logic board refuses to close the door to prevent injury. You can verify this by looking for the status lights on the sensors; a flickering or dark light indicates a communication break.
Power issues often stem from a tripped breaker or a loose connection at the wall outlet. If the unit is silent and shows no lights, check your home’s electrical panel. Sometimes, the issue is internal, such as a worn-out drive gear or a trolley that has become disconnected from the chain or belt. These parts experience natural wear over time. If the motor hums but the door doesn’t budge, the gear inside the drive unit may have stripped, which is a common failure point in older units.
Mechanical resistance also triggers safety reversals. If the door track is bent or the rollers are dry and stiff, the motor senses too much weight and stops. This protects the motor from burning out. You should test this by pulling the emergency release cord and manually lifting the door; if it feels heavy or catches at a certain point, the problem is the door hardware, not the opener itself.
Align the safety sensors
This fix is for users whose door won’t close and whose wall button or opener lights are flashing. The two sensors located at the bottom of your door tracks must point directly at each other. You’ll see an LED on both the sending and receiving sensors. If one is off or blinking, the alignment is off.
To fix this, loosen the wing nut on the sensor bracket. Gently move the sensor until the light turns solid. If the light stays off, check the wire connections at the back of the motor unit to ensure they’re tight and free of corrosion. If you have to move the sensor more than an inch, check if the mounting bracket itself is bent from a bump.
This fix isn’t for electrical faults where the entire unit has no power. If the sensors are aligned but the door still reverses, ensure no sunlight is hitting the receiving sensor directly, as this can mimic an obstruction. If the lights are solid and the door still doesn’t close, the issue might be with the logic board. Always refer to the Chamberlain owner’s manual for your specific model to see the correct LED status for your hardware. If you can’t get the lights to turn solid despite clear alignment, it’s time to call a professional.
Reset the travel limits
This fix is for doors that stop halfway or reverse before hitting the floor. Over time, the force and travel settings can drift, causing the opener to think the door has hit an object when it has simply reached its end point.
To adjust this, locate the adjustment screws or the digital buttons on the side or back of the motor housing. If your model uses screws, turn the “down” limit screw one full turn counter-clockwise to allow the door to travel further. If your model uses buttons, press the “limit” button and follow the sequence to set the new closed position.
This fix is for users who have confirmed the door path is clear of debris. If the door stops and reverses, watch where it happens. If it always happens at the same spot, the track might be dirty or obstructed. If the door hits the floor and then immediately reverses, you need to adjust the down travel limit. Be careful: if you set the force too high, the door loses its safety sensitivity. If you’re unsure about the force settings, check the label on your motor for the manufacturer’s recommended range. If the door still reverses after two attempts, don’t continue to force it, as you could damage the drive mechanism.
Inspect the door balance

This is for cases where the motor struggles or the door makes loud grinding noises. A garage door should be perfectly balanced; it should stay in place when you open it halfway manually. If it slams down or flies up, the springs are worn.
To check this, pull the red emergency release handle to disconnect the door from the opener. Lift the door halfway by hand and let go. If the door stays in the middle, it’s balanced. If it falls or rises quickly, the spring tension is wrong.
A common mistake is assuming that a door that stays put at the top is balanced. This is false. A properly balanced door must hold its position when released at the halfway point. If it drifts more than six inches in either direction, the tension is off.
This isn’t a task for an average homeowner. The springs are under extreme tension and can cause severe injury if they snap. If your door isn’t balanced, you must call a professional door technician to adjust the springs. Attempting this yourself carries a high risk of property damage or physical harm.
What not to do
Don’t spray oil or grease directly into the motor housing. Lubricants coat internal sensors, leading to permanent electrical shorts that often require a full unit replacement.
Never bypass safety sensors by wiring them together or taping them in a fixed position. This removes the only mechanism that prevents the door from crushing objects or people. If your door reverses unexpectedly, clean the sensor lenses with a dry microfiber cloth before assuming the electronics have failed.
Don’t tighten the chain or belt until it’s perfectly flat. It must retain a slight sag of roughly one-half inch. Without this slack, you place excessive radial load on the motor bearings, which will cause the drive gear to strip prematurely.
Avoid replacing internal components like the logic board or capacitors unless you have experience with high-voltage electrical systems. These capacitors can hold a lethal charge even after the power is unplugged. If you touch the terminals without discharging them first, you risk a severe shock. Always consult a professional if you can’t verify the voltage status.
How to stop it happening again
Regular maintenance keeps the system running smoothly. Check the track and sensors as part of your usual clean to ensure the door operates without issue.
| If you’re doing this | Do this instead | Why |
|---|---|---|
| Ignoring squeaky rollers | Apply silicone-based lubricant | Reduces motor strain |
| Letting dirt build up | Wipe the sensor lenses | Prevents false reversals |
| Forcing the door closed | Check for track obstructions | Protects the drive gear |
Most owners mistake a sluggish door for a motor failure. If the door moves sluggishly, test the balance by disconnecting the opener and lifting the door manually. If it falls or requires more than ten pounds of force to move, the springs are failing. Don’t adjust these yourself; call a technician immediately.
If the door reverses without hitting an object, clean the photo-eye lenses with a dry microfiber cloth. A thin layer of dust or spiderwebs often trips the safety beam. If the problem persists, check the alignment of the mounting brackets. A shift of even one-quarter inch can trigger a false safety stop.
Frequently asked questions

Can I replace the safety sensors myself?
Yes, you can replace damaged or water-logged sensors. Most sensors connect via simple low-voltage wires that snap or screw into the motor unit. Before buying replacements, ensure the existing wires aren’t frayed or chewed by pests, as broken wiring is more common than a dead sensor.
Why does my garage door opener light flash 10 times?
Ten flashes indicate that the safety sensors are misaligned or obstructed. The system refuses to close because it can’t confirm the path is clear. Check the sensor wires for breaks and ensure the lenses are clean and facing each other.
How long should a Chamberlain garage door opener last?
Most openers last between ten and fifteen years. This varies by model, as heavy-duty belt-drive units often outlast entry-level chain-drive systems. If your unit is over fifteen years old, parts may be hard to find and the safety technology is likely outdated.
Is it safe to operate the door with the emergency release?
No, you should never use the motor to move the door while it’s disconnected via the emergency release cord. The trolley will travel along the rail without the door attached, which can cause it to slam into the header bracket. Only use the release to move the door manually during power outages.
What happens if I lose my remote control?
You can clear all old remote codes from the motor’s memory to keep your home secure. Most Chamberlain units have a “Learn” button on the motor head. Press and hold this button for about six seconds until the indicator light turns off. This deletes every remote previously programmed. You can then program your new remotes one by one by pressing the “Learn” button and then the button on your new remote.
How do I stop the door from reversing?
The door reverses when it detects an obstruction or if the travel limits are set too short. Clear the floor of all items and wipe the safety sensor lenses. If the door still reverses, adjust the “down” limit screw on the motor unit to provide more room to close.
Final Thoughts
If these quick adjustments don’t get things moving, check your owner’s manual for specific error codes or reset instructions. Sometimes a simple power cycle is all it takes to clear a glitch. If you’re still stuck, don’t hesitate to call a local technician; they’ll help you get your garage back in working order.
Related guides