
If your Maytag Centennial Washer Stuck on Sensing, the issue is usually an unbalanced load or a faulty lid lock. If the lid does not lock, the control board cannot start the cycle. Check for unevenly distributed items first, as this is the most frequent cause.
Why your Maytag Centennial washer gets stuck
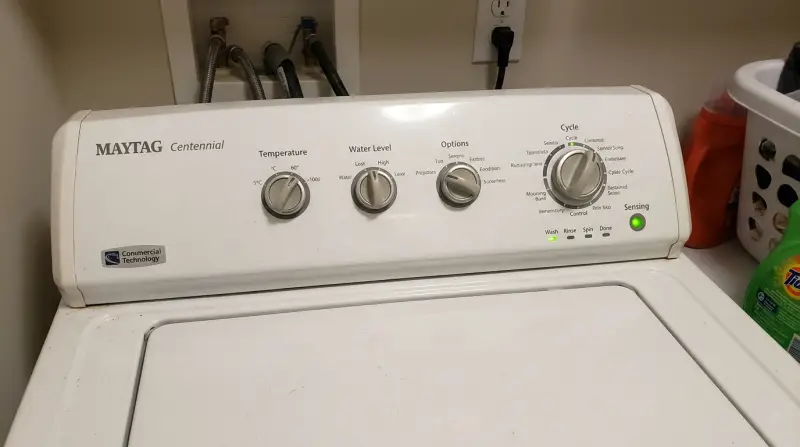
The sensing process relies on a series of electronic checks. Before the water enters the tub, the control board measures the weight and distribution of your laundry. If the sensors detect that the load is off-center, the machine pauses to prevent damage during the spin cycle. This is a safety feature designed to keep the unit stable.
Another frequent cause is the lid lock assembly. This part uses a physical switch to confirm the lid is shut. If the plastic latch is broken, or if the switch has failed, the washer won’t advance because it thinks the door is open. You can confirm this by checking for a blinking “Lid Locked” or “Sensing” light that doesn’t change after several minutes.
Finally, a buildup of soap residue or debris can interfere with the water level pressure sensor. If the pressure tube is blocked or disconnected, the control board receives no signal that the tub is ready, so it stays in the sensing loop indefinitely. You can find official troubleshooting guides on the manufacturer’s website to identify specific error codes for your model. Always check the machine’s manual for the exact light patterns, as this varies by model — check the label on the underside of the lid for the specific sequence.
Perform a hard reset
If the washer is stuck due to a momentary software glitch, a power reset often clears the memory. Unplug the machine from the wall outlet and leave it disconnected for at least ten minutes. This allows the capacitors on the main control board to discharge fully, which resets the logic.
After ten minutes, plug the washer back into a grounded outlet. Turn the cycle selector dial to the “Normal” setting. If you did this correctly, all the status lights will flash.
Rotate the dial until the “Rinse” light turns on and press “Start.” This enters the diagnostic mode. If the machine begins to spin or drain, the reset worked. If it remains stuck, the issue is likely a mechanical failure rather than a software error.
To distinguish between these, listen for a hum. If you hear a low buzzing sound when the machine should be moving, the motor or pump is likely jammed by debris. If the machine is dead silent, the fault lies in the control board or a tripped thermal fuse.
This fix is for users who have verified the power supply is stable. If you’re uncomfortable moving the appliance or working near electrical outlets, contact a professional appliance technician. A capacitor can hold a lethal charge even when unplugged, so never attempt to open the control housing or touch internal wiring. Attempting to bypass the housing to reach the board yourself often voids your warranty, costing you hundreds in avoidable repair fees.
Calibrate the sensors
Calibration resets the baseline for the water level and weight sensors.
If the lights flash, turn the dial until the “Rinse” light is illuminated. Press the “Start” button to begin. The machine will now run through a series of movements, filling slightly and spinning to measure the tub position. This process lasts about two to four minutes. When the lights stop flashing, the calibration is complete.
You must distinguish between software errors and mechanical failures. If the unit doesn’t initiate the cycle or the lights fail to flash after the dial sequence, the control board is likely not registering your inputs. Check that the door latch clicks firmly before beginning.
This fix isn’t for machines that have a physically broken lid switch or a damaged drive belt. If the machine makes a loud grinding noise during calibration, stop the process immediately and unplug the unit. Calibration is a routine maintenance task, but it can’t fix broken hardware.
Many users mistake a failing motor capacitor for a calibration error. If the drum hums but refuses to rotate during the test, the capacitor is likely shot. If the machine still fails to move past sensing after calibration, the main control board or the lid lock assembly likely requires a replacement by a qualified service person.
Inspect the lid lock

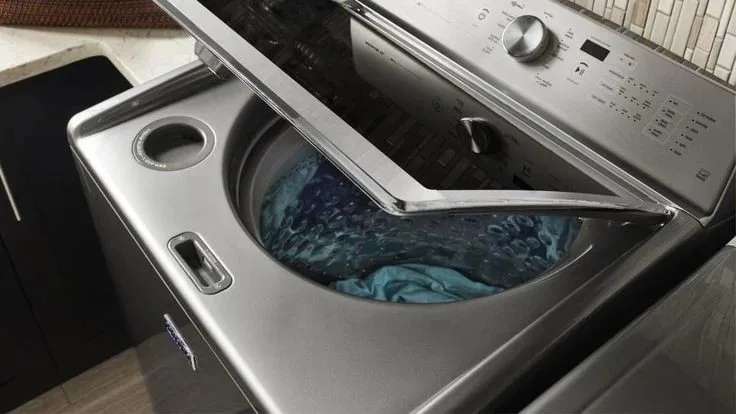
The lid lock is the most common mechanical failure point on these units. If the locking pin is bent or the latch is loose, the machine will stay in sensing mode forever. To check this, look at the small hole on the top deck where the lid meets the frame. Use a flashlight to see if any plastic debris or lint is blocking the hole.
If you see debris, use a pair of tweezers to remove it carefully. Don’t force the latch or use a screwdriver to pry it open, as this can snap the plastic and void your warranty. If the lock looks clean but the lid doesn’t click when you press it down, the internal solenoid has likely failed.
This fix is for users who can safely inspect the latch without force. If the latch is broken, the entire assembly must be replaced. This requires partial disassembly of the top cabinet. Because this involves removing the main control panel and potentially exposing internal electrical connections, this is technician-only work. If you aren’t experienced with appliance repair, don’t attempt to dismantle the cabinet. A professional service technician can test the continuity of the switch and replace the assembly safely.
What not to do
-
Don’t force the lid open while the light is blinking. This can break the locking mechanism, which is an expensive part to replace. If you hear a grinding noise, stop immediately and wait for the cycle to fully reset.
-
Don’t repeatedly turn the power on and off in quick succession. This can damage the electronic control board, leading to costly repairs that go beyond a simple reset. Always wait at least ten seconds between power cycles to allow the capacitors to discharge safely.
-
Don’t add extra water to the tub manually. The machine is designed to sense the weight of the clothes, and adding water will confuse the sensor further. If the machine fails to fill, check your inlet hoses for kinks rather than pouring water in by hand.
-
Don’t use a multimeter on the control board if you aren’t a technician. The board contains components that store high voltage even when the machine is unplugged, posing a real risk of electric shock. If the display is dead, check your home circuit breaker before attempting any internal diagnostics.
How to stop it happening again
Regular maintenance prevents sensor errors and keeps the control board from logging false faults. Most users wait for a total failure before inspecting the unit, but this reactive approach often leads to permanent board damage.
| If you’re doing this | Do this instead | Why |
|---|---|---|
| Overloading the tub | Use smaller, loose loads | Sensors need space to measure weight |
| Using too much soap | Use high-efficiency (HE) detergent | Excess suds block the pressure tube |
| Slamming the lid shut | Close the lid gently | Prevents damage to the plastic latch |
| Ignoring small vibrations | Level the washer feet | Unbalanced tubs trigger sensing errors |
If your machine vibrates during the spin cycle, check the leveling immediately. A machine off by even a quarter-inch will cause the suspension system to register an imbalance. If you notice a “sud” error code, run a hot water cycle with two cups of white vinegar to dissolve the residue. This simple step saves the cost of a professional service call.
Frequently asked questions
Can I bypass the lid lock on my Maytag washer?
No, you can’t safely bypass the lid lock. This feature prevents the basket from spinning while the lid is open to avoid serious injury. If the lock is broken, you must replace it with the correct manufacturer-approved part after verifying your specific model number.
Why does my washer stop at sensing after filling?
If the machine stops at sensing, the pressure sensor likely can’t detect the water level. This usually occurs because the air tube is clogged or disconnected from the pressure switch. If the tube is clear and properly attached, the pressure switch itself may be faulty and require replacement.
How long should the sensing phase take?
The sensing phase should typically take between thirty seconds and two minutes. If your machine stays on sensing for more than five minutes, it isn’t receiving the correct feedback from the sensors. This usually indicates an error that requires a reset or a mechanical repair. If you have waited more than ten minutes, turn the machine off and perform the calibration steps to see if the system can re-establish its baseline.
Is it safe to leave the washer on sensing mode?
No, you shouldn’t leave the washer unattended while it’s stuck in the sensing phase. An electronic glitch can cause the machine to cycle incorrectly or overheat the control board. If the cycle doesn’t start within a few minutes, unplug the unit to prevent potential electrical issues.
What happens if I ignore the sensing error?
If you ignore the sensing error, the washer will simply remain idle and won’t wash or spin your clothes. Over time, the control board may log multiple errors, which can make diagnosing the true root cause more difficult for a technician. Addressing the issue early prevents the problem from getting worse and helps you avoid a situation where the machine is full of water and can’t drain.
Final Thoughts
If these simple adjustments don’t get your machine moving again, it’s time to look deeper into the control board or sensor wiring. Don’t hesitate to reach out to a professional if you’re uncomfortable tinkering with electrical parts. You’ll save yourself a lot of frustration by getting an expert’s opinion early on.