
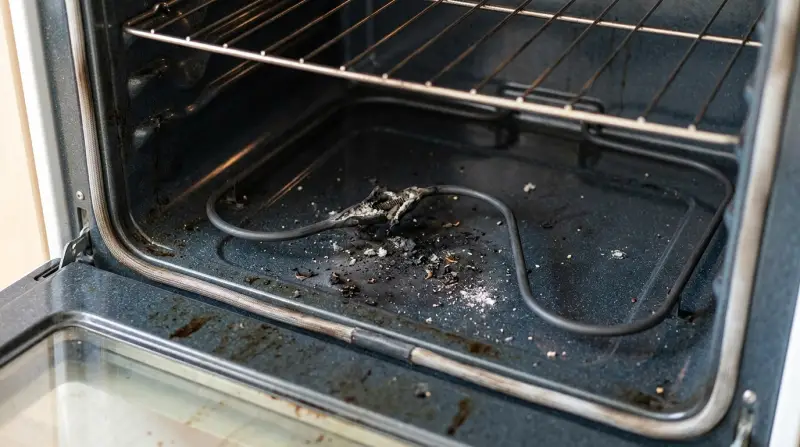
If your electric oven heating element exploded, turn off the power immediately. A shattered element often leaves live, exposed wires inside the oven that can cause severe shock or fire if the appliance remains energized. Do not touch the broken pieces while the power is on.
Locate your home’s electrical service panel and flip the specific breaker for the oven to the “off” position. Don’t rely on the oven’s front control dial alone, as it doesn’t provide a physical disconnect from the power source.
If you smell gas or see smoke, evacuate the area and call emergency services. If the oven is simply sparking or buzzing without fire, wait at least 30 minutes for the internal components to cool before attempting to remove the damaged element.
Do this first
-
Cut the power: Locate your home’s breaker box and switch off the circuit breaker labeled “Oven” or “Range” to eliminate the risk of electric shock. Don’t rely on the oven’s control panel; a faulty relay could still energize the element even when the display is dark.
-
Ventilate the area: Open nearby windows to clear any smoke, metallic dust, or burning smells caused by the electrical arc during the failure. If the air remains acrid, use a box fan to pull air out of the kitchen for ten minutes.
-
Wait for cooling: Allow the oven interior to reach room temperature for at least 60 minutes before attempting to look closely at the broken component. Touching a hot element can cause severe burns, and metal becomes brittle when heated, making it prone to snapping during removal.
-
Inspect the connection: Use a flashlight to check if the terminals where the element connects to the back wall are charred or melted. If the porcelain block inside the wall is blackened, the wiring harness is likely damaged. You must replace the block, not just the element.
-
Photograph the damage: Take a clear picture of the broken element and the model number plate. This plate is usually found on the oven door frame or the drawer edge. Always verify the serial number; manufacturers often change parts mid-production for the same model.
Why an Electric Oven Heating Element Exploded
An electric oven heating element exploded because the metal sheath protecting the internal heating coil suffered a structural failure. These elements consist of a coiled resistance wire surrounded by magnesium oxide powder, all encased in a metal tube. Over time, the constant expansion and contraction from heating and cooling cycles create microscopic cracks in the outer metal shell. Once a crack forms, air and moisture reach the inner coil, causing it to oxidize and eventually burn through. When the coil breaks while energized, it creates an electrical arc—a high-energy spark that can melt the metal casing and create a popping or explosive sound.
This failure is rarely a single event; it’s usually the result of long-term material fatigue. If you see a bright flash or hear a loud “bang,” the arc has likely vaporized a small portion of the metal sheath. The Consumer Product Safety Commission emphasizes that damaged electrical components in kitchen appliances should never be bypassed or repaired with tape. If the element looks bowed, blistered, or has visible holes, the internal insulation has failed. Don’t attempt to weld or patch a broken metal sheath, as the internal resistance wire will continue to degrade, leading to another arc. If the failure caused damage to the electrical socket on the back wall of your oven, the problem is no longer just the element. Replacing the element is a standard DIY task, but repairing a melted terminal block requires professional electrical knowledge to ensure the new connection is secure and won’t overheat.
Check these, cheapest first
Check the breaker status
The breaker may have tripped during the blast. Look for a switch in the center position at your service panel. Flip it fully off, then back on. If it trips again immediately, the short circuit is still active, and you must stop.
Inspect the element sheath
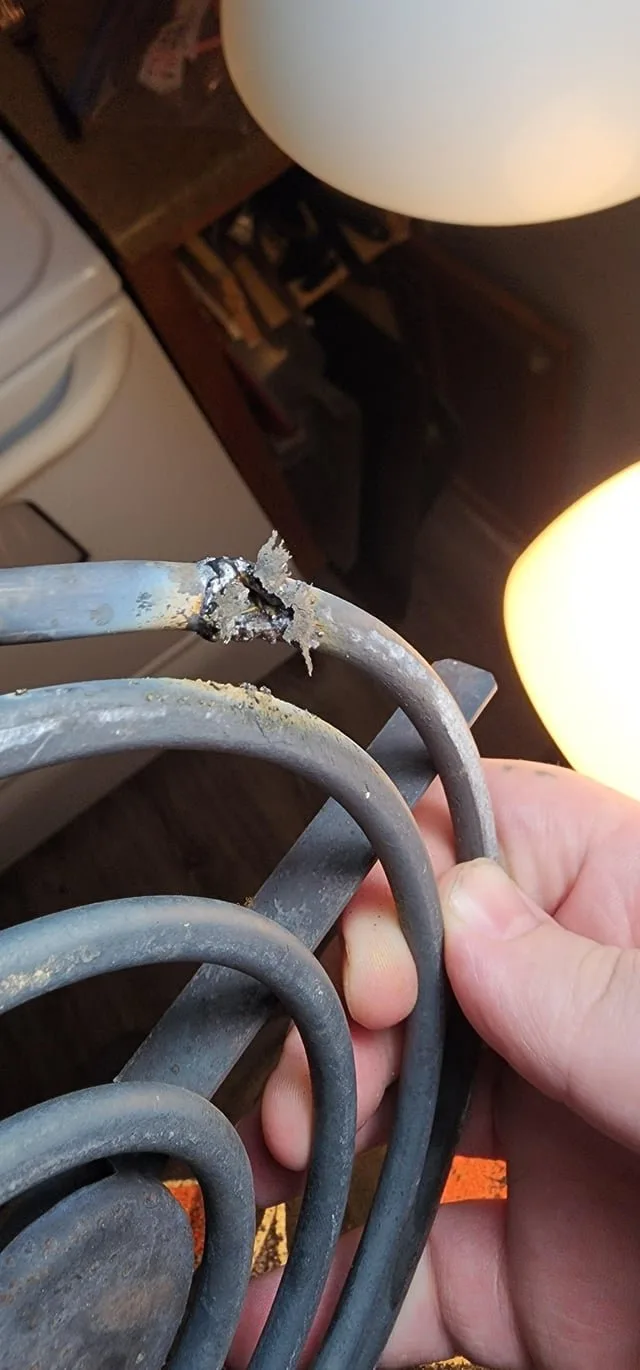
Look for cracks, holes, or white powder leaking from the metal tube. A small crack is a sign of end-of-life failure. Large gaps or melted metal indicate a severe electrical arc has occurred.
Examine terminal connections
Check the two points where the element enters the back wall. If the ceramic block is blackened or the metal spade terminals are fused, the electrical connection is compromised. This is a common mistake; replacing just the element will fail if the underlying socket is also melted.
Verify the model number
Find the metal tag on the door frame or storage drawer. Use this exact number to search for parts. Buying a “universal” element often leads to poor fitment, which causes the new part to fail prematurely.
Test for continuity
If you own a multimeter, don’t attempt to test the element yourself; this task should be performed by a qualified technician.
The fix
To fix the issue, you must replace the entire heating element assembly. First, ensure the power is off at the breaker. Remove the two screws holding the element to the back wall of the oven. Gently pull the element forward until you see the electrical spade connectors. If the wires are held by screws, loosen them to release the old element. If they use push-on connectors, pull them off firmly.
If your oven is a 240-volt model, these wires carry significant current; ensure the new element’s spade connectors fit tightly into the existing wires. A loose connection will cause heat buildup and melt the new part within hours. Use needle-nose pliers to crimp the connector slightly if it slides on too easily.
Slide the new element into the terminal holes and secure it with the original screws. If the new element comes with instructions for a “burn-in” cycle, follow them exactly. This usually involves running the oven at 400°F for 30 minutes with the door cracked to burn off protective oils applied during manufacturing.
A successful fix is shown by the element glowing an even, bright orange across its entire length without popping sounds. If the problem returns within a week, check the terminal block again. If the wires behind the terminal block look scorched or brittle, the internal wiring harness has been damaged by the heat. In this case, stop troubleshooting immediately and call a professional technician to replace the harness. Attempting to splice scorched wires yourself creates a serious fire hazard, as the insulation is likely compromised deep within the wall cavity where you can’t see the damage.
Where this stops being a DIY job
You must stop and call a professional technician if the electrical socket or terminal block inside the oven wall is melted or charred. Replacing a heating element is a simple plug-and-play task, but replacing the internal wiring or the terminal block involves working deep within the appliance housing.
A technician will have the tools to ensure the connections are properly insulated and rated for the high heat of an oven. If you attempt this and the wires aren’t secured correctly, you risk an electrical fire behind the oven wall. A professional will also perform a ground-fault test to ensure the oven chassis isn’t energized, which is a risk you can’t easily measure with basic tools.
The decision rule is simple: if you see any discoloration on the plastic housing or the metal prongs, the heat has already compromised the structural integrity of the connection. Don’t attempt to clean or bypass these parts. A common mistake is using standard electrical tape or hardware-store wire nuts, which will melt under oven temperatures. Using these materials costs you the safety of your home. If you’re uncomfortable moving the oven or working with the electrical supply lines, hire a licensed service immediately.
Frequently asked questions
Can I still use the oven if one element is broken?
No, you shouldn’t use the oven. Even if only the bottom element broke, the broiler or convection systems might still draw power through the damaged circuit, potentially causing further electrical shorts or fire. Keep the breaker off until the broken part is replaced. Using a damaged appliance creates a hazard that can cause permanent damage to the oven’s control board or internal wiring harness.
How long does an oven element usually last?
Most heating elements last for several years depending on frequency of use. If you bake daily, the metal casing experiences more thermal expansion cycles, which shortens the lifespan of the protective sheath.
Is it safe to buy a generic replacement element?
It’s risky to use generic parts. While cheaper, generic elements often have different wattage ratings or slightly different dimensions that can cause them to overheat or fail within a few months. Always use the manufacturer’s part number found on your oven’s data plate to ensure the electrical load matches your specific oven’s design requirements.
Why did my oven make a loud pop?
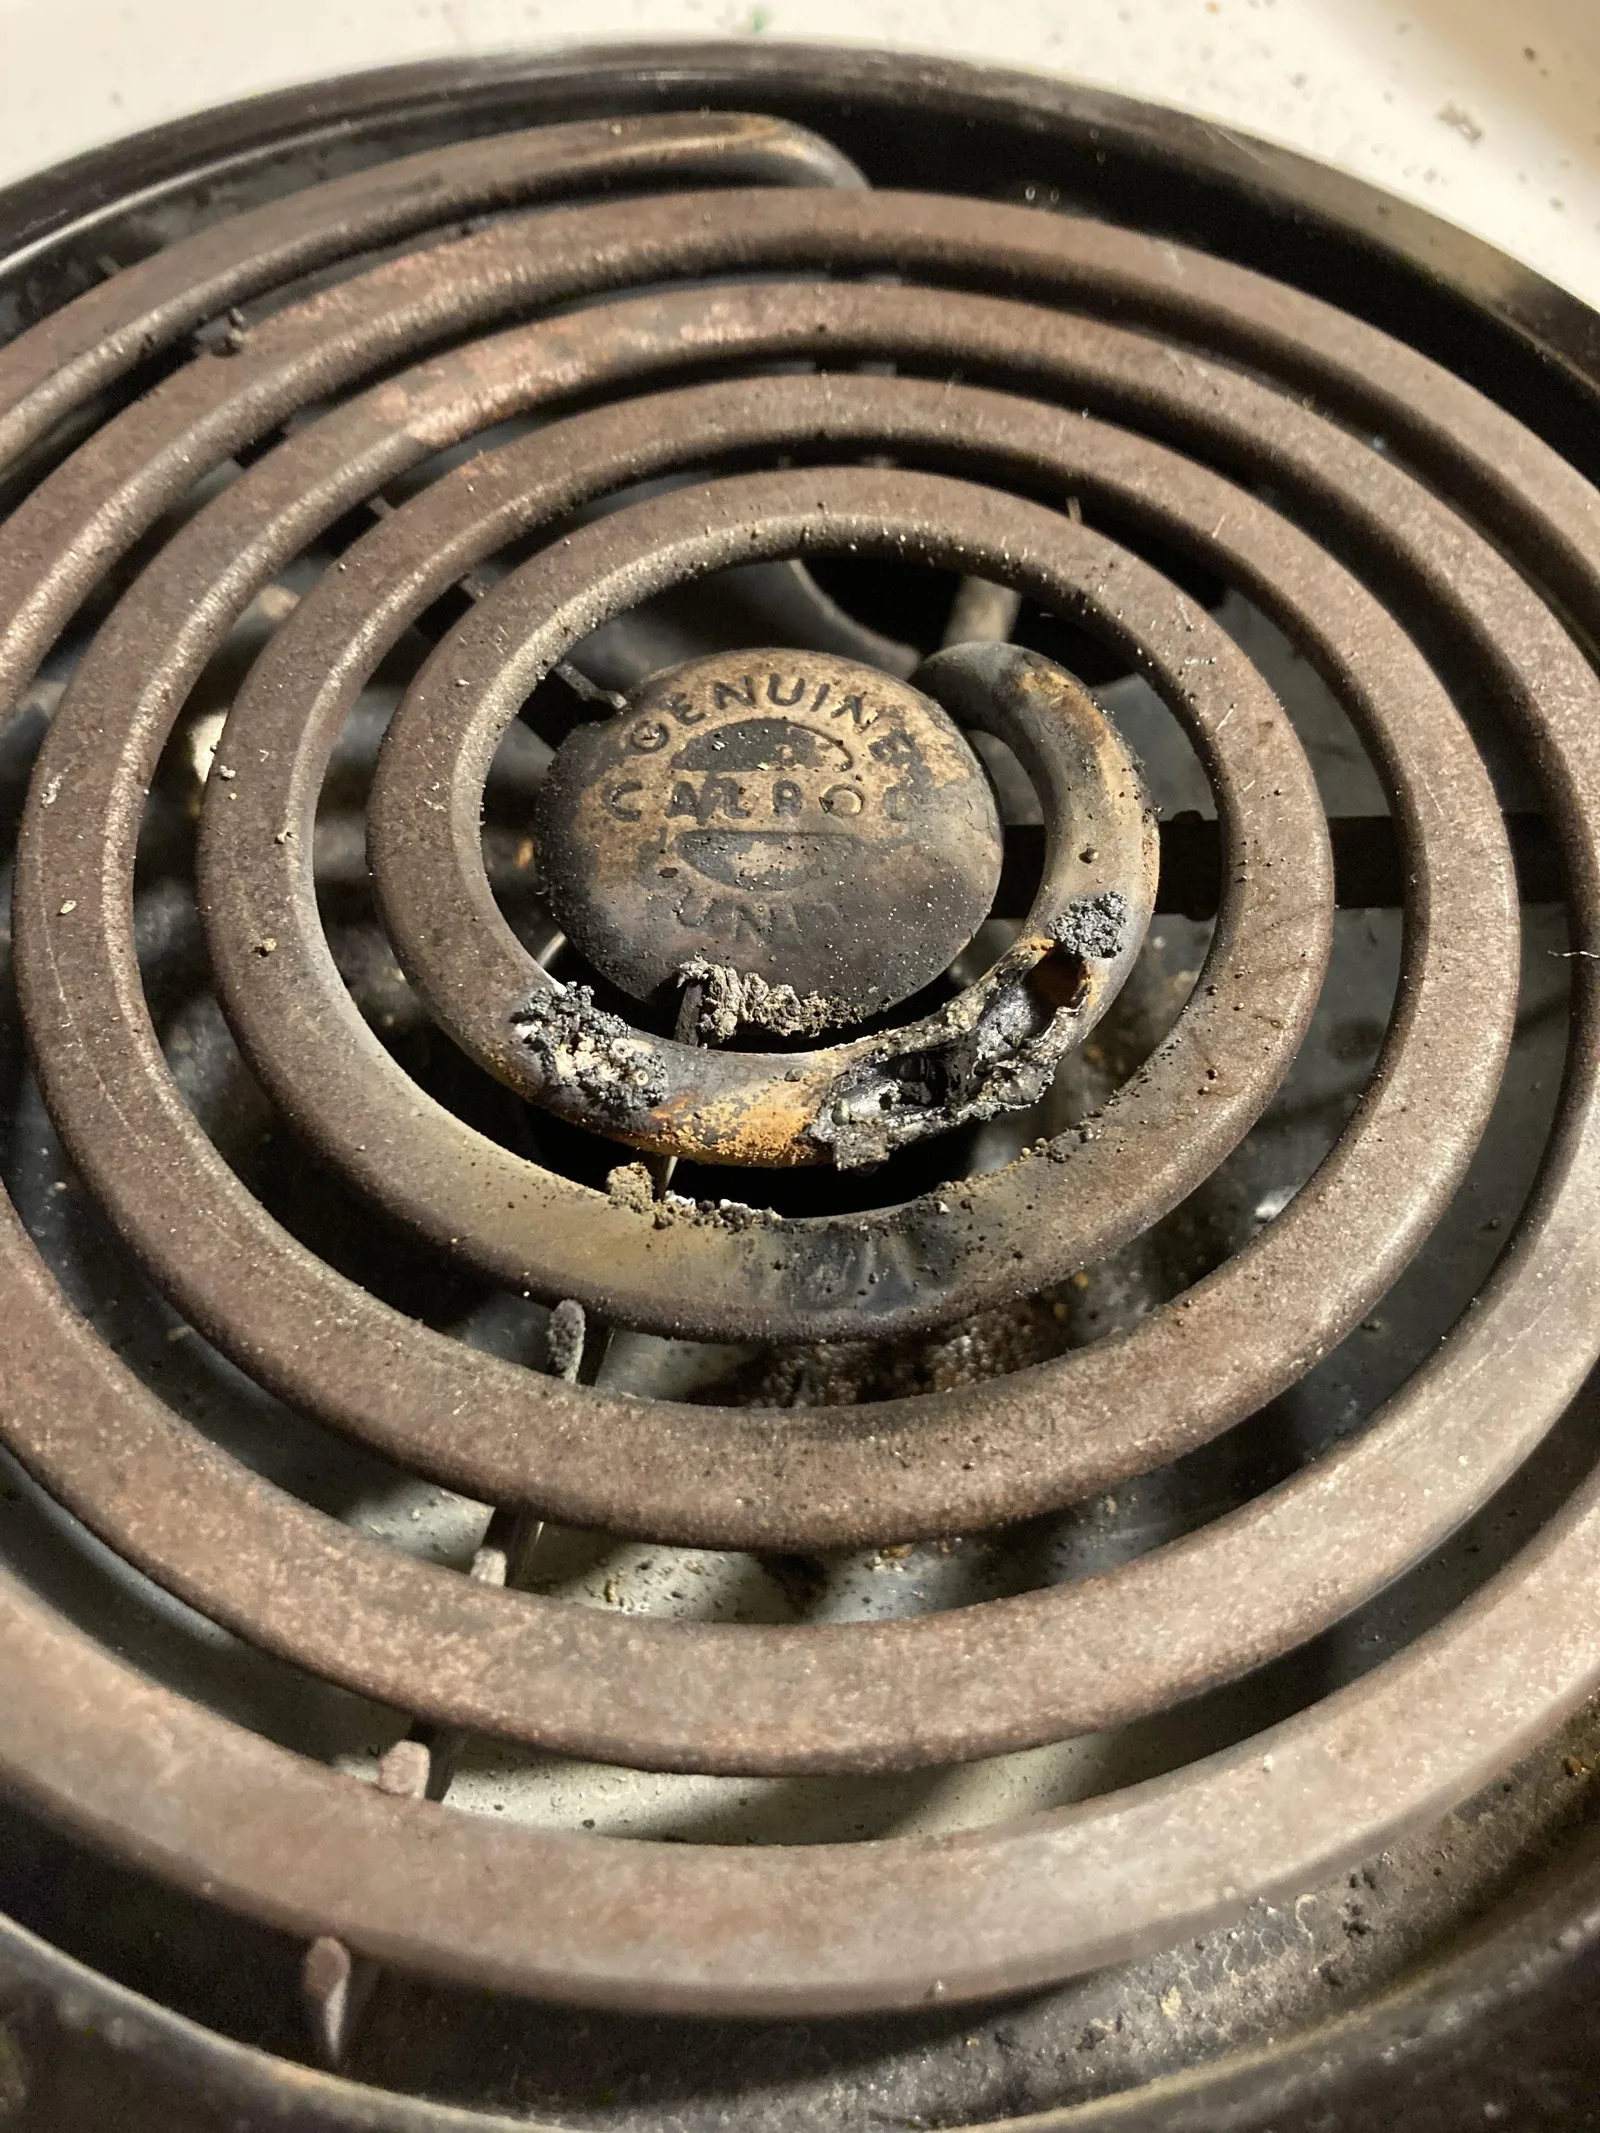
The popping sound occurs when the internal heating coil breaks and creates an electrical arc. This arc is a high-temperature spark that jumps across the gap where the wire snapped, vaporizing a small amount of metal and insulation. This sound is a clear indicator that the element has suffered a critical failure and must be replaced immediately before further use.
Does it matter if the new element is slightly bent?
Yes, it matters significantly. If the element is bent, it might touch the oven walls or the rack, creating a short circuit or causing uneven heating. A properly installed element should be perfectly parallel to the oven floor or ceiling. If your new part arrived bent, return it for a replacement rather than trying to force it into shape.
How do I know if the new element is working?
You’ll know the element is working when it glows a uniform, bright orange after about 3 to 5 minutes of operation. If the element stays black or only glows in certain spots, it’s either not receiving power or the internal coil is defective. If it doesn’t heat up, check your breaker again and verify that the electrical connectors are pushed in all the way.
Final Thoughts
Once you’ve confirmed the oven is completely cold and disconnected, it’s best to contact a certified technician for the repair. They’ll ensure the new part is installed safely so you don’t run into any more issues. You shouldn’t try to handle the wiring yourself, as it’s better to be safe.
Related guides