
You can fix a freezer door not sealing by cleaning the rubber gasket, adjusting the door hinges, or replacing a worn seal. This common issue happens when debris, ice buildup, or bent hardware prevents the door from closing flush against the frame. If the door stays slightly open, warm air enters the freezer, which forces the compressor to run constantly and leads to excessive frost.
Causes of poor freezer door sealing
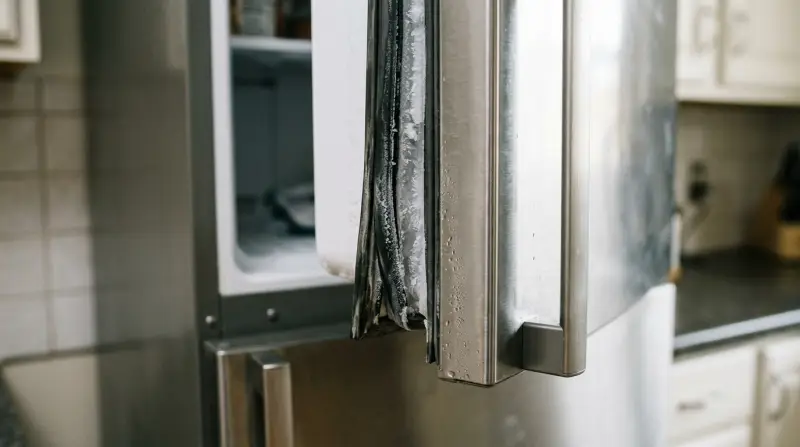
The primary cause for a poor seal is a dirty or damaged door gasket. Over time, food crumbs, sticky spills, and oils collect on the soft rubber folds. This buildup creates small gaps that allow cold air to escape. If you ignore these crumbs, the rubber eventually hardens or cracks, making it impossible to form an airtight grip.
To test your seal, close the door on a single sheet of paper. If you can pull the paper out with zero resistance, your gasket is failing. If the paper slides out easily, you must replace the seal immediately to prevent compressor burnout.
Another frequent cause involves misaligned hinges. If the door sags, the magnet inside the gasket can’t contact the metal cabinet frame. This often happens if the freezer is overloaded with heavy items, which puts extra stress on the hinge pins. Additionally, if the freezer isn’t level, gravity pulls the door away from the frame at an angle. Use a bubble level on the top surface; if the bubble is off-center, adjust the leveling legs until the door swings shut on its own.
Finally, internal ice accumulation is a common culprit. If the freezer is in a humid environment or the door was left ajar, moisture enters and freezes on the seal. This creates a hard, icy barrier that acts like a wedge, pushing the door out. If you see frost buildup specifically on the gasket, stop and defrost the unit entirely. If the frost returns within 48 hours, the issue is a failing door seal rather than a simple humidity problem.
Clean the gasket thoroughly
If your freezer has a weak seal, start by cleaning the gasket with warm water and mild dish soap. Don’t use harsh chemicals like bleach or ammonia, as these can dry out and ruin the rubber. A soft cloth or a sponge works best for this task.
Work your way around the entire perimeter of the door. Use an old toothbrush to scrub deep into the folds of the gasket where crumbs hide. After scrubbing, rinse the area with a damp cloth and dry it completely. If the rubber feels dry or brittle, some manufacturers suggest applying a very thin layer of petroleum jelly to keep it supple.
Test the seal once you’re finished. Place a thin piece of paper between the gasket and the cabinet, then close the door. If you can pull the paper out with no resistance, the seal is still failing. If the paper stays put, the cleaning has restored the suction.
Perform this test at four points: the top, bottom, and both sides. If the paper slips out at only one corner, the gasket is failing at that location. In that case, tightening the hinge screws is the necessary fix. If the gasket remains deformed after a deep cleaning, it has lost its elasticity and will need to be replaced. Ignoring a permanent gap costs you money, as the compressor must run constantly to compensate for the escaping cold air, leading to premature motor failure.
Adjust the door hinges
If cleaning the seal doesn’t work, check the door alignment. Most modern freezers feature adjustable hinges that allow you to shift the door position. You’ll need a screwdriver or a socket wrench to loosen the hinge screws slightly. Once loose, push the door into the correct position so it sits square against the frame.
Tighten the screws while holding the door in place. If the door still sags, you may need to add a shim or adjust the leveling legs at the bottom of the unit. A freezer that leans forward will struggle to keep its door shut, so use a carpenter’s level to ensure the unit is perfectly flat.
The decision rule is simple: if the gap is uneven at the top, adjust the hinge; if the door sits low on the latch side, adjust the leveling legs. A common mistake is over-tightening the screws, which can strip the metal threads inside the cabinet wall. This error often necessitates a professional repair or a complete hinge replacement.
This adjustment is for someone comfortable using basic hand tools. If your model uses hidden hinges or requires specialized bracket adjustments, check the manual first. If you aren’t confident in your mechanical ability, contact a professional appliance technician. Attempting to force a hinge can strip the threads or damage the door frame, which is a costly mistake to repair. Always verify the seal integrity with a single sheet of paper after finishing. If the paper pulls out with no resistance, the alignment remains off.
Replace the door seal
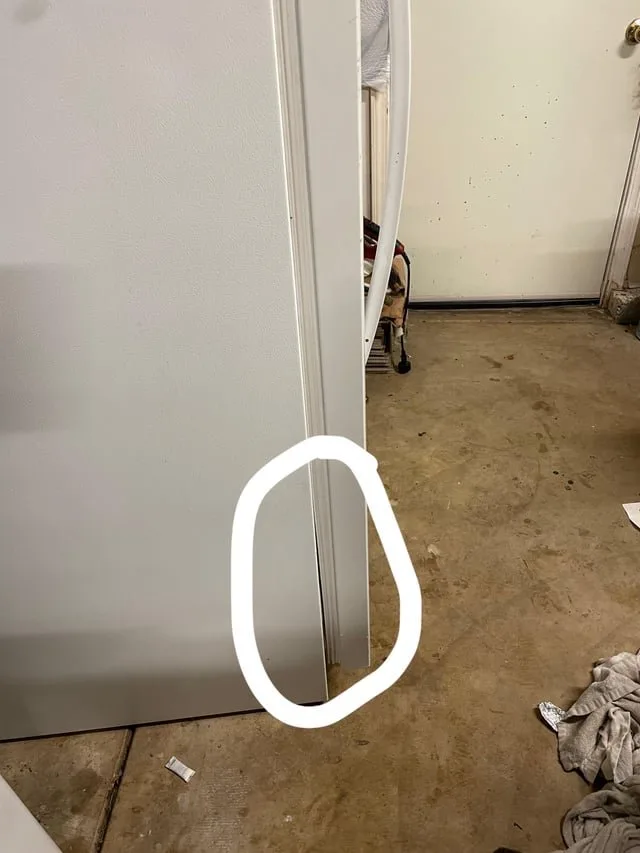
When a gasket is torn, punctured, or permanently warped, the only real solution is to install a new one. This is a simple but necessary investment if the current seal no longer holds the paper test. You must order the exact part number for your specific freezer model to ensure a proper fit.
To replace it, pull the old gasket out of the channel around the door. Some models use screws hidden under the rubber, while others use a pressure-fit track. If your gasket is screwed in, loosen the fasteners before pulling. Once the old seal is out, press the new one into the track starting at the top corners.
Take your time to ensure the corners are seated correctly, as these are the most common spots for air leaks. If the new seal feels stiff, use a hairdryer on a low heat setting to gently warm the rubber, making it more flexible for installation. This fix isn’t for everyone; if you feel unsure about removing door panels or handling internal mounting hardware, hire a professional. A poorly installed seal will perform worse than the old one, leading to higher electricity bills and ruined food.
What not to do
Don’t use a hair dryer to melt ice on the seal. Excessive heat warps the rubber gasket permanently. Once the rubber loses its shape, the seal fails entirely, forcing a full replacement.
Don’t apply heavy tape to hold the door shut. Tape leaves a sticky residue that ruins the finish. If you find yourself reaching for tape, you have a mechanical alignment issue that tape can’t fix.
Don’t force the door shut with heavy objects like chairs. This puts immense pressure on the hinges and risks snapping the door frame. If the door won’t latch, check the leveling feet first. If the fridge tilts forward, the door will never seal properly.
Don’t ignore the sound of the compressor running constantly. This is a telltale sign of a failed seal. Ignoring this leads to permanent motor burnout, which is often more expensive than buying a new unit.
How to stop it happening again
Regular maintenance keeps the cooling system efficient and prevents the seal from degrading prematurely. You must treat the gasket as a precision component rather than a static piece of rubber.
| If you’re doing this | Do this instead | Why |
|---|---|---|
| Leaving the door open | Close it immediately | Minimizes moisture and ice buildup |
| Cleaning with bleach | Use mild soap and water | Prevents rubber drying and cracking |
| Overloading the door | Keep heavy items on shelves | Prevents hinge sagging and misalignment |
| Ignoring frost patches | Scrape or melt ice safely | Keeps the gasket path clear for a seal |
Most owners mistake a loose seal for a broken one. If you notice a gap, place a thin piece of paper in the door and close it. If the paper slides out with zero resistance, your gasket is failing. Tighten the mounting screws before buying a replacement. If the paper stays put, the rubber is simply stiff. Apply a thin layer of petroleum jelly to restore its flexibility.
Frequently asked questions
Can I fix a freezer seal with a hair dryer?
Yes, you can use a hair dryer on the lowest setting to reshape a warped gasket. Move the dryer constantly to soften the rubber before pulling it gently toward the frame until it cools. Avoid holding the dryer in one spot to prevent melting or cracking the seal.
How long does a freezer door gasket last?
A high-quality freezer gasket typically lasts between five and ten years with proper care. Lifespan varies based on usage frequency and environmental humidity. Regularly wiping the gasket with a damp cloth prevents the buildup of food acids and oils that cause premature degradation.
Is it safe to eat food from a freezer that wasn’t sealing?
No, food isn’t safe to eat if the freezer temperature rose above 40°F for more than two hours. Check for signs of thawing like large ice crystals or soft textures to assess safety. If the food has reached room temperature, discard it to avoid bacterial growth.
Why is there ice inside my freezer door?
Ice inside the door happens because warm, moist air is leaking into the freezer through a damaged or dirty seal. When the warm air hits the cold interior, it turns into frost and eventually builds up into ice. This ice creates a wedge that pushes the door further open, making the problem worse. You must clean the gasket and ensure the door closes tightly to stop this cycle of condensation and freezing.
What happens if the freezer door doesn’t seal?
A freezer door that fails to seal forces the compressor to run constantly, which can lead to motor burnout. This extra effort increases electricity costs and creates heavy frost that blocks airflow. Your frozen goods may also suffer from freezer burn, negatively affecting their texture and flavor.
Final Thoughts
If the problem persists after these checks, it’s best to call a professional technician to inspect the internal components. They’ll quickly determine if a hidden mechanical fault is causing the gap. Don’t wait too long, as keeping your food properly frozen shouldn’t be a struggle you have to face alone.
Related guides
- Sealing Gap Between Double Doors: Easy Solutions for a Tight Fit
- How to Remagnetize Freezer Door Seal: Quick DIY Fix
1 thought on “Freezer Door Not Sealing”